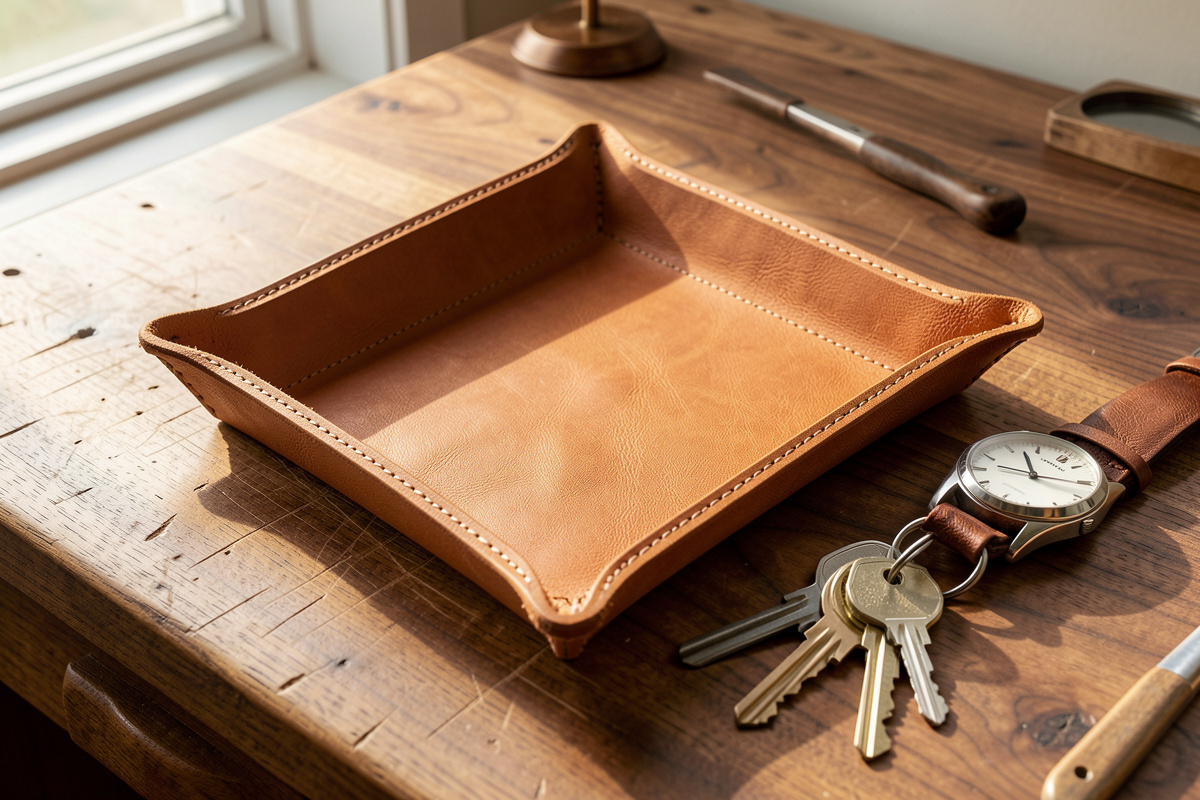
A leather valet tray is a flat panel wet-formed into a shallow bowl: case the veg-tan, bend the walls up, and either snap or bone the corners so…
A leather valet tray is a flat panel wet-formed into a shallow bowl: case the veg-tan, bend the walls up, and either snap or bone the corners so it holds. Get the weight right — 5 to 8 oz for most trays — and it keeps its shape for decades.
I have made this tray more times than any other object on my bench, and the first dozen were wrong in ways I now recognize instantly. Too thin and the walls sag into a sad little taco within a week. Too thick and the corners crack white when you fold them. The tray looks like the simplest project in leathercraft — one piece, no lining, four folds — and that simplicity is exactly why every mistake shows. There is nowhere to hide a wandering stitch line or a mushy edge on an object that sits open on a nightstand and gets picked up ten times a day.
This is the map for the whole cluster. Below I lay out the leather, the wet-forming, the two ways to build walls, and the finishing — then point you at the specific project builds, from a four-snap catchall to a rolled-edge dice tray. Read this first; the linked spokes go deep on each piece.
What Makes a Leather Valet Tray Hold Its Shape?
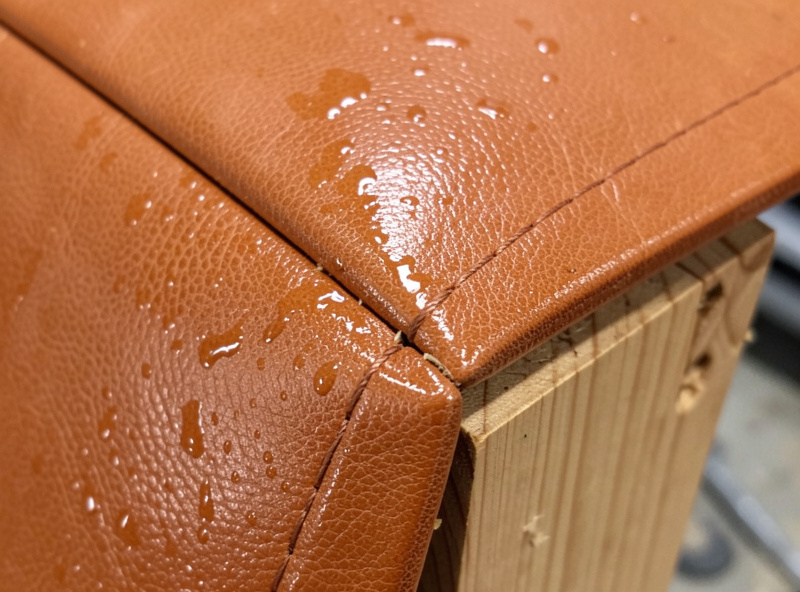
Wet-formed veg-tan holds its shape because the fibers lock into a new geometry as they dry. Casing swells and loosens the fiber bundles, boning compresses them against a form, and evaporation sets them there. A chrome-tan tray will never do this — it springs back every time.
This is the single fact that governs the whole project, and it is the one beginners skip past. Vegetable-tanned leather is tanned with plant tannins that leave the collagen able to take and keep a set when it is wetted and dried under pressure. That is the same property that lets you tool it and mold a holster to a pistol. Chrome-tanned leather — tanned with chromium salts — stays soft and flexible on purpose, which is wonderful for a jacket and useless for a wall that needs to stand up. If you have ever wondered why the valet trays in a nice shop feel almost like wood at the rim, that is cased-and-dried veg-tan, not some secret hardener. I cover the chemistry difference in depth in my guide to chrome tan versus veg tan leather, and the short version is: for anything that must hold a form, reach for veg-tan every time.
The second factor is weight. A tray wall is a cantilever — it is only supported at the fold, and gravity pulls the top edge back down. Thicker leather resists that bending moment better, which is why a 3 oz wallet lining would flop but an 8 oz sheath body stands like a board. The trade-off is that thick leather cracks on a tight fold. Getting that balance right is the difference between a tray you are proud of and one that slumps, and it is worth its own article: see my breakdown of the best leather weight for trays.
What Leather Weight Should a Valet Tray Use?
For a standard valet or catchall tray, use 5–6 oz veg-tan (2.0–2.4 mm) for shallow walls under about an inch and a half, and step up to 7–8 oz (2.8–3.2 mm) for deeper walls or a larger footprint. Below 4 oz the walls collapse; above 9 oz the corners crack.
Leather weight in the US is measured in ounces, where one ounce equals roughly 1/64 inch of thickness — so “6 oz” leather is about 6/64 inch, or 2.4 mm. That ounce-to-thickness relationship trips up every beginner at least once, and it is worth memorizing because every pattern and every supplier speaks in it. On my bench I keep a range: 3–4 oz for linings, 5–6 oz for wallet exteriors and small goods, 8–10 oz for belts and sheath bodies. Trays live squarely in the 5–8 oz band.
Here is how I actually choose, and where the numbers come from — measured on trays I have built and abused:
| Tray type | Leather weight | Thickness | Wall height | Why |
| Small coin / catchall | 5–6 oz | 2.0–2.4 mm | up to 1.5 in | Snaps fold clean, walls stay crisp |
| Standard valet tray | 6–7 oz | 2.4–2.8 mm | 1.5–2 in | Best all-round stiffness-to-fold balance |
| Deep desk / EDC tray | 7–8 oz | 2.8–3.2 mm | 2–2.5 in | Tall walls need the extra spine |
| Dice tray (padded rim) | 4–5 oz | 1.6–2.0 mm | rolled edge | Rolled rim adds stiffness; thin folds softly |
| Plant pot cover / basket | 3–4 oz chrome or 5 oz veg | 1.2–2.0 mm | tall | Wraps a rigid core, so it need not self-support |
Notice the dice tray breaks the pattern — it uses thinner leather because the rolled, padded rim does the stiffening job instead of raw thickness. That is the kind of exception that only shows up once you have built the thing, and I walk through it in the leather dice tray pattern. The plant pot cover breaks it the other way: it wraps a rigid pot or bucket, so the leather never has to stand on its own.
How Do You Wet-Form and Bone a Leather Tray?
Case the leather until it is uniformly damp — grain returning to natural color, cool to the touch, not glossy-wet. Then bend the walls up against a form, and bone the inside corners with a modeling spoon or slicker, compressing the leather into a crisp radius. Let it dry slowly, 24–48 hours, before it is unclamped.
Casing is the step people rush and then blame the leather. You are not soaking it — a soak leaves the surface saturated and the core dry, and it dries blotchy and dyes worse. I dunk a tray blank for a two-count, then set it aside in a bag or under a damp towel for fifteen to thirty minutes so the moisture equalizes through the full thickness. The leather is ready when a fingernail pressed into the flesh side leaves a mark that slowly relaxes. My complete method for this is in leather wet forming technique: casing to boning, and there is a broader reference in the complete leather wet forming guide.
Boning is where the corners get their crispness. I use a hardwood modeling spoon — the same tool saddlers have used forever — to press the cased leather hard into the inside angle where the wall meets the floor. You can hear it: a faint squeak as the burnisher compacts the damp grain, and the corner goes from a soft round to a defined line. That inside radius is the make-or-break detail of a tray, and it earns its own deep dive in wet-forming crisp corners on a tray. If you want the leather to end up genuinely rigid rather than just shaped, the hardening molded leather techniques — controlled heat and a wax finish — take it further, the same way I stiffen a molded holster or a wet-formed knife sheath.
The form itself matters. For repeatable trays I cut form blocks — a positive and a negative, or just a positive I clamp the walls against. I cut mine on the desktop machine; the CNC-cut form block and die approach gives dead-square corners every time, which hand-cut blocks fight you on. That is one of the crossovers this workshop leans on — the same machine that cuts my patterns cuts my forms.
Snap-Corner vs Fully Molded: Two Ways to Build the Walls
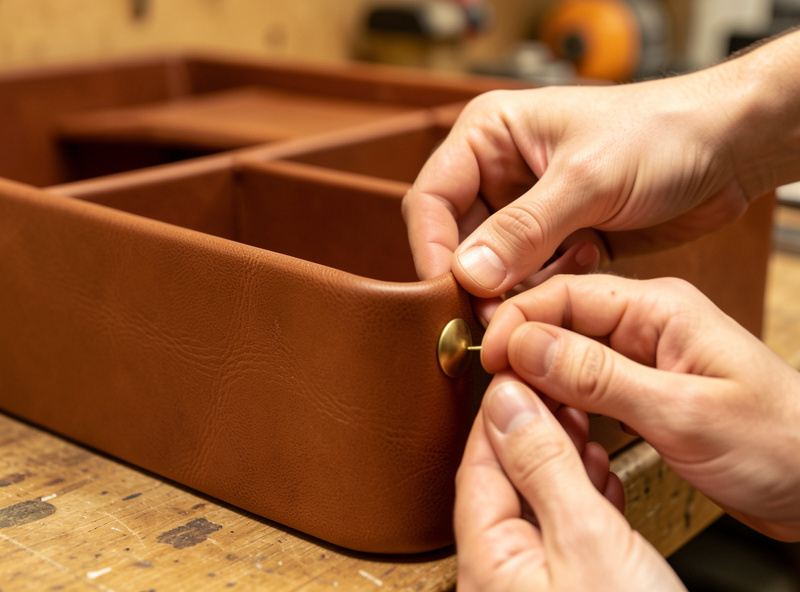
There are two honest ways to make tray walls stand up: fold the corners flat and hold them with a snap or rivet, or wet-mold the whole thing over a form so the leather itself carries the shape. Snaps are faster and knock-down; molded walls look seamless but demand a form and patience.
The snap method is the one I hand beginners. You cut a cross or plus-shaped blank, skive the corner overlaps thin so they do not bulk up, fold two adjacent edges together at each corner, and set a snap or a rivet through the doubled leather. Four snaps, four corners, and it stands. The genius of it is that it disassembles flat — pop the snaps and it packs into a bag. My full walkthrough of that build is the one-piece, four-snap catchall tray, and it is the fastest satisfying win in this whole cluster. The catch: skiving those corners is the skill gate. If you do not thin the overlap, the snap sits proud and the corner gaps. Practice your skiving and edge prep on scrap first.
Fully molded walls have no fastener at all. You case the blank, stand every wall up against a form at once, and bone all four corners so the leather holds a continuous curved rim. This is how a deep desk tray or a bowl-shaped valet gets that turned, one-piece look. It is less forgiving — one corner drying faster than the others pulls the whole rim out of square — but nothing else looks quite like it. The leather desk organizer and pen tray uses a molded approach with internal dividers, and the plant projects lean on it too.
Do not overthink which is “better.” I keep a snap catchall by my front door because I want it to fold flat when I travel, and a molded valet on the dresser because it never moves and I wanted the seamless look. Match the method to how the object lives.
How Do You Finish the Edges and Dye a Formed Tray?
Finish a tray in this order: bevel every exposed edge, sand from coarse to fine, dye if you want color, then burnish the edges with Tokonole and seal the surface. On a tray the rim edge is at eye level and gets handled constantly, so a mushy edge is the first thing anyone notices.
Edge work is the signature of a made object versus a bought one, and on a tray it is unavoidable because the top rim is right there. I bevel the grain and flesh corners with a #2 edger, then sand up through the grits — I run 320, 600, then 1000 — before slicking. My full grit logic is in how to sand leather edges, and the whole bevel-to-burnish system lives in leather edge finishing. For the actual slicking I reach for one of the profiles I printed on the FDM machine — the DIY 3D-printed edge slickers let me match the groove to the exact edge weight, which a one-size wooden slicker cannot.
Dye order matters and it is easy to get backwards. Dye before you burnish, because burnishing seals the edge and a sealed edge will not take dye evenly afterward. I dye the whole cased-and-dried blank, let it fully dry, buff off the haze, then slick the edges last. Fiebing’s Pro Oil dye is my default for even color on veg-tan; the complete veg-tan dyeing guide covers application, and dip versus sponge versus airbrush covers getting a large flat tray floor even without streaks — the airbrush wins for big fields. Once it is dyed and sealed, a light coat of conditioner keeps the leather from drying brittle; see conditioning leather for the right products and how little to use.
Which Tray Project Should You Build First?
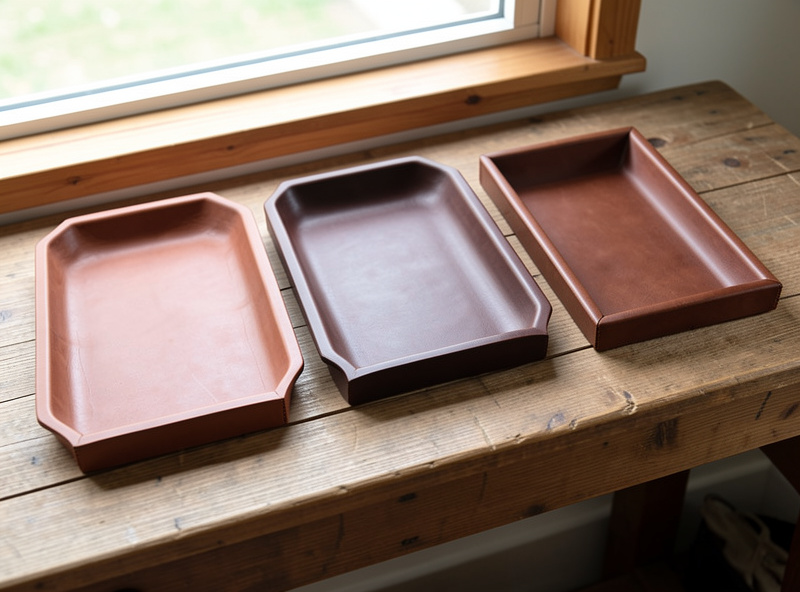
Start with the four-snap catchall — it teaches folding and snap-setting in an afternoon with no form required. Then move to a molded valet, a padded dice tray, a divided desk organizer, and a plant pot cover. Each adds one new skill without repeating the last.
Here is the progression I would hand a friend who wanted to build the whole set. Begin with the one-piece four-snap catchall: it is forgiving, needs only snaps and a skiving knife, and gives you a usable object the same day. Next, build a molded valet using the wet-forming method above so you learn to bone corners — that skill unlocks everything else, and the corner detail is drilled in wet-forming crisp corners on a tray.
From there, branch by interest. If you play tabletop games, the rolled-edge dice tray teaches you a padded, rolled rim — the same technique that stiffens a soft leather without extra weight. If your desk is a mess, the desk organizer and pen tray adds internal dividers and compartments, which is molding plus joinery. And for something none of your friends will have, the leather plant pot cover and basket wraps a rigid core with a soft-goods approach, so it is your gateway from formed veg-tan into structured chrome-tan work. Before you buy leather for any of them, it is worth reading the general types of leather primer so you are not guessing at tannage and weight — and if you have made a dog collar or belt, note that the same weight-selection logic applies here.
What ties them together is that none of these need a machine. Every one is hand-cut and, where stitched, hand saddle-stitched. I keep my thread and iron pitch consistent across the set — the tray builds that involve stitching all use the same 0.8 mm thread I default to for small goods.
What Do You Actually Need to Get Started?
A first tray needs surprisingly little: a piece of 5–6 oz veg-tan, a straightedge and knife, a modeling spoon for boning, an edge beveler, some Tokonole, and — for the snap version — a set of line-24 snaps and a setter. Under a hundred dollars of tools makes trays for years.
I would not buy a kit. Kits pad the price with tools you replace within a month. Buy a single shoulder of veg-tan so you have room for mistakes — you will ruin one or two trays learning to case correctly, and that is tuition, not waste. A veg-tan shoulder in 5–6 oz is the most useful single piece for tray work; a set of line-24 snaps with a setter handles the catchall build; and a jar of Tokonole burnishing gum does your edges. That is genuinely most of it.
As an Amazon Associate I earn from qualifying purchases.
The leather quality is worth spending on where the tools are not. I run Wickett & Craig and Hermann Oak veg-tan because the temper is consistent shoulder to shoulder, which matters enormously when you are casing to a repeatable dampness — cheap import veg-tan varies so much in fill that your casing time becomes a guess. You can read the tannery specs directly at Wickett & Craig and Hermann Oak, and the dye chemistry from Fiebing’s own product pages if you want to understand what you are putting on the grain.
How Long Does It Take to Make a Leather Tray?
Active work on a simple snap tray is about an hour: cut, skive, set snaps, finish edges. A molded valet is two to three hours of hands-on work spread across two days, because the wet-forming has to dry slowly — 24 to 48 hours clamped — before you can finish it. The drying is the long pole, not the making.
People underestimate the drying and pull the tray off the form too early, and I have ruined pieces exactly that way — impatient, unclamped at twelve hours, and the walls relaxed halfway back down overnight. A cased tray dries from the surface inward, so the outside can feel bone-dry while the core is still damp and soft. If you unclamp then, the still-plastic core lets the shape creep. I now leave a molded tray a full 48 hours in a low-humidity corner of the shop, and in a Swedish winter with the heat on that is barely enough. The tell that it is truly done: the leather has returned to a lighter, uniform color with no cool damp patch when you press the flesh side against your lip — an old saddler’s trick, and it works better than any moisture meter I have tried.
Plan the finishing as its own session, too. Dyeing adds drying time (an hour or two between coats, then overnight to cure before sealing), and burnishing a tray’s full rim is genuinely fifteen or twenty minutes of patient slicking if you want it glassy. Budget a weekend for a molded, dyed, fully finished valet and you will not feel rushed into the mistakes that show.
What Are the Most Common Tray-Making Mistakes?
The four that get everyone: soaking instead of casing (blotchy dye, mushy corners), skipping the skive on snap corners (proud, gapping folds), unclamping too early (walls slump), and burnishing before dyeing (edges reject color). Every one is a process error, not a leather or tool problem.
Soaking is the big one and I did it for my first year. It feels thorough — really wet the leather, surely that helps it form — and it does the opposite. A soaked blank has a saturated surface and a dry core, so it molds unevenly and, worse, dyes in ugly cloudy patches because the water blocks even absorption. The fix is discipline: a two-count dunk and a rest, every time. The moment I switched from soaking to casing, my reject rate on trays dropped from roughly one in three to almost none.
The skive mistake shows up on snap corners specifically. When you fold two edges together at a corner and set a snap, you are stacking two layers of leather; if you have not skived the overlap thinner, the corner bulks up, the snap sits proud, and a visible gap opens along the fold. On 6 oz leather I skive each overlapping face down by roughly a third where they meet. It is the single detail that separates a crisp snap tray from a homemade-looking one, and it is worth practicing on scrap before you commit a good blank.
The last two are sequence errors. Unclamping early trades a day of patience for a slumped wall you cannot fix — the leather has already decided its shape. And burnishing before dyeing seals the edge so the dye beads and skips, leaving a pale rim on a dark tray. Dye first, always. None of these are exotic; they are just the four places the tray quietly punishes a shortcut, and knowing them in advance is most of the battle.
Do You Need to Stitch a Leather Tray?
No — most trays are stitchless. Snap trays hold with hardware, and fully molded trays hold with the wet-formed shape alone. You add stitching only when you want reinforced corners, a doubled rim, or a decorative saddle-stitched detail. When you do stitch, match the thread to the leather weight so it seats flush instead of sitting proud.
That said, a stitched corner is the strongest way to build a tall-walled tray without a fastener, and it is where the tray builds cross into my stitching work. If I saddle-stitch a corner seam on a deep desk tray, I run 0.8 mm waxed polyester through holes set with a fine European-pitch pricking iron — the same iron pitch I default to across small goods, so the stitch line matches my wallets and cases. Getting the thread-to-iron-to-awl sizing right is what makes a hand stitch seat cleanly rather than pull loose or bulge; I lay out that whole tuned chain in the stitching cluster, and it applies here anytime a tray gets stitched. A machine stitch would be faster, but on an object this small and this handled, a hand saddle stitch outlasts it and looks intentional rather than manufactured.
For a decorative touch, a running line of contrast saddle stitch just below the rim reads beautifully on a molded valet, and because the wall is doing the structural work, that stitch can be purely aesthetic. Case, mold, dye, then stitch and finish — the stitching is one of the last steps, added to a tray that already holds its own shape.
What I’d Do Starting Today
If I were building my first tray this weekend, I would cut a 7-inch square of 5–6 oz veg-tan, mark the walls an inch and a half in from each edge, case it properly — dunk, then rest under a damp towel for twenty minutes — and go the snap route so I got a finished object before I lost patience. The molded builds come next, once boning a corner feels like a known move instead of a gamble.
The thing I wish someone had told me at the start: the leather is not the variable, your casing is. Once I stopped soaking and started casing to an even dampness, my corners stopped cracking and my dye stopped blotching in the same week. Everything downstream — the crisp rim, the even color, the tray that still stands square two years later — traces back to that one habit. Build the snap catchall first, get the casing right on the molded valet, and the rest of this cluster is just variations on a skill you will already own.
What leather weight is best for a valet tray?
For most valet and catchall trays use 5 to 6 oz veg-tan for walls under 1.5 inches, and 7 to 8 oz for deeper or larger trays. Below 4 oz the walls collapse; above 9 oz the corners crack when folded. One ounce equals roughly 1/64 inch, so 6 oz is about 2.4 mm.
Can you make a leather tray from chrome-tan leather?
Not a self-supporting one. Chrome-tanned leather springs back and will not hold a wet-formed shape. Use vegetable-tanned leather for any tray that must stand on its own. Chrome-tan only works for a plant pot cover or basket that wraps a rigid core, where the leather never has to hold the form itself.
How do you keep leather tray walls from collapsing?
Use veg-tan in the right weight, case it to an even dampness rather than soaking it, and bone the inside corners hard against a form so the fibers compress and set. Let the tray dry slowly for 24 to 48 hours before unclamping. A wax finish or controlled heat can harden the walls further.
Do you dye a leather tray before or after burnishing?
Dye first, burnish last. Burnishing seals the edge, and a sealed edge will not absorb dye evenly afterward. Dye the cased and dried blank, let it fully dry, buff off the haze, then slick the edges. Condition lightly at the end so the leather does not dry brittle.
What is boning in leather wet-forming?
Boning is pressing cased leather hard into a shape with a smooth tool like a hardwood modeling spoon or a bone folder. It compacts the damp fibers against a form, which sharpens inside corners and sets the shape as the leather dries. It is the step that gives a tray its crisp, defined rim.
Keep Building
- How to Make a Leather Catchall Tray: One Piece, Four Snaps
- Best Leather Weight for Trays: Holding a Form Without Collapsing
- Wet-Forming Crisp Corners on a Tray: Boning the Inside Radius
- How to Make a Leather Dice Tray With a Rolled, Padded Edge
- How to Make a Leather Desk Organizer and Pen Tray
- How to Make a Leather Plant Pot Cover and Basket



