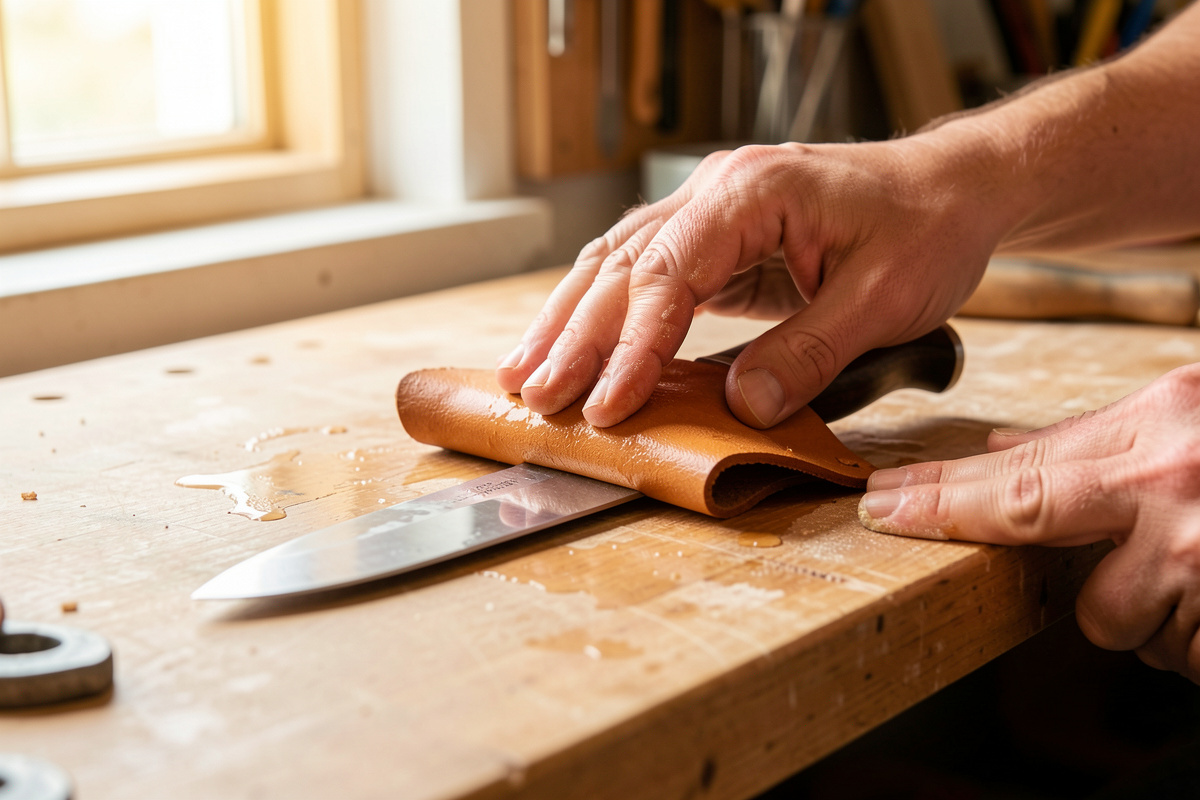
Leather wet forming is the process of soaking vegetable-tanned leather until it relaxes, shaping it over a form, and letting it dry so it holds that shape permanently.…
Leather wet forming is the process of soaking vegetable-tanned leather until it relaxes, shaping it over a form, and letting it dry so it holds that shape permanently. Done right, an 8-9 oz veg-tan sheath body will hold a knife’s exact contour and keep it for the life of the piece. Chrome-tan will not do this — only veg-tan molds, because its plant-tannage structure sets when it dries.
I have wet-formed knife sheaths, pancake holsters, valet trays and pen sleeves on the bench for years, and the difference between a piece that looks vacuum-formed and one that looks lumpy comes down to four things: the right leather, the right water, the right amount of working time, and a dry-down that nobody rushes. This guide covers the whole system the way I actually run it, then sends you to the focused spoke guides for sheaths, holsters, custom molding and hardening.
What Wet Forming Actually Does to Leather
Wet forming works because vegetable-tanned leather is hygroscopic and thermoplastic-adjacent: water swells the fiber bundles and lets them slide past each other, and when the water leaves, the plant tannins re-bond the fibers in their new position. That is the whole trick. You are not stretching the leather so much as casing it — bringing it to an even, damp, pliable state — then pushing it into a shape it will remember.
The reason this only works on veg-tan is chemistry, not snobbery. Chrome-tanned leather is tanned with chromium salts that keep the fibers permanently lubricated and soft; it springs back instead of setting, and it will not burnish or hold a crease the way veg-tan does. If you have ever wondered why every molding tutorial specifies veg-tan, that is why — and it is the same reason veg-tan is the leather that tools, dyes and burnishes while chrome-tan stays soft. For molded work, veg-tan is the only correct choice.
Choosing Leather Weight for Molded Pieces
Weight (thickness) decides whether a molded piece feels like a tool or like a wet paper bag. The rule I work to: the more the piece needs to hold a rigid form and take abuse, the heavier you go. A knife sheath body wants 8-9 oz; a pancake holster wants 7-8 oz; a soft eyeglass case can drop to 4-5 oz because it does not need to be rigid. Reference the ounces-to-millimeter chart if you think in metric — 8-9 oz is roughly 3.2-3.6 mm.
Lighter leather molds with crisper detail but holds less structure; heavier leather holds structure but fights you on tight inside curves and needs harder boning to take an edge. Most beginners pick leather that is too thin because it is easier to cut and stitch, then wonder why the finished sheath flexes. For molded work, err heavier than you would for a flat-stitched piece.
| Molded Project | Leather Weight | Why This Weight | Hardening? |
|---|---|---|---|
| Knife sheath body | 8-9 oz veg-tan | Rigid protection, takes deep boning | Optional heat-set |
| Pancake / OWB holster | 7-8 oz veg-tan | Retention without bulk | Light heat-set |
| Valet tray / catch-all | 5-6 oz veg-tan | Holds walls, stays light | No |
| Eyeglass / pen sleeve | 4-5 oz veg-tan | Soft form, crisp detail | No |
| Mask / armor / cosplay | 6-10 oz veg-tan | Holds 3D shape, rigid | Yes — heat or wax |
Casing: Getting the Water Content Right
Casing is the single most under-explained step, and it is where most molded pieces are won or lost. Casing means bringing the leather to an even, uniform moisture content all the way through — not soaking-wet on the surface and bone-dry in the core. Properly cased leather has the look and feel of cool modeling clay: it takes an impression and holds it, the surface is no longer glossy-wet but slightly cool to the touch.
My method: dunk the cut piece in room-temperature water for 10-30 seconds depending on weight (longer for heavier leather), pull it out, then wait. The waiting is the part people skip. The water needs time to migrate evenly through the cross-section, and the surface needs to return from dark-saturated to its slightly-darkened cased tone. On 8-9 oz that can be 15-30 minutes in a plastic bag or under a damp cloth. Mold too wet and the surface mushes and loses crispness; mold too dry and it cracks and will not take detail. The full sequence lives in the wet forming technique guide.
One variable nobody mentions: ambient humidity changes your casing times. In my Swedish workshop a piece cases faster and dries slower in the damp shoulder seasons than it does in the dry, heated depth of winter, when the same 8-9 oz panel can flash past the cased window while I am still setting up the form. I started logging not just dunk seconds but the rough shop conditions, and now I bag a winter piece a little sooner to slow the surface down, and give a summer piece a few extra minutes to even out. If your molded detail comes out inconsistent piece to piece despite an identical routine, the room is the variable you are not controlling.
Water Temperature and the Hardening Question
Cold-to-lukewarm water is for shaping. The leather stays workable, takes detail, and dries to a firm-but-flexible state. Hot water is a different operation entirely — it is the front end of hardening. Veg-tan immersed in water near 80°C (175°F) begins to shrink, harden and darken; this is the basis of cuir bouilli, the old armor-hardening method. You do not use hot water for routine molding because it shrinks the piece unpredictably and you lose dimensional control.
For most sheaths and holsters, you shape with cool water, dry naturally, and then decide whether to add a separate hardening step — oven heat, hot wax, or a dip — covered in depth in the hardening guide. Treat shaping and hardening as two stages, not one, and you keep control of both the fit and the final stiffness.
Forms, Bucks and Molds
You shape leather over a form — the object or buck that gives the piece its 3D geometry. For a knife sheath the form is the knife itself, ideally bagged in cling film or a thin freezer bag so moisture and steel never meet (wet leather and carbon steel make rust and tannic stains fast). For a holster the form is a blue gun or a dummy — never a live firearm — or a 3D-printed replica of the exact model.
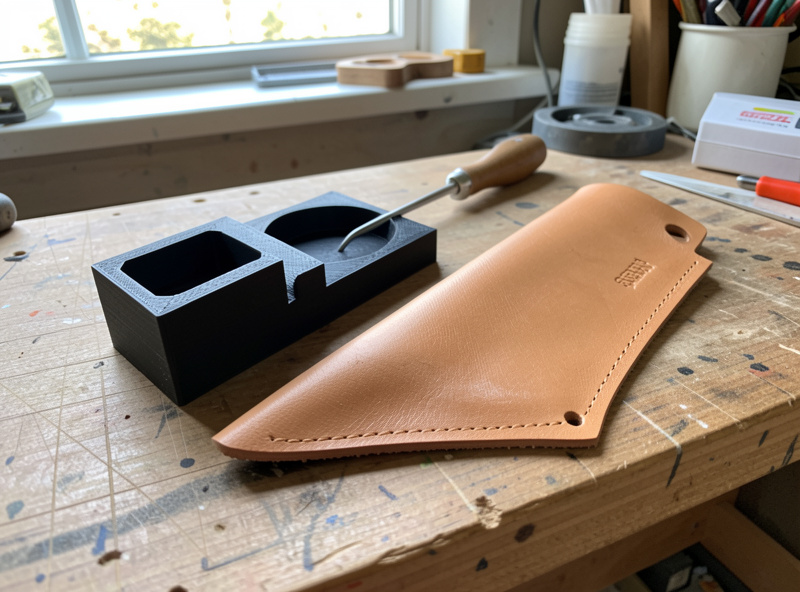
For repeatable production work, makers cut male-and-female form blocks: a press buck the leather drapes over and a cavity it presses into, often cut on a CNC for accuracy. I cut some of mine on the desktop machine — see CNC-cut form blocks — and print smaller bucks and boning tools on the FDM printer, the same machine that prints my edge slickers. The form does not have to be fancy; it has to be the exact shape you want the leather to remember, with no sharp edges that will cut the wet fibers.
Boning: Pushing Detail Into the Form
Boning is the act of working the cased leather tight against the form with a smooth tool — traditionally a piece of bone, today a modeling spoon, a hardwood folder, or a printed boning tool. You press and rub the damp leather into every contour: the spine of the knife, the trigger guard channel of a holster, the welt line of a sheath. Good boning is what creates that crisp, vacuum-formed look where the leather hugs the object’s edges with a visible defined line.
Work from the center outward, push the leather down into recesses and around raised features, and re-wet the surface with a damp sponge if it dries before you finish. The line you bone in while wet is the line that stays after it dries, so take your time. Over-boning a too-wet piece tears the grain; under-boning a too-dry piece leaves a vague, soft shape. This is feel, and it comes from reps — the same patience-discipline the whole craft runs on.
The Dry-Down: Where Patience Pays
Once shaped and boned, the piece has to dry slowly and completely before you do anything else — no stitching the welt closed early, no dyeing, no sealing. Air-dry at room temperature, out of direct sun and away from radiators; forced heat dries the surface faster than the core and warps the shape. Depending on weight and humidity this is 12 to 48 hours. The piece is dry when it has returned to its natural pale color all the way through and feels room-temperature rather than cool.
Rushing the dry-down is the most common way a good molding job goes wrong: the leather looks dry on the outside, you stitch and seal it, and over the next week trapped moisture migrates out and the shape relaxes. Let it dry fully. Veg-tan rewards patience and punishes hurry — which is exactly why I find it the calming bench in a workshop otherwise full of sparks and dust.
Sequencing: When to Dye, Stitch and Seal a Molded Piece
Order of operations on a molded piece is not the same as on a flat one. You generally cut, edge-bevel and pre-finish the parts, then wet-form, then dry fully, then dye, then stitch the welt, then burnish and seal. Some makers dye before forming (water can lift and move dye during shaping); I prefer to dye after the piece is dry and the shape is locked, then condition and seal last. The dyeing guide covers stacking color, and Resolene sealing covers the topcoat.
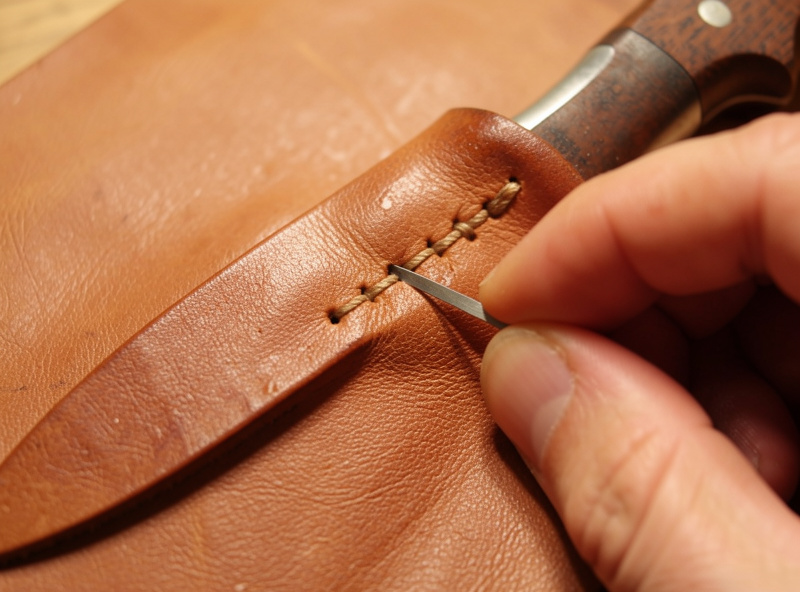
Stitching after forming matters because the welt and seam need to follow the final molded geometry; stitch a sheath flat and then mold it and your stitch line fights the shape. Use a hand saddle stitch on the welt — it survives the flex and abuse a sheath or holster takes far better than a machine lockstitch on small goods.
The Common Mistakes I See
Most failed molding jobs trace to a handful of repeatable errors. Using chrome-tan instead of veg-tan (it will not hold a form, full stop). Casing too wet so detail mushes, or too dry so it cracks. Skipping the bag-the-knife step and ending up with rust stains and a corroded blade. Force-drying and warping the shape. Stitching or sealing before the core is dry. And going too thin on the leather so the finished piece flexes when it should be rigid — the single most common beginner miss.
None of these are hard to avoid once you know them, and every one of them I have made on a real piece and had to throw away. That is the value of the bench: you ruin a few sheaths, figure out why, and never make that mistake again. If you are brand new to veg-tan, start with the beginner’s guide and a cheap practice piece before you mold something you care about.
The Wet-Forming Kit: What You Actually Need
You do not need much to start wet-forming, and most of it you already own if you work veg-tan. The non-negotiables: a tub of room-temperature water, a sponge for re-wetting the surface, cling film or freezer bags to protect the form, a smooth boning tool, and your form itself. Everything else is refinement. I keep a dedicated shallow tub so I am not dunking work in the sink, and a stack of thin produce bags because they conform to a knife better than thick freezer bags.
For boning tools, a hardwood modeling spoon and a folder cover most jobs; I print a few specialty profiles — a narrow point for trigger-guard channels, a wide flat for sheath faces — on the FDM printer because PETG takes the moisture without swelling and I can dial the exact radius I want. A few binder clips or spring clamps hold a molded face against a backer while it sets. That is genuinely the whole kit. The expensive part of molding is patience and reps, not gear, which is part of why I keep coming back to it on the quiet bench. If you want repeatability across many identical pieces, that is when form blocks earn their keep — covered below.
Press Blocks vs Hand Boning vs Vacuum Forming
There are three ways to push leather into a shape, and they suit different goals. Hand boning is the default for one-off work: maximum control, every contour worked by feel, and no setup cost beyond a tool and a form. It is how I make sheaths and trays where each piece is a little different. The downside is it is slow and the result depends entirely on your hands.
Press blocks — a matched male buck and female cavity that clamp the cased leather between them — trade setup time for repeatability. Cut the block once (I cut mine on the desktop CNC for accuracy) and every holster comes out identical, which matters if you make the same model repeatedly. The leather still needs hand-detailing at the edges, but the bulk of the form is set by the block under clamp pressure. Vacuum forming, where a pump pulls the leather tight against a buck inside a membrane, is the production-shop approach traditional and high-end goods makers use for consistent deep draws; it is more equipment than most hobbyists need, and I mention it for completeness rather than as something I run on the home bench. For nearly everyone reading this, hand boning is the right answer, with a press block as the upgrade when you start repeating a design.
Troubleshooting Molded Leather
When a molded piece goes wrong, the cause is almost always traceable. The shape relaxed after drying: you sealed or stitched before the core was dry, or you cased too dry to set a strong memory — re-case, re-form and dry fully this time. The surface is mushy and detail is soft: you molded it too wet; next time wait longer after dunking so the surface returns from dark-saturated to cased tone. Cracks or pale stress lines on tight curves: too dry when boned, or leather too heavy for that radius — re-wet and work more gently, or step down a weight.
Dark blotches or rust marks: bare steel touched wet leather — always bag the form. A musty smell or surface mold after a slow dry: the piece dried too slowly in a humid, stagnant spot; dry with air movement, just never with direct heat. Dye lifted or went patchy during forming: you dyed before molding and the water moved the color — this is exactly why I dye after the shape is locked. None of these are fatal on a practice piece, and every one teaches you where your casing or sequencing went off.
Conditioning, Sealing and Caring for a Molded Piece
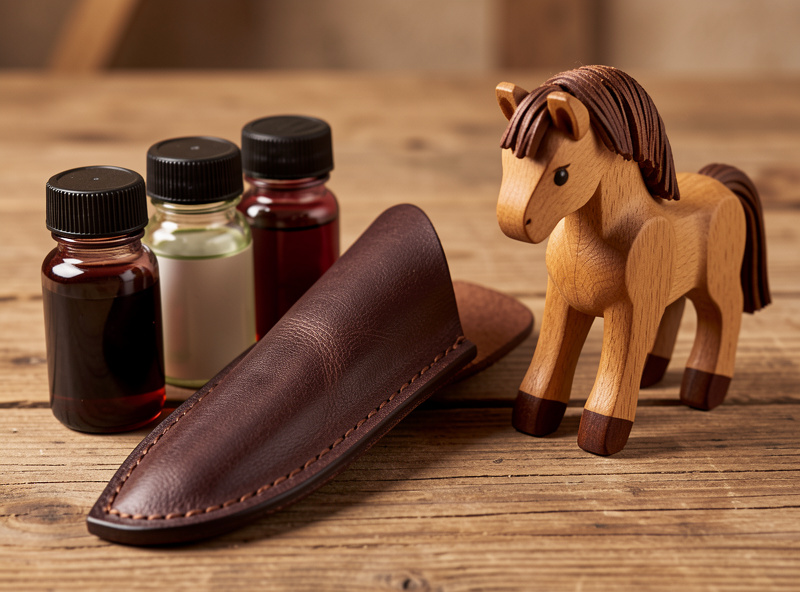
A molded piece needs its finish chosen with the shape in mind. Once dry, dyed and stitched, I condition lightly with neatsfoot oil — lightly, because too much oil softens the very stiffness you molded in — then seal with a thin coat of neutral Resolene or a carnauba creme to lock color and shed moisture. A hardened piece (see the hardening guide) often takes a wax finish that doubles as the seal. The goal is a topcoat that protects without flooding the leather and relaxing the form.
In use, the enemy of a molded piece is heat and re-wetting: leave a wet-formed sheath in a hot car or soak it and it can soften and lose shape, because the same water-and-heat that molded it can un-mold it. Wipe it, condition it once or twice a year, and keep it out of the dishwasher-hot end of the temperature range, and a properly dried, sealed molded piece holds its shape for decades. That permanence — a flat hide remembering a 3D shape because you cased and dried it correctly — is the whole quiet satisfaction of the craft.
Where to Go Next
This hub is the map; the spokes are the turn-by-turn directions. For the core skill, read the wet forming technique guide. For specific projects, see making a leather knife sheath and the leather holster making guide. Deciding between materials? Read Kydex vs leather. For fit and stiffness, see molding for custom fit and hardening molded leather. And to keep your detail-pushing tools sharp, the sharpening guide applies to your modeling and edge tools too.
Frequently Asked Questions
Can you wet form chrome-tanned leather?
No. Chrome-tanned leather is tanned with chromium salts that keep the fibers permanently flexible, so it springs back instead of holding a molded shape. Only vegetable-tanned leather sets when it dries. For any sheath, holster or tray, use veg-tan.
What water temperature should I use for wet forming?
Use room-temperature to lukewarm water for shaping, which keeps the leather workable and dimensionally stable. Hot water near 175F starts to shrink and harden the leather, which is the cuir bouilli hardening process, not routine molding. Keep shaping and hardening as separate steps.
How long does wet-formed leather take to dry?
Depending on leather weight and humidity, a molded piece air-dries fully in 12 to 48 hours. It is done when it returns to its natural pale color all the way through and feels room-temperature rather than cool. Never force-dry with heat, which warps the shape.
What leather weight is best for a wet-formed knife sheath?
For a rigid knife sheath body, use 8-9 oz vegetable-tanned leather, roughly 3.2 to 3.6 mm thick. Lighter leather molds with crisper detail but flexes too much for a protective sheath. Most beginners go too thin and end up with a floppy result.
Do I have to harden wet-formed leather?
No. Most sheaths and holsters are shaped with cool water and dried naturally, which leaves them firm but flexible. Hardening is a separate optional step using oven heat, hot wax or a hot-water dip, used when you want armor-like rigidity. Shape first, then decide on hardening.
How do I protect a knife blade during wet forming?
Wrap the knife in cling film or a thin freezer bag before pressing wet leather around it. Wet veg-tan leather and carbon steel react fast, producing rust on the blade and dark tannic stains on the leather. The plastic barrier keeps moisture and steel separated while you bone in the detail.
Related Guides
- Leather Wet Forming Technique: Casing to Boning
- How to Make a Leather Knife Sheath
- Leather Holster Making Guide
- Kydex vs Leather Holster: Which to Make
- Leather Molding for Custom Fit
- Hardening Molded Leather



