The leather edge slicker you bought from the local supplier for 25 USD is a turned hardwood handle with four bullnose grooves of fixed sizes. The grooves match…
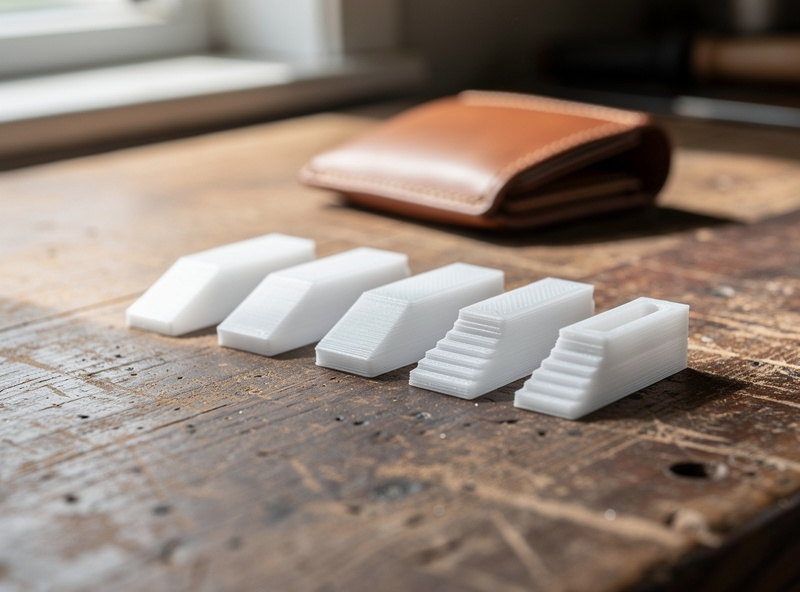
The leather edge slicker you bought from the local supplier for 25 USD is a turned hardwood handle with four bullnose grooves of fixed sizes. The grooves match three common belt thicknesses and one wallet thickness, so 60-80% of your leather projects fit one of the grooves and the rest do not. A 3D-printed slicker designed in OpenSCAD with parametric groove sizes prints in 90 minutes, costs 0.40 USD in PETG, and lets you generate a custom slicker for any project thickness. The same parametric file produces 6 different slickers from one source. See the leather edge finishing hub for how DIY slickers fit into the full bevel-and-burnish workflow. For where DIY slickers fit in the broader tool inventory, the leatherworking tools hub covers the three-tier buy-in progression.
This guide covers the slicker geometry that actually burnishes well, the filament choices that survive years of leather contact, and the parametric design template that adapts to any thickness or edge profile. Hardware target is any 220x220mm 3D printer with a 0.4mm nozzle; PETG is the recommended filament for tooling that lasts.
Every commercial edge slicker I bought had a groove that was slightly too wide for the 3-4 oz leather I use on wallets. Printing a custom PETG slicker with a 1.2mm groove radius produced better burnishing results than any of the three store-bought slickers on my bench. The OpenSCAD parametric template below generates the exact geometry for your leather thickness range.
Why Off-the-Shelf Slickers Stop Fitting
Edge slickers shipped with a fixed set of grooves: typically 3mm, 5mm, 7mm, and 10mm bullnose channels for the most common belt and bag thicknesses. The moment you work with 4mm bridle leather, 6mm latigo, or any non-standard thickness, the slicker either rolls the edge unevenly (groove too small) or fails to compress the fibers (groove too large). The fix is more slickers, but each commercial unit is 25-40 USD and the marginal value drops fast.
The other limit is groove geometry. Commercial slickers offer bullnose (rounded U) only. For specific projects — saddle skirting, belt loops, decorative pieces — flat-bottom grooves or V-grooves produce better results, and no commercial supplier sells them. A 3D-printed slicker can have any groove shape you can model in CAD, including custom profiles for repeat-pattern items where the same edge geometry produces consistency batch after batch. The broader selection guidance for off-the-shelf slickers is on the best edge bevelers for leather guide.
The third limit is hand-fit. Commercial slickers are sized for an average adult hand. If you have small or large hands, every burnishing session leaves your wrist sore. A 3D-printed handle sized to your hand specifically — measure your power-grip diameter, model an ergonomic taper, print — eliminates the fatigue. After two hours of consecutive burnishing, the difference between a wrong-sized commercial slicker and a hand-fit DIY slicker is dramatic.
The Slicker Geometry That Burnishes Well
The functional element is the bullnose groove. The radius matches the leather thickness: a 4mm leather edge needs a 4mm groove radius, give or take 0.3mm. Too tight and the fibers compress unevenly; too loose and the groove rolls the edge round instead of polishing it flat. Match groove to leather within 0.5mm for clean results.
The handle profile matters more than people expect. A cylindrical handle 25-30mm in diameter is the maximum-power-grip configuration; smaller diameters produce hand fatigue, larger diameters do not let the wrist rotate freely. Length runs 100-130mm, with a slight taper from base to working tip. The working tip — the section that contacts the leather — is the same diameter as the handle for slickers under 10mm groove, slightly thicker for larger grooves to maintain grip during the firm-pressure passes.
| Leather Thickness | Groove Radius | Tip Diameter | Best Use |
|---|---|---|---|
| 1.5-2mm | 1.5mm | 20mm | Wallet, card holder edges |
| 2-3mm | 2.5mm | 22mm | Bag straps, light belts |
| 3-4mm | 3.5mm | 25mm | Standard belts, bag bodies |
| 4-5mm | 4.5mm | 28mm | Heavy belts, sheaths |
| 5-7mm | 6mm | 32mm | Saddle parts, holsters |
For a complete project workflow showing how the slicker integrates with edge dye and finish, the burnish leather edges with Tokonole guide covers the full burnishing sequence. The 3D-printed slicker plays the same mechanical role as a commercial one in that workflow.
Filament Selection: PETG, ABS, or Walnut-Filled PLA
PETG is the right default for leather tooling. It survives years of leather contact (Tokonole, gum tragacanth, water-based dyes do not stain or degrade PETG), takes friction without permanent deformation, and prints reliably on any printer. ABS works similarly but warps during print without an enclosure. Walnut-filled PLA looks more attractive but the PLA matrix creeps under sustained pressure — the slicker becomes slightly oblong after 20-30 hours of use.
Avoid plain PLA for any tool that takes consistent pressure. The 60-65°C glass transition temperature is too close to the heat generated by friction during burnishing — a slicker pressed firmly for 30 seconds locally heats the contact zone past the PLA softening point. Tokonole’s water content compounds the issue. PETG handles all of this without measurable change.
For the highest-quality slickers, use carbon-fiber-reinforced PETG — sold by most filament makers as CF-PETG or PETG-CF (verify the base polymer before buying; Polymaker’s PolyMide CoPA-CF, despite the similar name, is actually a nylon composite, not a PETG blend). The carbon fiber adds stiffness and surface hardness, producing a slicker that performs more like the commercial hardwood units. Cost runs roughly 2-3x normal PETG (see Proto-Pasta’s CF-PETG pricing) but the slicker lasts 3-5x longer — and because carbon fiber is abrasive, swap in a hardened-steel nozzle before printing it; a stock brass nozzle wears out fast on CF filament. If you’re printing a lot of these, the math favors CF-PETG; for a hobby workbench, plain PETG is plenty. The drying protocol matters even more for CF-PETG because moisture spoils the matrix bonding — see the how to dry 3D printer filament guide.
The Parametric OpenSCAD Template
A 30-line OpenSCAD file produces any slicker variation from three parameters: groove radius, total length, and handle diameter. The file uses minkowski operations to round the handle taper, then subtracts the bullnose groove from the working tip. Re-export with new parameters in 60 seconds; print in 60-90 minutes.
For users not comfortable with OpenSCAD, Fusion 360 sketches with parametric driven dimensions produce the same result with a more visual workflow. Both approaches let you generate the entire 6-slicker set from one source file in an afternoon. The savings versus buying 6 commercial slickers is roughly 150 USD; the customization value (groove sizes that actually fit your specific leather stock) is the bigger win.
Burnishers (the Other Edge Tool)
Burnishers — different from slickers because they are smaller and designed for one-handed precision work — print equally well in PETG. The geometry is a simple cone with a curved tip; useful for bevel transitions, corners, and small-radius areas where a full slicker is too big. A 12-piece set of burnishers in different tip radii prints in 4 hours and replaces a 60 USD commercial set.
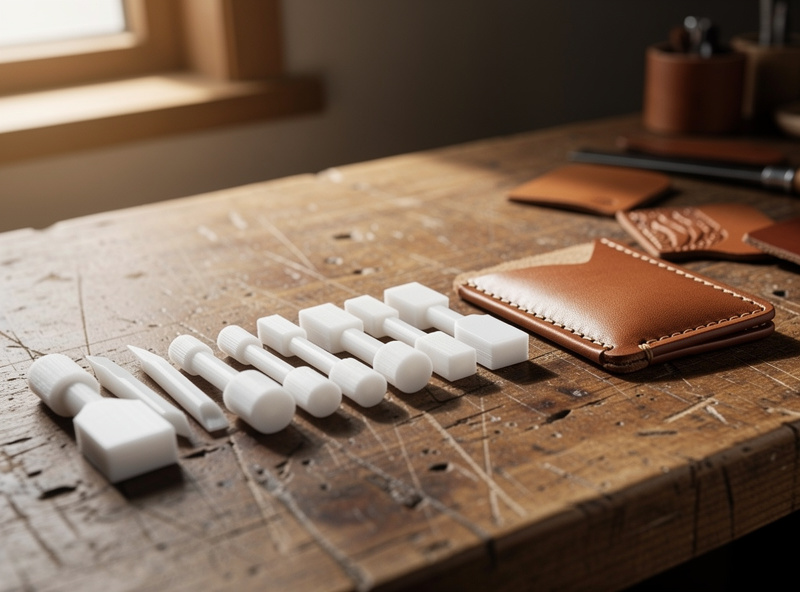
For the handle of small burnishers, switch to TPU 95A (flexible filament) for the grip section. A semi-flexible handle reduces hand fatigue dramatically during precision work where the burnisher is gripped tightly for 20-30 minutes at a time. The dual-material print (rigid PETG tip, TPU handle) requires a multi-material printer or two prints joined with epoxy — both are more involved but the result rivals premium commercial burnishers.
The complete workflow connects directly to the broader 3D-printed leather tooling toolkit on the 3D-printed leather tooling guide. Edge slickers and burnishers are the two highest-value entry points; once you print these, the full set of mallets, stitching ponies, and pattern templates becomes obvious next steps.
Frequently Asked Questions
Can a 3D-printed edge slicker actually burnish leather?
Yes. A PETG slicker with the right groove radius produces equivalent burnishing results to a hardwood commercial slicker. The PETG surface absorbs Tokonole and water similarly to wood, and the slight surface texture (from the print layer lines) actually grips leather fibers slightly better than smooth wood for the first few passes.
What filament is best for leather edge slickers?
PETG is the right default. It survives years of leather contact, takes friction without permanent deformation, and prints reliably. Avoid plain PLA because the 60-65 Celsius glass transition is too low for the friction heat during burnishing. CF-PETG lasts longer for high-volume use.
How long does printing an edge slicker take?
60-90 minutes per slicker on a 0.4mm nozzle at 0.2mm layer height. A 6-slicker set covering wallet to belt thicknesses prints in roughly 8 hours of total machine time. Material cost is under 3 USD for the entire set in PETG.
What groove radius should an edge slicker have?
Match the groove radius to the leather thickness within 0.5mm. A 3mm leather edge needs a 3mm-radius bullnose groove. Too tight compresses fibers unevenly; too loose rolls the edge round instead of polishing it flat. Print one slicker per common leather thickness in your stock.
Will a printed slicker last as long as wood?
PETG slickers last 3-5 years with normal hobby use. Carbon-fiber-reinforced PETG lasts 5-10 years. Hardwood slickers last 10-20 years but cost 25-40 USD versus 0.40 USD for printed PETG. Most hobbyists print replacements rather than wait for wear.
Do I need a hardened nozzle to print these slickers?
Only if you print in carbon-fiber-reinforced PETG. The carbon fiber is abrasive and wears through a stock brass nozzle within a few hundred grams of filament, so switch to a hardened-steel or ruby-tipped nozzle first. Plain PETG, PLA, or TPU prints fine through a stock brass nozzle since none of them contain abrasive fill.
Related Articles
- 3D-Printed Leather Tooling Guide
- Best Edge Bevelers for Leather
- Tokonole vs Gum Tragacanth: Which Burnishes Best
- How to Burnish Leather Edges With Tokonole
- How to Dry 3D Printer Filament