Leather working for beginners is the practice of cutting, stitching, and finishing vegetable-tanned leather using fewer than ten hand tools, with a typical first project costing under $80…
Leather working for beginners is the practice of cutting, stitching, and finishing vegetable-tanned leather using fewer than ten hand tools, with a typical first project costing under $80 in materials and tools combined. Most self-taught crafters can turn out a usable wallet within their first 10 hours on the bench — provided they pick the right starter project and avoid the five classic mistakes covered below.
This guide walks through every decision a new leatherworker faces before they cut their first piece: which leather to buy, which six tools actually matter, what beginner projects produce a finished item people are happy to use, and how to handle the four post-cut steps (saddle stitch, burnish, dye, hardware) without wasting a hide. Every section links into a deeper cluster article when you want to drill down.
I built my first leather wallet in a single weekend using a $75 kit and a piece of 5 oz veg-tan from Hermann Oak. The stitching was crooked, the edges were fuzzy, and I carried it proudly for two years. What I learned in those first 10 hours — that a sharp knife matters more than expensive leather, that counting the stitch beat is non-negotiable, and that burnishing is 80% bevel prep and 20% elbow grease — is what the rest of this guide builds on. If I were starting over today, I would buy exactly the six tools in the Three-Tool Truth section below and skip the $150 Amazon kit entirely.
What Is Leather Working?
Leather working is the craft of turning a flat, tanned animal hide into a three-dimensional, functional object — wallets, belts, sheaths, bags, holsters, and bound books are the most common entry-level products. The work breaks into six skills: pattern drafting, cutting, edge finishing, stitching, dyeing, and hardware setting. A complete beginner can pick up the first three in a single weekend.
The hobby splits roughly into two camps. Hand-stitched, vegetable-tanned work is the classic Western path — it uses a saddle stitch, takes longer, and produces heirloom-grade pieces that last decades. Machine-stitched, chrome-tanned work is the production path — faster, cheaper per unit, but requires a $700+ industrial sewing machine. This guide assumes you are starting hand-stitched, because the entry cost is roughly one-tenth the price.
Vegetable-tanned leather is the universal beginner choice for one reason: it accepts dye, takes tooling impressions, burnishes to a glass-smooth edge, and forgives mistakes. Chrome-tanned leather is softer and easier to cut, but it resists most dyes, won’t burnish, and won’t hold tooled patterns. If a tutorial does not specify which to buy, assume vegetable-tanned, weight 4–6 ounces (1.6–2.4 mm thick).
The Three-Tool Truth (Essential vs Nice-to-Have)
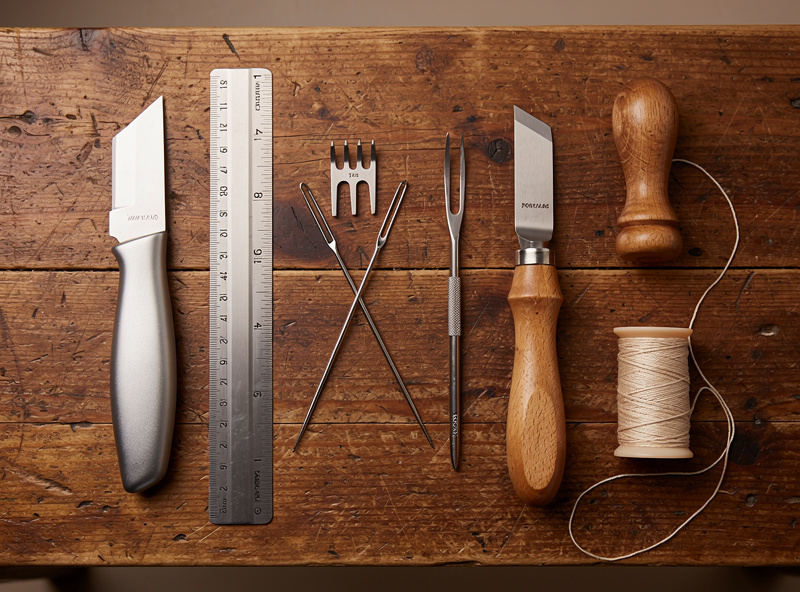
You can complete a wallet, card holder, or belt with exactly six tools: a sharp utility knife, a steel ruler, a pricking iron or stitching chisel, two harness needles, a stitching pony, and a piece of unfinished hardwood for burnishing. Total cost: about $55 if you buy the chisel set on its own and skip a leather-specific knife. Everything else marketed as “starter kit” is sold to extract money from beginners — you do not need 40 stamps, six sizes of edge beveler, or a swivel knife to make a wallet.
The knife is the one tool worth upgrading early. A blunt or wandering blade ruins more first projects than any other single factor. A $9 utility knife with sharp 0.6 mm blades cuts veg-tan up to 5 oz cleanly and stays cheap to replace; a $35 round knife or head knife is faster for thicker leather but only useful once you’ve practiced thin-stock cuts. Beginners who skip the knife upgrade typically tear their first belt strap because a dull blade pulls the fibers instead of slicing them.
The pricking iron / stitching chisel question confuses every beginner. A pricking iron only marks the leather and you punch the holes separately with an awl. A stitching chisel goes all the way through. For your first ten projects, buy a stitching chisel set in 4 mm or 3.85 mm spacing. Pricking irons require an awl-sharpening skill that takes longer to learn than stitching itself. We compare the alternatives in our stitching pony vs stitching clamps review and in the deeper guide on how to saddle stitch leather by hand.
Choosing Your First Leather
Pick by weight first, grade second, tannage third. Weight controls what you can build: 2–3 oz for card holders and wallets interiors, 4–5 oz for wallet exteriors and small bags, 6–8 oz for belts and holsters. Buying a single piece outside that range is the most common $40 mistake new crafters make — they buy a 9 oz strap thinking it is generic “leather” and cannot stitch it without industrial gear.
Grade matters next. Full-grain leather has the entire surface intact and develops the rich patina the hobby is famous for. Top-grain has the uppermost surface sanded off to hide blemishes and produces a flatter, less interesting result. The full-grain vs top-grain distinction is well covered in our full grain vs top grain leather guide. For your first three projects, source full-grain veg-tan in any natural color from a US- or Italy-tanned supplier — Wickett & Craig, Hermann Oak, and Sedgwick are the three names you’ll see referenced in every serious tutorial.
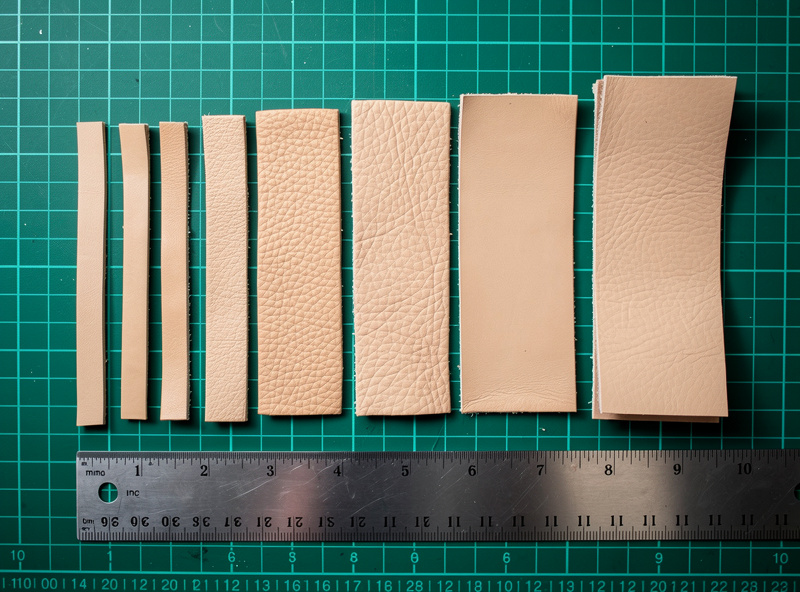
The table below maps the four most useful weight ranges to the projects they suit best. Memorize these before you place your first order — every supplier sells in ounces, and asking for “thick leather” is how beginners end up with belt blanks they cannot cut.
| Weight (oz) | Thickness (mm) | Best Beginner Projects | Hand-Stitchable? | Burnishes Well? |
|---|---|---|---|---|
| 2–3 oz | 0.8–1.2 mm | Card holder, watch strap, bookmark, lining | Yes — easy | Marginal — too thin |
| 4–5 oz | 1.6–2.0 mm | Bifold wallet exterior, key fob, simple sheath | Yes — ideal | Yes — excellent |
| 5–6 oz | 2.0–2.4 mm | Hat band, dog collar, small messenger bag flap | Yes — moderate | Yes — best results |
| 7–8 oz | 2.8–3.2 mm | Belt, holster, knife sheath | Yes — slow, requires pre-pierced holes | Yes — but slow |
The best leather for wallets deep-dive covers why most beginners should start with 4–5 oz vegetable-tanned for their first wallet exterior and 2–3 oz for the interior pocket card slots. Mixing weights inside one project is the standard professional practice, not an advanced technique — it just looks scary the first time. For a full ounce-to-millimeter conversion chart and a project-by-weight reference covering every common leather weight from 1 oz through 12 oz, see the leather thickness oz chart.
Your First Project Decision
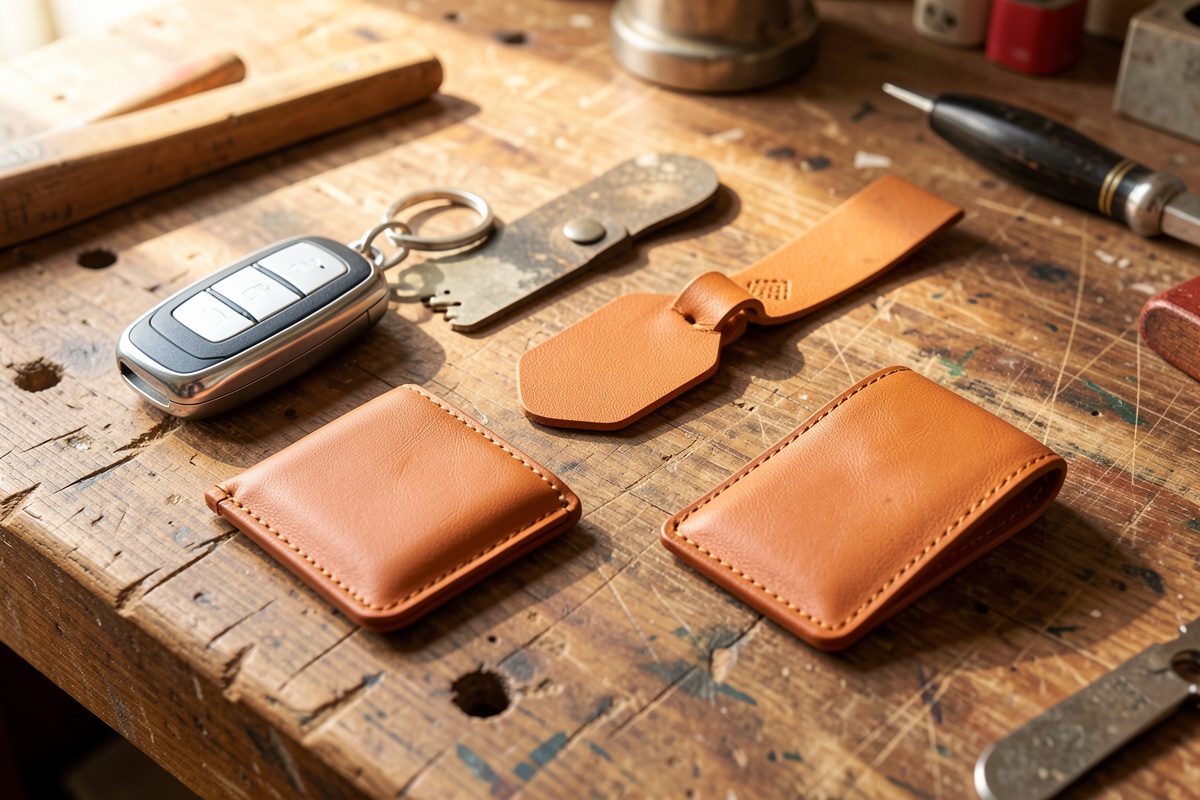
The single biggest factor in whether a beginner sticks with the hobby is their first finished project. Pick something that is (a) finished in under 6 hours, (b) uses fewer than 5 cuts, and (c) produces an item the maker actually wants to carry. Pen sleeves, simple card holders, and minimalist wallets fit all three. Avoid anything described as “intermediate” until you have completed three pieces — a holster, a structured backpack, or a tooled belt with a buckle change all hide difficulty in the photos.
Use the difficulty matrix below to plan your first three projects. The “Hours” column assumes a beginner who has watched the relevant tutorials but never cut leather before. Add 30% for your very first project regardless of which one you pick — that overhead is just learning to handle the tools.
| Project | Skill Level | Hours | Material Cost | Tools Needed |
|---|---|---|---|---|
| Pen sleeve | Absolute beginner | 2–3 | $6 | Knife, ruler, chisels, needles, thread |
| Card holder (3-slot) | Beginner | 4–5 | $11 | + burnishing tool, edge beveler |
| Bifold wallet | Beginner+ | 8–12 | $22 | + awl, contact cement |
| Belt with snap-buckle | Beginner+ | 5–8 | $28 | + punch set, snap setter |
| Tool roll / pen roll | Beginner+ | 6–9 | $18 | + leather strap stock |
| Knife sheath (pancake) | Intermediate | 10–15 | $25 | + wet-forming setup |
The card holder is the universal first project for a reason: it teaches all four core skills (cut, stitch, burnish, edge bevel) on a piece small enough that mistakes do not waste material. Our leather card holder pattern guide walks through the entire build with the exact dimensions to copy. Once that is finished and in your pocket, the leather bifold wallet build is a logical next step — same skills, more cuts, two interior pieces.
Stitching Basics for Beginners
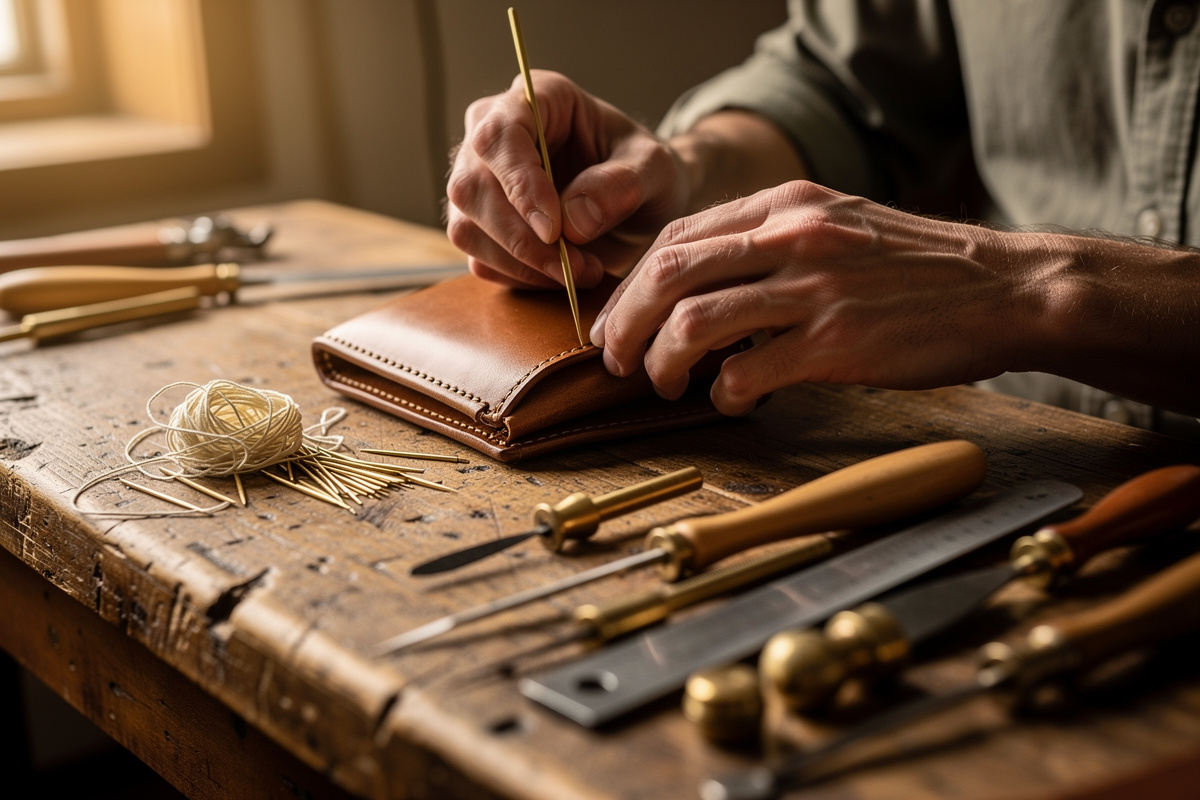
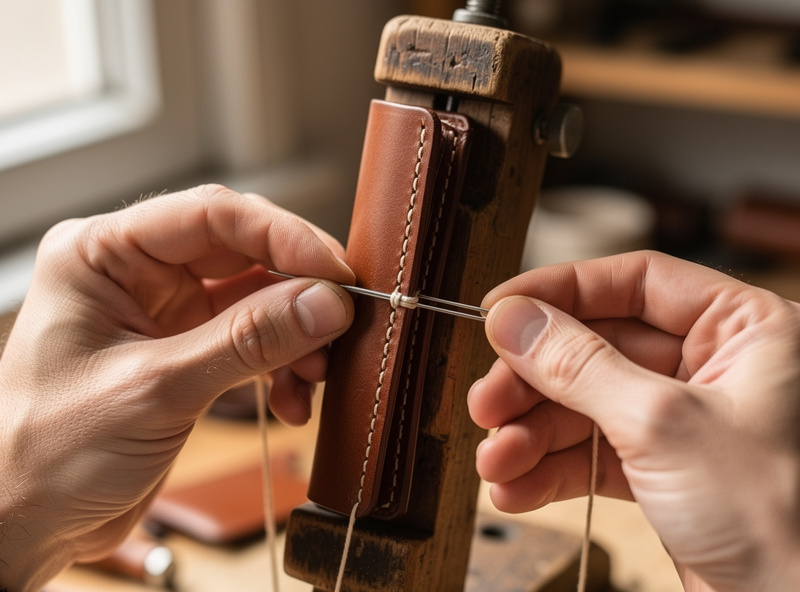
Hand-stitched leather goods use one stitch — the saddle stitch — and one variation in spacing. Master that one stitch and you have covered 95% of every leather project ever made. The saddle stitch uses two needles on one thread, threaded through the same hole from opposite sides, locking each stitch independently. Cut a stitch on a saddle-stitched piece and the rest of the seam holds; cut a stitch on a machine-sewn piece and the seam unravels.
Two needles, one thread, waxed linen or polyester braid in 0.6 mm or 0.8 mm — that is the entire kit. Beginners overspend on thread variety. Buy 50 meters of natural-color waxed thread from Ritza Tiger or Vinymo, learn to keep tension consistent on it, then experiment with colors and weights once your tension is repeatable. Inconsistent tension is the single most common beginner-stitching flaw and shows up as a wavy, drunken-looking seam line on the back of a wallet.
Stitch length per inch (SPI) is the second decision. Most veg-tan wallets stitch at 6–8 SPI (3.85–4 mm chisel spacing); belts go finer at 5–6 SPI for a more rugged look; tiny card holders go finer still at 8–10 SPI. The deeper analysis lives in the best stitch length for leather review where we compare wallet, belt, and bag projects head-to-head. A stitching pony is non-optional for hand stitching because both your hands need to be free; clamps work too but cost roughly the same and offer less workholding range.
The single piece of stitching advice nobody tells beginners: pull each stitch with the SAME tension every single time. Count a beat — one-two-pull-tighten — until it becomes muscle memory. Inconsistent stitch tension is what makes a homemade-looking wallet look homemade; it is not the cut, the dye, or the burnish. Thirty minutes of deliberate practice on scrap leather solves it permanently.
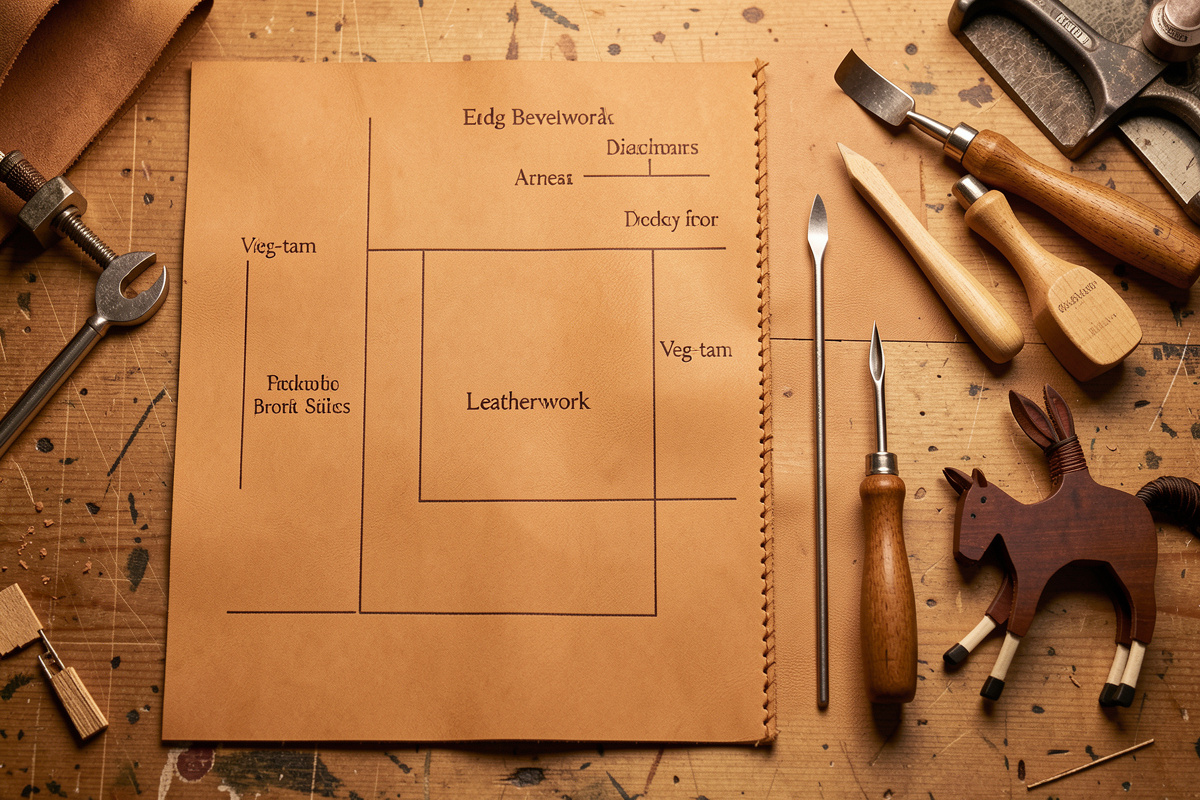
Edge Finishing 101
Raw cut leather edges look fuzzy and fibrous. Edge finishing transforms that into the glass-smooth, dark, slightly rounded edge that signals craftsmanship at a glance. The basic process is: bevel both edges, sand with 400 then 800 grit, dampen the edge, rub with Tokonole or gum tragacanth, burnish with a wood slicker, repeat until the fibers compact and shine. Five minutes per linear foot, once you’ve done it a few times.
The bevel is what makes the rest of the steps work. An edge beveler in size 1 or size 2 (matching your leather thickness) shaves a 45-degree chamfer off both top and bottom corners of the cut edge. Without that bevel, the edge stays squared and refuses to round over no matter how long you burnish. The burnishing tutorial walks through the full sequence step-by-step with the exact pressure and timing.
The Tokonole vs gum tragacanth comparison covers the two main edge-finishing compounds: Tokonole is a Japanese pre-mixed gum that produces a slightly waxy, very dark finish; gum tragacanth is the traditional Western compound that gives a more matte result and lower cost per ounce. For absolute beginners, Tokonole is easier — it is more forgiving of inconsistent application — and the small jar lasts through your first 30+ projects.
Hardware is the fourth pillar most tutorials underweight. Snaps, rivets, buckles, and screws are what turn a flat strip into a usable belt or a stitched flap into a buttoned wallet. The best rivets for leather guide compares copper, brass, and stainless options across diameter and length. Setting snaps without buying a $90 press is entirely doable — see the hand-tool snap setting tutorial for the cheap-and-correct method.
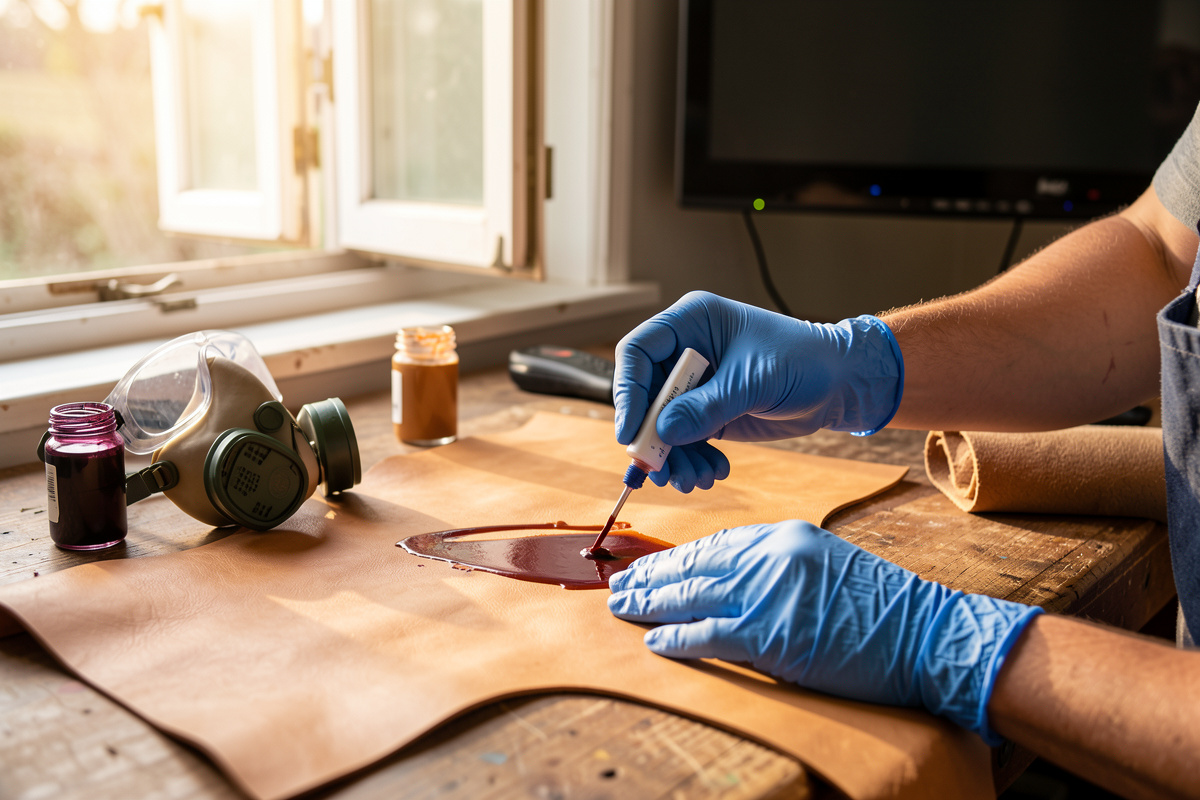
Dyeing 101
Vegetable-tanned leather arrives the color of soft butter. Most beginners want it darker, redder, browner, or closer to the color of leather they have seen in stores — and that is what dye does. The best leather dye for veg-tan roundup ranked Fiebing’s Pro Oil Dye, Angelus Acrylic, and Eco-Flo Hi-Lite Stain across eight brands; for a first project, Fiebing’s Pro Oil Dye in dark brown is the most forgiving option.
The single thing dye tutorials almost never emphasize: blotchy and streaky dye jobs are 80% prep, not 20% application. Wipe the leather down with denatured alcohol or oxalic acid solution before you dye. Oils from your hands and surface waxes from the tannery cause the streak patterns beginners blame on their dye technique. The dye leather without streaks tutorial covers the full prep-and-apply sequence with the dauber motion that prevents pooling.
Apply dye in thin coats, let each dry fully (overnight is safest), buff between coats with a soft cloth, and finish with a top coat of Resolene, neatsfoot oil, or a beeswax-based balm. The top coat is what locks the dye in so it does not transfer onto pockets, jackets, or shirts. Skipping the top coat is the difference between a wallet that ages beautifully for ten years and one that bleeds dark stains into a pair of jeans on day three.
The Five Mistakes That Sink First Projects
Most failed beginner projects come from one of five errors, all preventable. The full deep-dive lives in our common leatherworking mistakes guide; the headline list is below.
Mistake one: dull blade. A blade that is “still cutting” is already too dull. Replace utility knife blades every 30 minutes of active cutting; round-knife edges are stropped before each session. A torn cut never recovers in finishing — it stays fuzzy under the burnisher.
Mistake two: wrong leather weight. A 7 oz piece looks like leather to a beginner, but it is twice the thickness needed for a wallet exterior. The cuts get harder, the stitching gets slower, and the final piece sits in your pocket like a brick. Match weight to project before you order.
Mistake three: skipping the bevel. Square edges never burnish smooth. Five seconds of bevel per linear inch saves 30 seconds of failed burnishing per inch — and produces a finished edge that actually looks finished.
Mistake four: inconsistent stitch tension. Pull every saddle stitch the same. The drunken-line look on the back of a homemade wallet is tension drift, not stitch length, not thread choice, not chisel spacing.
Mistake five: dyeing on un-prepped leather. Surface oils and waxes cause blotches. Alcohol or oxalic-acid wipe-down is mandatory; case-hardening (re-wetting the leather pre-dye) helps depth of penetration.
Upgrading Your Tooling Beyond the Basics
Once your first three projects are finished, the next $200 of tooling adds the most leverage. Skip the random $300 starter kit advertised on Amazon — it is mostly stamps and hammer heads that you will not use for years. Instead, spend that money on items that affect every project you make.
The leatherworking starter kit guide compares what you actually need vs what is wasted spend in detail. Top three upgrades after the initial six tools: a wing divider for marking stitch lines (replaces the unreliable ruler-and-pencil method), a 3 oz / 1.6 mm splitter or skiving knife (lets you thin one piece for an interior fold), and a granite or marble slab for hammering chisels (concrete and wood absorb too much energy and produce ragged holes).
Power tools are a separate decision tree. 3D-printed leather tooling covers stamps and burnishers you can print at home; laser engraving veg-tan settings covers branded marks; CNC-cut leather patterns and dies covers production-scale cutting. None of those are necessary for a hand-stitched hobby and all of them assume you already own a 3D printer, laser, or desktop CNC. Resist the urge to buy power tooling first — most beginners who go that route quit before finishing a single hand-built project.
Where to Learn Beyond This Guide
YouTube has the best free instruction. Search “Nigel Armitage saddle stitch” for the canonical pricing-iron-and-awl tutorial; “JH Leather” for production-pace bag construction; “Ian Atkinson” for measured introductions to every basic skill. Books worth the shelf space: Al Stohlman’s The Art of Hand Sewing Leather (still in print after 50 years) and Geoffrey West’s Leatherwork — A Manual of Techniques.
Skip subscription “leather schools” until you have at least 50 hours of practice. The free instruction available is so deep that paid courses make sense only when you know which specific advanced skill you want to learn (advanced wet-forming, exotic-skin handling, machine sewing setup). Until then, watch, copy, ruin some scrap leather, and watch again. The skill compounds quickly — week 4 looks dramatically different from week 1.
A few leatherworkers eventually sell the occasional piece to friends or at a local market; if that’s ever a question for you, the how to price handmade leather goods and selling leather goods on Etsy pieces cover that ground. Most of us stay hobbyists, and that’s the point of this guide — building things you actually want to carry, not running a shop.
Frequently Asked Questions
How much does it cost to start leather working?
A complete beginner can start with a $55 tool kit (utility knife, ruler, stitching chisels, two needles, stitching pony, hardwood burnisher) plus $20 of vegetable-tanned leather and thread. About $75 total covers your first three projects with material left over.
What is the best leather for a beginner?
4 to 5 ounce vegetable-tanned full-grain leather from a US or Italian tannery (Wickett and Craig, Hermann Oak, Sedgwick). It cuts cleanly, accepts dye, burnishes to a smooth edge, and forgives mistakes better than chrome-tanned or oil-finished alternatives.
Should I learn hand stitching or machine stitching first?
Hand stitching first. The saddle stitch is the foundation skill, costs roughly one-tenth as much to set up as a leather sewing machine, and produces stronger seams. Machine stitching makes sense once you are producing items at volume.
What is the easiest first leather project?
A pen sleeve or three-slot card holder. Both finish in under 6 hours, use under $11 of materials, and teach all four core skills (cut, stitch, burnish, edge bevel) on a piece small enough that mistakes do not waste material.
How long does it take to get good at leather working?
Most self-taught crafters produce professional-quality work after 30 to 50 hours of focused practice, typically 8 to 12 finished projects. Stitch tension consistency is the slowest skill to develop and accounts for most quality differences between week-1 and week-6 work.
Do I need a sewing machine for leather working?
No. Hand-stitched leather goods are stronger than machine-sewn equivalents because each saddle stitch locks independently. A leather sewing machine costs $700 to $5,000 and is only justified for production volume above 5 to 10 items per week.
What is the difference between veg-tan and chrome-tan leather?
Vegetable-tanned leather uses tree bark tannins, accepts dye, takes tooling impressions, burnishes smooth, and develops a patina. Chrome-tanned uses chromium salts, is softer and faster to produce, but resists most dyes, will not burnish, and will not hold tooled patterns. Beginners always start with veg-tan.
Related Guides
- Leatherworking Starter Kit: What You Need vs Wasted Money
- Common Leatherworking Mistakes Beginners Make (And How to Fix)
- Full Grain vs Top Grain Leather: What Is the Real Difference?
- How to Saddle Stitch Leather by Hand (Step-by-Step)
- How to Make a Leather Card Holder (Slim Wallet Pattern)