Make a leather bifold wallet by cutting one outer panel (4 by 8.5 inches), two inner panels (4 by 4 inches each), and six card pocket pieces (2.5…
Make a leather bifold wallet by cutting one outer panel (4 by 8.5 inches), two inner panels (4 by 4 inches each), and six card pocket pieces (2.5 by 3.5 inches) from 3-4 oz vegetable-tanned leather. Skive the panel edges, glue the assembly with leather cement, punch stitching holes with a 3mm chisel, saddle stitch with waxed thread, then bevel and burnish all edges. Total build time is 4-6 hours. The leather projects for beginners hub covers the bifold wallet as project three in the recommended starter sequence.
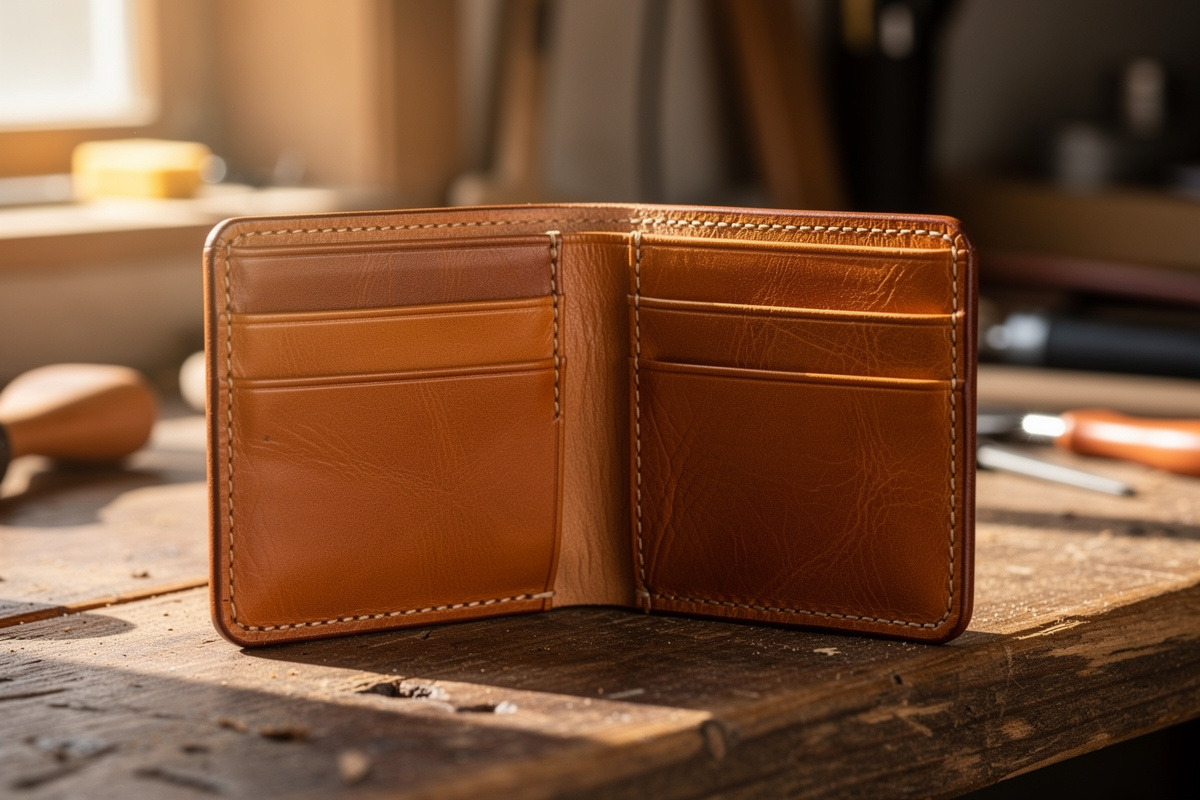
The bifold wallet is the most-built leather project in the hobby — almost every leatherworker has made at least one within the first 6 months. The reason is alignment of difficulty and demand: a bifold teaches every fundamental skill (cutting, skiving, glueing, stitching, edge finishing) in a project small enough to finish in a weekend, and the finished piece replaces a daily-carry item with something noticeably better than store-bought. This guide walks through the full build from pattern to burnished edge.
My first bifold wallet took 14 hours and came out crooked because I freehanded the stitch line instead of using a wing divider. The pattern dimensions and build order below are what I refined across four builds — the skiving and assembly sequence in particular will save you 3 hours of rework. A sharp size-1 beveler and a stitching pony are the two tools that make the biggest difference in the final result.
Pattern and Materials List
The standard hobbyist bifold pattern uses one outer wrap (4 x 8.5 inches), two inner panels (4 x 4 inches), and six card pockets (2.5 x 3.5 inches). About 0.6 square feet of 3-4 oz veg-tan total, plus 4-5 feet of waxed thread, leather cement, dye, finish, and burnishing compound. Buying every item new, total material cost runs 45-70 dollars for a fully finished, dyed wallet — the leather itself is 15-25 of that, and the number drops closer to 20-30 dollars on your second or third wallet once glue, burnishing compound, and finish are already on the shelf from a prior project.
The full materials list:
- Veg-tan leather, 3-4 oz, 12 by 12-inch piece (15-25 dollars): Hermann Oak, Wickett & Craig, or Maverick Leather. Enough for one bifold plus several card holders from offcuts.
- Waxed polyester or linen thread, 0.6mm, 5-foot length (under 1 dollar): Tan or dark brown to match leather. Small spool covers many wallets. 0.6mm is the smallest Ritza 25 “Tiger” thread size and the right match for a 3mm chisel spacing.
- Leather cement (Renia Aquilim 315, 4 oz): 6-10 dollars; lasts dozens of projects. Barge Cement works too but doesn’t come in a 4 oz size — it’s sold in 3/4 oz, 2 oz, and up.
- Fiebings Pro Oil dye in chosen color (9-12 dollars per 4 oz): Optional if leaving leather natural for patina aging.
- Tokonole burnishing compound (8-12 dollars per 120ml bottle): Edge finishing essential.
- Tan-Kote or Resolene leather finish (10-15 dollars): Surface protection over dye.
Pattern dimensions are reasonable but adjust them for your typical card-and-cash usage. Larger wallets that hold more cards just scale the inner panel and card pocket dimensions; the outer wrap stays at 4 x 8.5 inches because that fits standard back-pocket sizing. Pre-made downloadable PDF patterns exist on Etsy for 5-15 dollars if you prefer not to draft your own. Read more about leather selection in our best leather for wallets guide.
Cutting the Leather Pieces
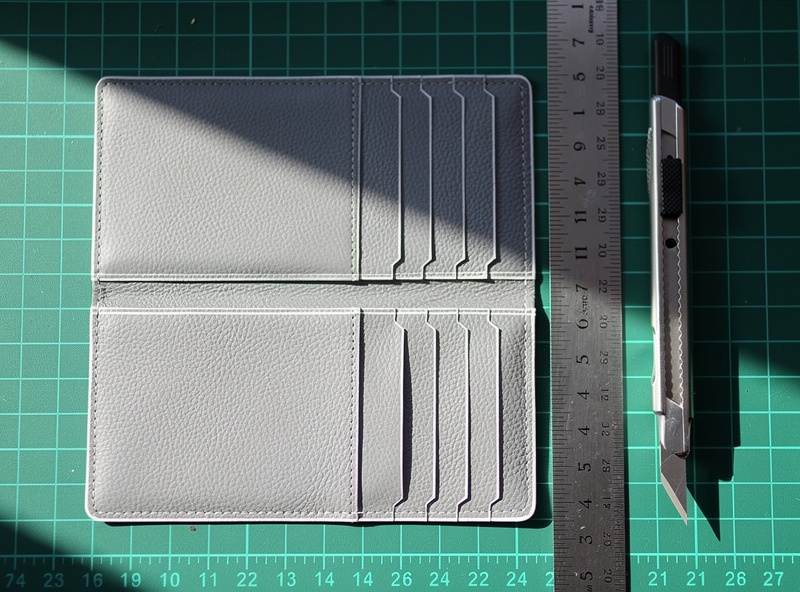
Cut all leather pieces with a sharp utility knife and metal ruler in single firm passes — sawing motions produce ragged edges. Use a self-healing cutting mat to protect the work surface and avoid damaging the knife edge. Cut on the flesh side (back) of the leather so the grain side stays mark-free for visible exterior surfaces.
Cutting procedure:
- Trace the pattern onto the flesh side of the leather: Use a silver gel pen or scratch awl. Avoid pencil — graphite transfers to the grain side.
- Position pattern pieces parallel to the spine direction of the hide: Veg-tan stretches less along the spine axis. Wallet pieces should run in this direction.
- Cut on a self-healing mat with a fresh utility blade: One firm pass per cut; sawing creates fuzzy edges that need extra finishing.
- Use a metal ruler with cork backing: Cork prevents slipping; metal edge guides the knife.
- Cut all pieces before any other operation: Group cutting prevents pattern drift between sessions.
- Inspect each piece for grain defects before proceeding: Surface scars, holes, or thin spots show up dramatically after dyeing. Recut from a different area if needed.
The visible exterior of a bifold is typically the outer wrap; choose the cleanest section of leather for that piece. The inner panels and card pockets are less visible in finished use, so minor defects there are acceptable. The cutting stage takes 30-45 minutes for the full piece set.
Skiving the Edges
Skive (thin) the edges of the outer wrap and inner panel where they overlap each other to reduce wallet thickness at the fold and seam. Use a curved skiving knife or French skiving knife to thin the leather to about half thickness over the last 1/4 inch from each edge. Proper skiving removes 30-40% of the wallet’s pocket-bulk.
Skiving rules:
- Skive only the edges that overlap: The flesh side of the outer wrap where it meets the inner panel; the flesh side of the inner panel where it meets the outer wrap.
- Aim for a 30-degree angle: Not a sudden cliff. Smooth taper from full thickness to half thickness over 1/4 inch.
- Practice on scrap first: Skiving is the trickiest step. Plan to spend 15-20 minutes on practice scraps before touching the project pieces.
- Sharp skiving knife only: A dull skiving knife tears the leather instead of cutting it. Strop before each project.
- Hold the knife at a low angle: Almost parallel to the leather surface. Steeper angles cut deeper than intended.
- Card pockets do not need skiving on standard bifolds: Save skiving effort for the panels where it matters.
If skiving feels too risky on your first wallet, build it without skiving. The wallet will be slightly thicker but still fully functional. Skive on subsequent wallets once the technique improves. For bevel context, see our best edge bevelers for leather guide.
Assembly and Stitching
Glue the pieces together with leather cement before stitching — the glue holds positions while you punch holes and stitch. Apply thin layers to both surfaces being joined, let dry to tacky (3-5 minutes), then press together firmly. Once the assembly is glued, mark the stitch line, punch holes with a 3mm chisel, and saddle stitch with two harness needles.
Assembly sequence:
- Glue the card pockets to the inner panels first: Three pockets per inner panel, stacked with the bottom of each pocket about 1.5 inches from the next.
- Glue the inner panels to the inside of the outer wrap: Inside the wrap forming the bifold pocket layout.
- Mark the stitch line 4mm from each edge: Using a stitching wheel or scratch awl. Consistent spacing is critical for visual quality.
- Punch holes with a 3mm chisel and mallet: Three solid mallet strikes per chisel set produces clean diamond holes on 3-4 oz leather.
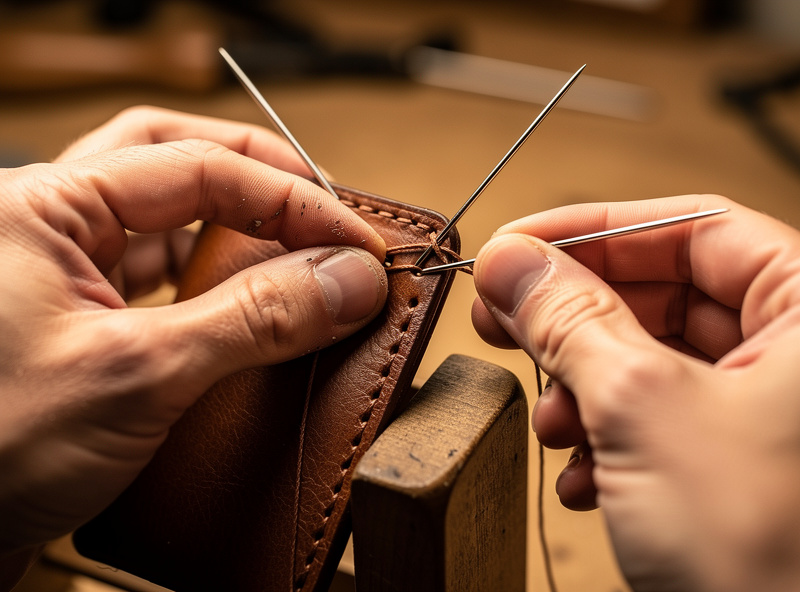
- Saddle stitch the entire perimeter: Two needles, one thread; cross at each hole. Tight tension but not so tight the leather puckers.
- Backstitch at start and finish: 2-3 stitches reversed at each end to lock the thread without knots.
- Trim thread tails flush: Use a hot iron tip or lighter to melt thread ends if using polyester; cut flush if using linen.
Stitching the perimeter takes 1-2 hours of focused work depending on stitch density. The result is the visible craftsmanship of the wallet — clean diamond stitches that signal “handmade.” Read about stitch length specifics in our best stitch length for leather guide.
Finishing: Beveling, Dyeing, Burnishing
After stitching, finish all edges in this order: bevel both grain and flesh sides with a size 1 beveler, sand any rough edges with 320-grit sandpaper, dye edges to match if dying the wallet, then burnish with Tokonole and a wooden slicker until glass-smooth. Final finish coat of Resolene or Tan-Kote seals dye and adds water resistance.
Edge finishing sequence:
- Bevel grain side at size 1: Removes the sharp 90-degree corner.
- Bevel flesh side lightly: Smaller bevel than grain side; just enough to round the corner.
- Sand all edges with 320 grit: Removes any fuzz and equalizes the bevel transition.
- Dye edges if matching wallet color: Apply with a small applicator; let dry 15-30 minutes.
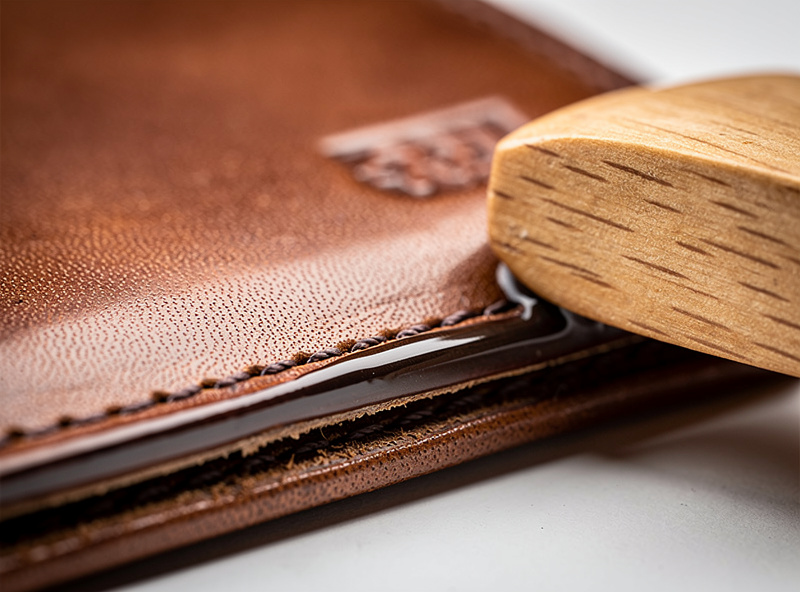
- Apply Tokonole thinly with a finger or cotton swab: Wait 30 seconds for water absorption.
- Burnish with a wooden slicker: Firm consistent friction; you should see and feel the edge transition to glass-smooth.
- Apply final Resolene or Tan-Kote finish to wallet exterior: Two thin coats for daily-use wallets.
Edge finishing takes 45-60 minutes for the full wallet perimeter. The visual difference between a stitched-but-unfinished wallet and a fully edge-finished wallet is dramatic — sharp raw edges look amateur, properly burnished edges look professional. Skipping this stage is the most common reason first wallets look “almost there” instead of finished. Read about specific Tokonole technique in our how to burnish leather edges with Tokonole guide.
Common Bifold Wallet Mistakes
Five mistakes show up consistently in first wallets: skipping the skive and producing a thick wallet, gluing inconsistently and creating gaps, punching stitch holes after gluing instead of marking before, using too-thick thread for 3mm spacing, and skipping edge bevel/burnish entirely. Each one degrades the finished result.
Common errors and corrections:
- No skive, thick wallet: The seams stack up to 12-15mm thick. Skive next time; this wallet still works but feels chunky.
- Glue gaps: Apply leather cement evenly to both surfaces. Press firmly along the entire seam, not just edges.
- Punching after gluing without marking first: Stitch line wanders. Mark with a stitching wheel before glue dries.
- Wrong thread thickness: 1.5mm thread on 3mm spacing looks chunky. Use 0.6-0.65mm thread on 3mm spacing — 0.6mm is the finest size Ritza 25 “Tiger” thread comes in, so that’s the practical floor.
- Skipping edge finish: Sharp raw edges look amateur. Always bevel-sand-burnish at minimum.
- Stitch tension too tight: Causes the leather to pucker along the stitch line. Pull firmly but not hard.
- Wrong glue type: Some glues are not flexible enough for the bifold’s repeated folding. Use Barge or Renia leather cement specifically.
The reliable practice is to make a “test wallet” from offcut scrap before committing project leather. The test wallet reveals technique gaps without ruining a 25-dollar piece of premium leather. After the test, the second wallet looks dramatically better. Read about beginner mistake patterns in our common leatherworking mistakes beginners make guide.
Before stitching a glued seam, the guide to the best glue for leather covers which adhesive holds each joint type and how to prep the surface so it grips.
Frequently Asked Questions
How long does it take to make a leather bifold wallet?
Most first wallets take 4-6 hours of active work spread over 2-3 sessions: 30-45 minutes cutting, 30 minutes skiving, 30-45 minutes assembly and gluing, 90-120 minutes stitching, 45-60 minutes edge finishing. Experienced makers complete bifolds in 3-4 hours total.
What leather thickness is best for a bifold wallet?
3-4 ounce vegetable-tanned leather (1.2-1.6mm thickness). Thinner leather feels cheap and tears at stitches; thicker leather produces wallets too bulky for back pockets. The 3-4 oz range balances durability with pocket-friendly thickness.
Do I need a stitching pony to make a wallet?
Strongly recommended but not required. A stitching pony holds the wallet free-handed so both hands can stitch. Without one, you can still saddle stitch by clamping the work between your knees, but the technique is awkward and stitch consistency suffers.
Can I make a wallet with chrome-tanned leather?
Yes, with adjustments. Chrome-tan does not skive or burnish as cleanly as veg-tan. The wallet will look different — softer, more flexible, less character development. For modern flexible wallets it works well; for traditional leatherwork stick with veg-tan.
What thread should I use for a leather wallet?
Waxed polyester thread, 0.6mm or 0.65mm diameter, in a color matching or contrasting your leather — Ritza 25 “Tiger” thread’s 0.6mm size is the standard match for a 3mm chisel on wallet-weight leather (Buckleguy’s official size card is the reference for matching thread diameter to iron pitch). Linen thread is the traditional choice but more expensive; polyester performs nearly identically.
Should I dye my leather wallet?
Personal preference. Natural undyed veg-tan develops beautiful patina over years; dyed wallets show their final color from day one. Dye if you want a specific color or for matching a leather collection; leave natural if you want to watch the wallet age and develop character.
Related Articles
- How to Make a Leather Card Holder
- Best Leather for Wallets
- How to Saddle Stitch Leather
- Best Stitch Length for Leather
- How to Burnish Leather Edges With Tokonole