Think of a leather travel wallet as a passport cover that grew up — it swallows a passport, boarding passes, several cards, and folded cash, yet still slides…
Think of a leather travel wallet as a passport cover that grew up — it swallows a passport, boarding passes, several cards, and folded cash, yet still slides into a jacket pocket. The make-or-break is thickness math: every slot layer adds bulk, so the interior gets skived thin and the boarding-pass slot runs full-height so a pass doesn’t crease. Build it in 4–5 oz veg-tan outer with 2–3 oz slots, skive the stack, and you get a wallet that folds flat and lasts a decade of trips.
This is the most advanced piece in the travel kit, and I’d tackle it only after you’ve made the passport cover, because the skiving and edge work on a thick multi-layer assembly are unforgiving. My own everyday travel wallet has flown more than I have, and it still closes flat — because the spine and the slot backs were skived, not just folded. The wallets that fail do so for one reason: someone stacked full-thickness slots and the thing bulged into a wedge that wouldn’t fold. Get the thickness math right and it’s the piece you’ll reach for every single trip.
It’s the capstone build of the leather travel accessories kit — the one that reuses every skill from the tag, the cable roll, and the passport cover at once.
What Should a Leather Travel Wallet Hold?
Spec the wallet around what you actually carry through an airport: one passport, two or three boarding passes, four to six cards, and folded cash or a currency slot. Deciding the contents first is what sets the slot count and — more importantly — the total layer stack you have to keep foldable. Overbuild the capacity and you get a brick that won’t close.
My own layout is deliberately restrained: a full-height passport sleeve on one side, a full-height boarding-pass slot on the other, three stacked card slots, and a long cash pocket behind them. That’s the most I can stack in 2–3 oz slot leather and still fold the wallet flat, and it took a couple of over-ambitious builds to learn where the ceiling is. The temptation is to add “just one more” card slot, but every slot is two more layers of leather at the fold, and by the fourth stacked slot you’ve built a wedge. Restraint is the craft here. Decide the real carry, cut for exactly that, and the wallet stays slim — the same discipline that keeps the passport cover closing flat, just multiplied across more layers.
How Many Slots Can You Stack Before It Won’t Fold Flat?
The practical ceiling is about three stacked card slots per side in 2–3 oz leather, or roughly 6 mm of stacked slot depth before the wallet stops folding flat. Every card slot adds two leather layers; stack too many and the fold zone becomes a rigid wedge that springs the wallet open. Skiving buys back some room, but there’s a hard limit.
Here’s the math I keep in my head. A single 2 oz slot layer is about 0.8 mm; three stacked slots plus their backs is six layers, roughly 4.8 mm — and that’s before the outer and lining. At the spine, where the wallet folds, all those layers meet and fight the bend. The table below is the capacity map I work from.
| Slot Layout | Layers at Spine | Folds Flat? | Best For |
|---|---|---|---|
| Passport + boarding pass only | 4 | Yes, easily | Minimalist carry |
| + 3 card slots (skived) | 6–7 | Yes, with skiving | My default travel wallet |
| + 5 card slots | 9–10 | Barely, springs open | Not recommended |
| + 5 slots + coin pocket | 12+ | No, becomes a wedge | Avoid — build a bag instead |
The lesson the table encodes: past six or seven layers at the spine, no amount of skiving saves you. If you truly need that much capacity, you don’t want a folding wallet — you want a zip travel organizer, which is a different project. I’ve hit this wall myself, and the fix is always to remove a slot, never to force the fold.
What Size Should the Boarding-Pass Slot Be?
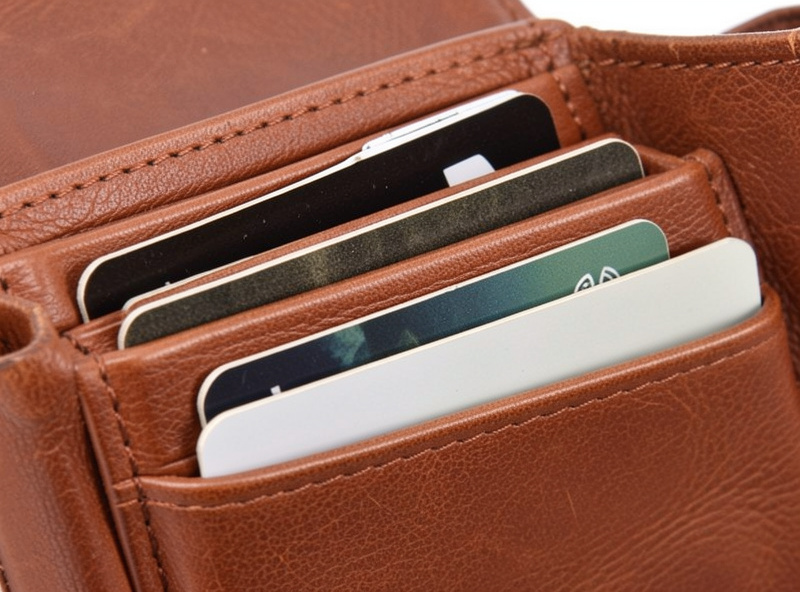
Make the boarding-pass slot full-height — the same height as the wallet interior — so a folded paper boarding pass slides in without creasing across the barcode. A too-short slot forces a second fold in the pass, and a creased barcode is the one that makes the gate scanner beep. Size the slot about 100 mm wide and full interior height.
Paper boarding passes are still everywhere, and they’re printed long. If your slot is only card-height, the pass folds twice and the crease lands right where the scanner reads — I’ve watched a gate agent wave a passenger’s crumpled pass under a reader four times. A full-height slot lets the pass fold once, cleanly, along a natural line. I run the boarding-pass slot opposite the passport sleeve so the wallet balances, and I skive the slot’s back edge thin so it doesn’t add a ridge. Even in the age of phone passes, the paper slot earns its place — the one trip your phone dies at 2% in a customs line, you’ll be glad the paper pass rode flat.
How Do You Skive the Interior to Keep It Slim?
Skiving is what makes the difference between a slim travel wallet and a brick. Thin every slot’s back edge and the spine fold from full thickness down to about 1.5–2 oz, so the layers that stack at the fold don’t build into a wedge. Skip skiving and even a well-planned layout won’t fold flat.
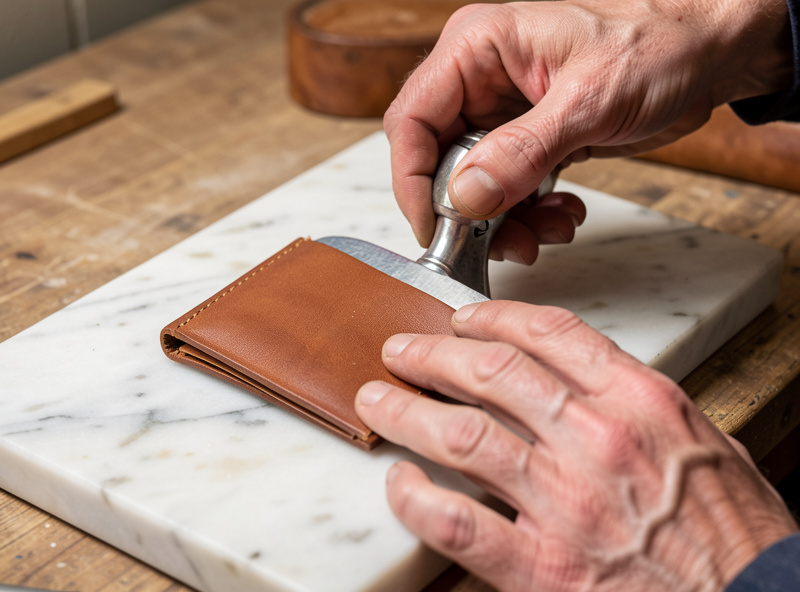
I skive with a French skiver for long even passes and finish with a paring knife kept scary-sharp on the strop — a dull skiving blade tears and gouges, and a gouged slot back is weaker, not just uglier. Work on a marble slab or self-healing mat, hold the blade nearly flat, and thin the top 12–15 mm of each slot’s back edge where it overlaps the next layer. The goal is a graduated stack: each layer steps down in thickness toward the fold so the whole assembly tapers instead of piling up. This is the single most important skill in the build, and it’s exactly why I send people to the passport cover first — you learn to skive a spine there on a two-layer piece before you try to skive six layers into a taper here.
How Do You Assemble and Saddle Stitch the Wallet?
Assemble from the inside out: build each slot stack, skive and glue it to its interior panel, then join the two interior panels to the outer and saddle stitch the whole perimeter in one seam. Because the assembly is thick at the edges, the stitching is the hardest of any travel piece — plan your hole layout before you commit.
I glue each sub-assembly with a thin line of contact cement only where the stitch will lock it, then mark the perimeter with a fine European-pitch pricking iron and open every hole with a stropped diamond awl held at a consistent angle. On a thick multi-layer edge the awl has to pass through five or six layers cleanly, so a razor-sharp, freshly stropped awl isn’t optional — a dull one wanders and your stitch line drifts. I run 0.8 mm Ritza Tiger thread here, a touch heavier than the passport cover’s 0.6 mm, because the seam is structural and takes real stress every time the wallet is stuffed and folded. Hold the work in a stitching pony, keep tension even, and backstitch the high-stress corners. There’s a satisfying resistance stitching a thick stack — each pull cinches with a firm creak, and when the whole perimeter is tensioned evenly the wallet feels like one solid object rather than glued layers.
How Do You Finish the Edges of a Thick Wallet?
A thick multi-layer edge is the most demanding burnish in the kit, because you’re fusing five or six leather layers into one continuous rounded edge. Bevel both faces, sand hard through 400 then 800 grit to true up the layered edge, dampen and slick with Tokonole until every layer disappears into one glassy surface, then seal with carnauba creme.
The sanding step matters more here than anywhere else — a multi-layer edge starts out stepped, and you sand it flush before you slick or the layers show as lines forever. I true the edge on a sanding block, then slick with a PETG slicker I printed on the workshop FDM printer to match this heavier edge, running it briskly so the friction heat fuses the layers. You can feel the moment the separate layers stop being separate and the edge starts to move as one hard surface under the slicker. Seal it well; a travel wallet’s edge takes constant pocket abrasion, and a properly burnished multi-layer edge is the clearest signal that the piece was made rather than bought — the detail that makes a border agent do a double-take.
How Do You Dye and Condition a Travel Wallet?
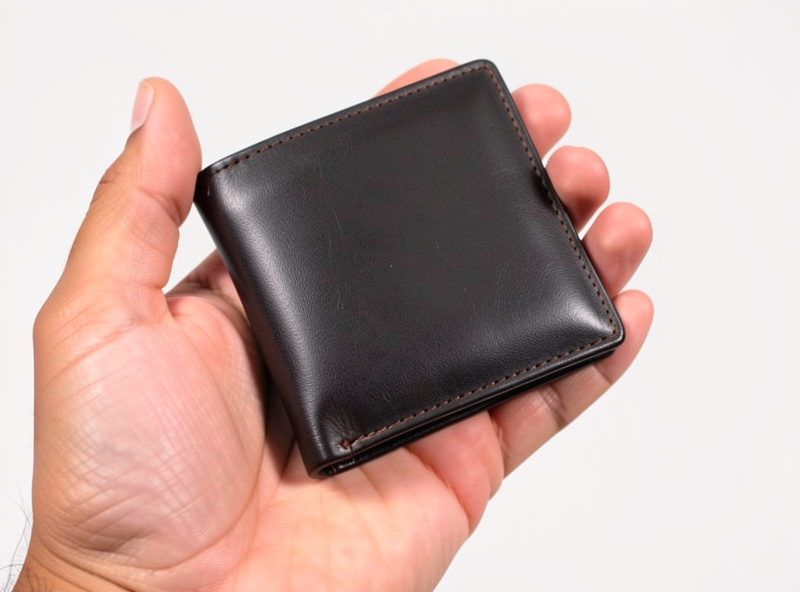
Dye the pieces flat before assembly, then condition and seal lightly, because a wallet that rides in a pocket builds its best patina from your own hands. Deglaze, dye with Fiebing’s Pro Oil, buff, give it one light coat of neatsfoot, and stop there — skip the heavy topcoat so hand oils can darken it naturally over the years.
For a travel wallet I like a mahogany or oxblood mixed within one dye family, and I dye every slot piece flat before I glue anything, so the color reaches every face evenly and doesn’t flood the stitch holes. One light coat of neatsfoot is the ceiling — over-oiling turns the crisp slots limp and dark, a mistake I made drowning an early wallet and watching the slots sag. Unlike the weather-facing luggage tag, a pocket wallet doesn’t need a heavy sealing coat; let it patina. Mine went from raw tan to deep honey over a couple of years of daily carry, and it looks better now than the day I stitched it — which is the whole reason to make one instead of buy one.
What leather weight is best for a travel wallet?
Use 4 to 5 oz veg-tan for the outer and 2 to 3 oz for the interior slots. The outer holds shape and folds cleanly, while the thin slot leather keeps the stacked interior slim enough that the wallet still closes flat.
How many card slots can a leather travel wallet have?
About three stacked card slots per side in 2 to 3 oz leather, roughly six or seven layers at the spine, before it stops folding flat. Past that the fold becomes a rigid wedge. If you need more, build a zip organizer instead of a folding wallet.
How big should the boarding-pass slot be?
Make it full interior height and about 100 mm wide so a paper boarding pass folds only once and does not crease across the barcode. A too-short slot forces a second fold right where the gate scanner reads.
Why won’t my leather travel wallet fold flat?
The interior layers are not skived. Thin every slot back edge and the spine fold down to about 1.5 to 2 oz so the stacked layers taper toward the fold instead of piling into a wedge. Skiving is the single most important step in this build.
Is a travel wallet harder to make than a passport cover?
Yes. It has more layers, demanding multi-layer skiving, and the thickest edge burnish in the travel kit. Make the passport cover first to learn skiving and slot work on a simpler two-layer piece before attempting the wallet.
Further Reading
The travel wallet is the capstone — if it fought you, drop back to the passport cover to drill skiving and slots on a simpler piece, then come back. The full build order and where this fits sits in the travel accessories master guide, and the luggage tag is still the best place to send a beginner first. For firm outer leather and thin slot stock, Wickett & Craig and Hermann Oak are my shelf staples; a 4–5 oz veg-tan wallet leather plus thin slot stock covers the whole build.
As an Amazon Associate I earn from qualifying purchases.