Crisp tray corners come from three things done in order: casing the veg-tan to an even dampness, folding the walls up against a hard form, and boning the…
Crisp tray corners come from three things done in order: casing the veg-tan to an even dampness, folding the walls up against a hard form, and boning the inside radius with a smooth tool until the fibers compress into a defined line. Skip the boning and every corner ends up soft and round. The boning is what turns a bent panel into a formed object.
This is the detail that separates a tray that looks made from one that looks like a beginner’s first attempt, and it is almost never explained properly. People show you the fold and the finished piece but not the twenty minutes of patient pressing in between. I have boned a lot of corners — good ones, and a fair number of ruined ones early on — and the technique is entirely learnable once you understand what is physically happening inside the wet leather.
Get this right and it carries into holsters, sheaths, and every molded piece you ever make. The inside radius of a tray is the same skill as the trigger-guard detail on a holster: press the cased leather into an angle and make it stay.
Why Do Tray Corners Come Out Round and Mushy?
Round corners happen because you folded the wall up but never compressed the leather into the inside angle. Leather bent without boning takes the path of least resistance — a soft, generous curve — because the fibers at the fold have not been forced into a tight radius. Without pressure setting them there, they relax back toward round as they dry.
Think about what a corner actually is: two walls meeting a floor, and the leather has to turn a sharp inside angle at that junction. When you simply push a wall upright, the leather bridges that angle with the gentlest curve it can, leaving a fat, rounded transition. It looks unfinished because it is — you have bent the leather, not formed it. The fibers are still loose and, worse, still damp and plastic, so overnight they creep back toward the shape they prefer.
This is why the same tool and technique that molds a holster to a pistol or a sheath to a blade applies to a tray. In all three you are forcing cased leather into a shape tighter than it wants and then locking it there. The tray is just a simpler geometry — four inside corners instead of a compound curve. If you have read my valet tray making guide, this is the deep dive on the one step that guide names as make-or-break.
How Do You Case Leather for Crisp Corners?
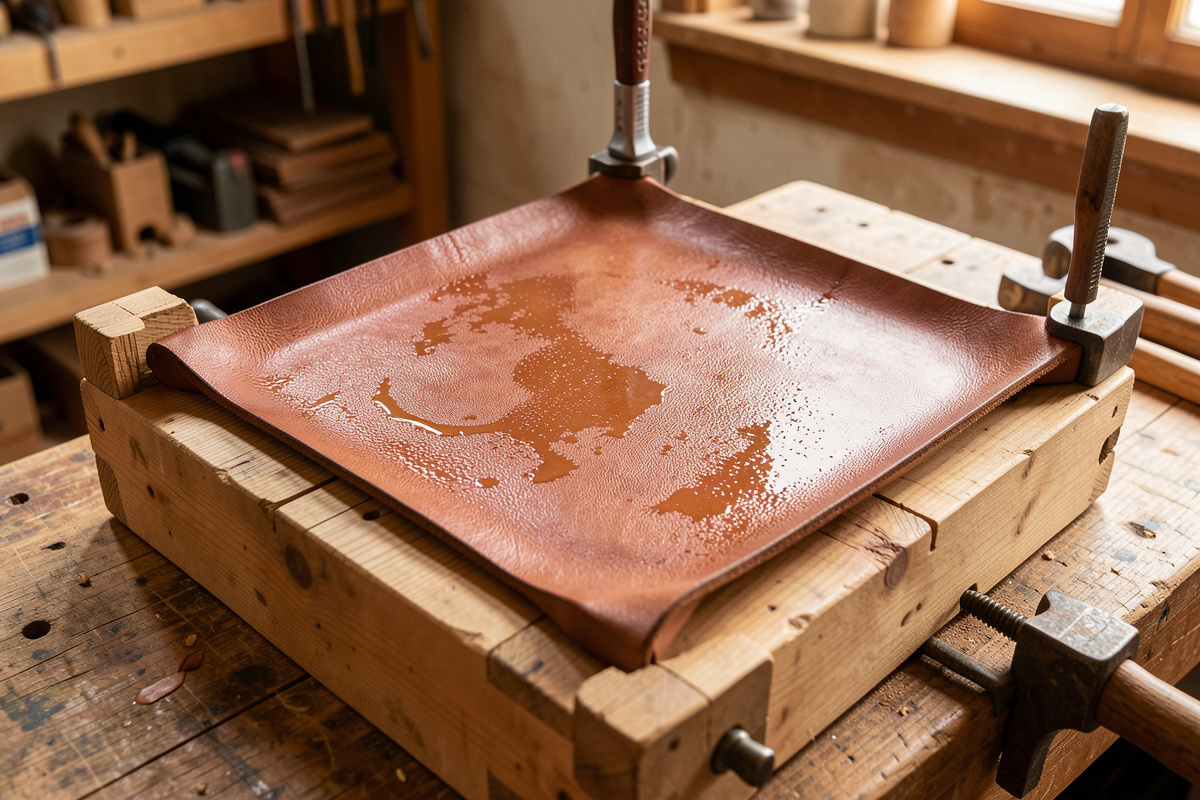
Case veg-tan by wetting it briefly, then letting the moisture equalize through the full thickness until the whole piece is uniformly damp — grain returned to its natural color, cool to the touch, not glossy-wet. Correctly cased leather holds a sharp boned line; soaked leather molds unevenly and dries blotchy. Casing is the foundation the whole corner sits on.
The mistake nearly everyone makes, myself included for a full year, is soaking. It feels right — surely wetter leather molds better — but a soaked blank is saturated on the surface and dry in the core, so it forms unevenly and the corner you bone at the top of the wall behaves differently from the one at the floor. My method now: dunk the blank for a two-count, then set it aside in a plastic bag or under a damp towel for fifteen to thirty minutes. The moisture migrates inward and evens out. The leather is ready when a fingernail pressed into the flesh side leaves a slowly-relaxing mark and the grain has gone from wet-dark back to its natural tone.
Only veg-tan cases and holds a set — that is the plant tannage doing its work, leaving the collagen able to take a new geometry when wetted and dried under pressure. Chrome-tan will not do this at all; it springs back every time. The tanneries I trust for consistent casing behavior are Wickett & Craig and Hermann Oak, because an even temper means an even casing, and an even casing means all four corners bone the same. My full casing walkthrough with the timing details is in leather wet forming technique: casing to boning, and the broader reference lives in the complete wet forming guide.
What Is Boning, and What Tool Do You Use?
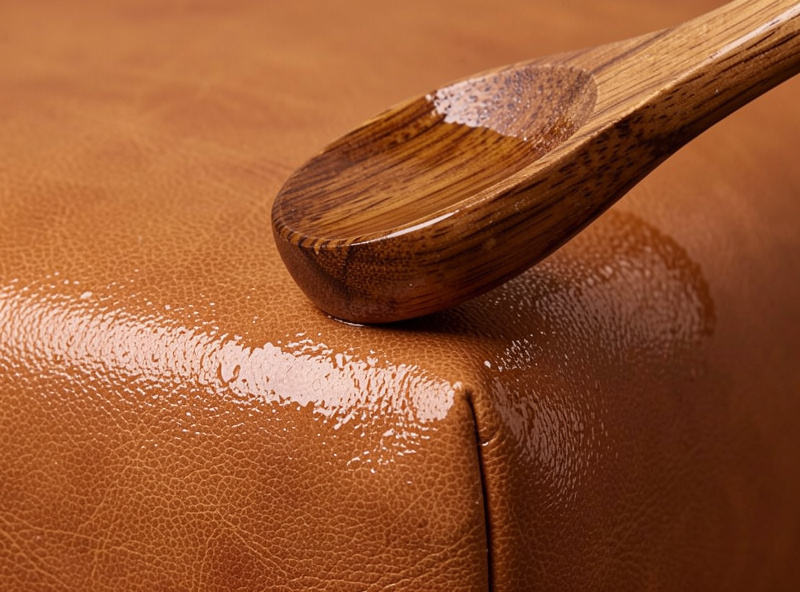
Boning is pressing cased leather hard into a shape with a smooth-edged tool so the damp fibers compact and set. The traditional tool is a hardwood or bone modeling spoon, but a bone folder, the rounded back of a spoon, or a smooth slicker all work. The tool must be smooth — any burr will score the wet grain permanently.
I use a hardwood modeling spoon for tray corners because its rounded tip reaches into the inside angle and its handle gives me leverage to press hard. You can genuinely hear boning working: a faint squeak as the tool compacts the damp grain, and the corner visibly darkens and tightens under the pressure. That sound is the fibers being burnished and compressed against the form — it is the same acoustic feedback I listen for when slicking an edge with Tokonole.
The tool’s smoothness matters more than its material. A nicked bone folder or a modeling spoon with a rough spot will drag a permanent line into the wet grain, and there is no fixing it once it dries. I keep my boning tools as smooth as my slickers — in fact some of the profiles I printed on the FDM machine double as boning tools for specific radii, which is a nice crossover: the same printed profile that slicks a 6 oz edge also bones a matching inside corner. Whatever you use, run your thumb over the working surface first and feel for anything that could catch.
How Do You Bone the Inside Radius Step by Step?
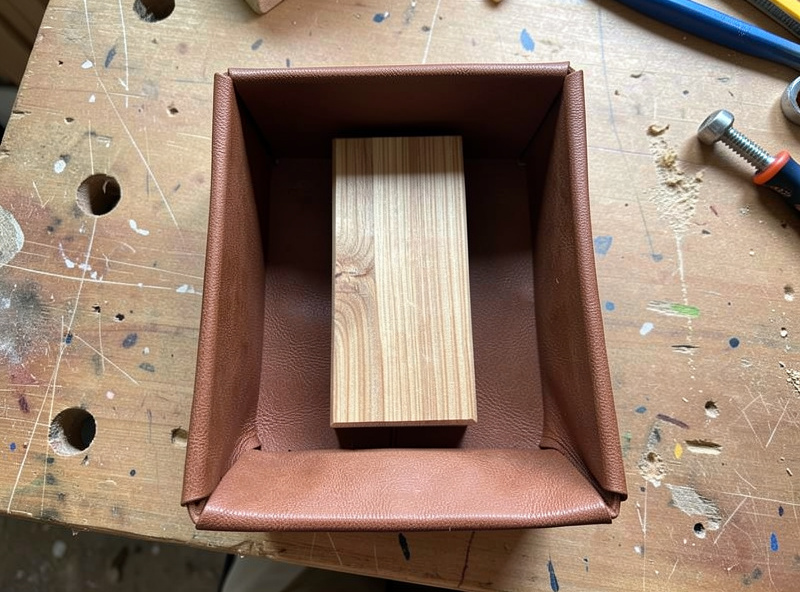
Fold the wall up against a form block, then run the modeling spoon firmly along the inside angle where wall meets floor, pressing the leather tight into that corner. Work each corner from the floor outward and upward, compressing the fibers into a defined line. Repeat passes as the leather firms; the radius sharpens with each one.
The form block is what you are boning against — a positive shape the size of your tray floor, so when you press the wall in, the leather has something solid to compact against. I cut mine on the desktop machine for dead-square corners; the CNC-cut form block approach guarantees the inside radius is the same at every corner, which a hand-carved block fights you on. Set the cased blank over or around the block, fold the walls up, and start boning.
Work the inside angle first — that junction of floor and wall is the corner that reads. Press the spoon into it and draw it along the length of the fold, firm and slow, so the leather compacts into the angle rather than bridging it. Then work up the vertical corners where two walls meet, pinching and pressing the leather into a defined edge. The first pass will not fully sharpen it; as the leather loses moisture it firms up and holds the shape better, so a second and third pass a few minutes apart each tighten the radius further. You are chasing a crisp line, and you will feel the moment it stops being round.
One thing I learned the hard way: do not over-thin the leather at the corner beforehand hoping for a sharper fold. I skived a corner too thin once trying to help it turn, and the boned radius came out weak and wanted to collapse because there was not enough fiber left to hold the set. The leather needs its body to keep the shape. Bone the full-thickness corner instead and let compression, not thinning, do the sharpening.
How Do You Keep All Four Corners Square?
Bone all four corners in the same session and at the same casing dampness, then clamp the walls to the form and let the whole tray dry together evenly. Corners drying at different rates pull the rim out of square. Even drying is as important as even boning for a tray that ends up true.
This is the failure that frustrated me most early on: I would bone one beautiful corner, admire it, drift to the next, and by the time I circled back the first had firmed up at a different moisture level than the last. The result was a rim that was crisp in places and soft in others, and a tray that sat slightly racked. The fix is rhythm — bone all four corners in one continuous pass while the whole blank is at the same dampness, then go around again. Treat the four corners as one operation, not four.
Drying is the other half. Clamp the boned walls against the form and let the tray dry slowly and uniformly — I give it 24 to 48 hours in a low-humidity corner, and I resist unclamping early. A tray that dries with one corner near a heat source and another in shade will warp toward the wet side. If you want the corners to end up genuinely rigid rather than merely shaped, the hardening techniques — controlled gentle heat once dry, and a wax finish — lock the compressed fibers hard. That is the same progression that stiffens a molded holster, covered in leather molding for custom fit.
How Do You Set and Finish a Boned Corner?
Once the tray is bone-dry, the corners are set — but a finish locks them and protects the compressed grain. Seal with a resist or a light wax, and if you dyed the tray, do it before final burnishing. A finished boned corner should look like the leather was always that shape, with a crisp, slightly burnished sheen along the radius.
The compression from boning actually leaves the corner slightly darker and denser than the surrounding leather — that is the burnished grain catching light, and it is a feature, not a flaw. I like to lean into it: a thin coat of neutral Resolene along the boned line makes it read as an intentional detail. If the tray is getting dyed, dye before you seal and before you do any edge burnishing, because a sealed corner will not take color evenly. Match your weight to the wall height too — the whole reason the corner holds is that the leather has enough body, which is why I keep the tray in the 6 oz range for this kind of molded work; the full logic is in best leather weight for trays.
If your corners still want to soften after all this, the culprit is almost always casing — too wet, unevenly cased, or unclamped too early — not the boning itself. Go back to getting the dampness even and the drying slow, and the boned radius will hold. A crisp corner is mostly patience: case right, bone all four together, clamp, and wait. That waiting is the part the tutorials skip, and it is the part that makes the tray.
Where This Skill Takes You Next
Once you can bone a crisp inside radius, the whole formed-object side of leatherwork opens up. The same move makes the sharp corners on a molded catchall, the defined walls of a desk organizer, and eventually the compound curves of a sheath. Build a plain square tray first purely to practice boning four corners, then apply it to whatever you actually want to carry. The tray is the exercise; the skill is forever.
Keep Building
- Leather Valet Tray Making Guide
- Leather Wet Forming Technique: Casing to Boning
- Best Leather Weight for Trays
- Hardening Molded Leather: Heat, Water and Wax



