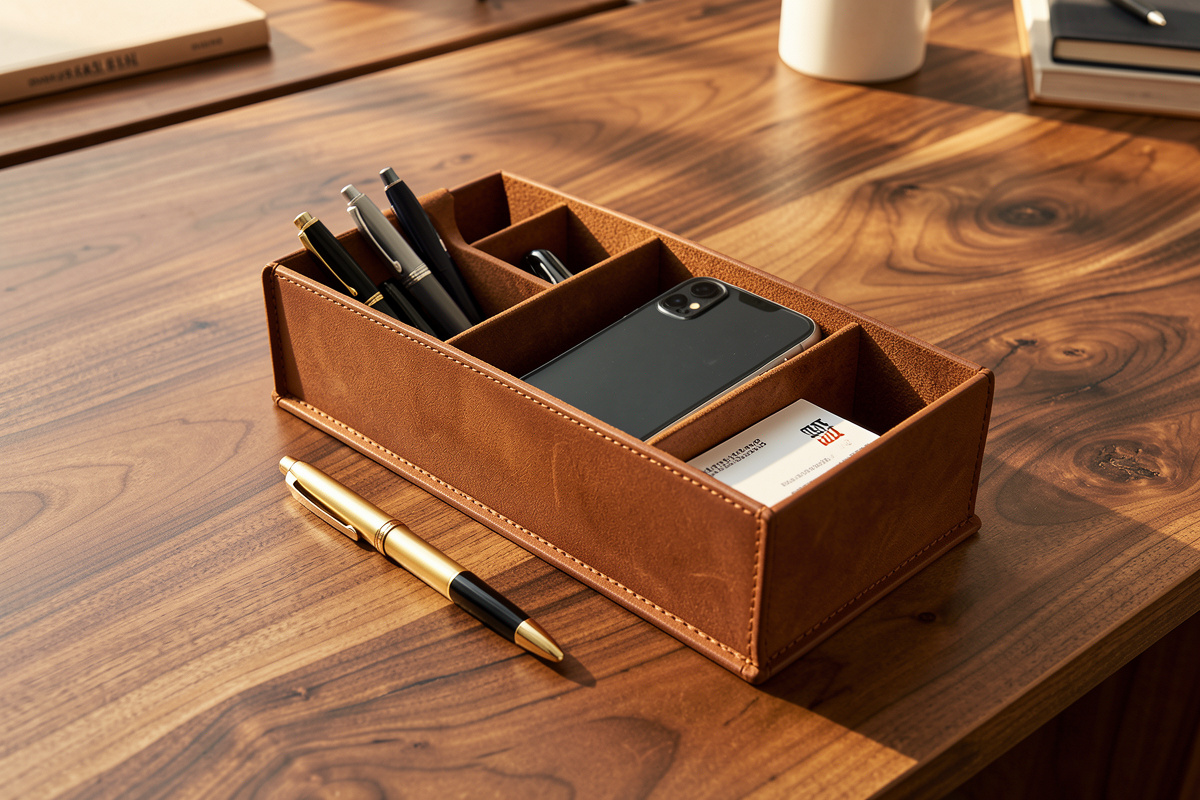
A leather desk organizer is a molded tray with internal dividers that split it into compartments for pens, cards, a phone, and small tools. Build the outer tray…
A leather desk organizer is a molded tray with internal dividers that split it into compartments for pens, cards, a phone, and small tools. Build the outer tray by wet-forming 6–7 oz veg-tan, then add stitched-in dividers to create the sections. The dividers are what turn a plain tray into an organizer, and they are the one new skill this project adds.
My desk was a mess of pens, a phone, sticky notes and a pocketknife until I built one of these, and the difference a divided tray makes is out of proportion to the effort. It is essentially a molded valet tray — the same wet-forming — with internal walls added to carve up the space. If you have already made a plain tray, this is the natural next step: one new technique, a genuinely more useful object.
The trap is treating the dividers as an afterthought. Where they sit, how tall they are, and how you anchor them decides whether the organizer feels designed or just partitioned. Let me walk through planning it, molding it, and getting the dividers to sit clean.
What Goes Into a Leather Desk Organizer?
The core of a desk organizer is a rectangular molded tray plus one or more internal dividers. A common layout is a long pen channel along the back, a phone slot, and an open catchall section. You are combining wet-forming, which you may already know, with simple joinery to anchor the dividers.
Everything in this build draws on skills from the rest of the tray cluster. The outer tray is molded exactly like a valet tray — cased, walls up, corners boned — which I cover end to end in my valet tray making guide and, for the corners specifically, in wet-forming crisp corners. What is new is the dividers: short internal walls that partition the floor into useful compartments. That is really the only additional concept, and it is more about layout thinking than any hard technique.
Decide up front what the organizer is for. Mine is a desk piece: a shallow back channel for three or four pens, a slot sized to stand my phone upright, and an open bay for loose bits. Yours might be a card-and-key tray, or a bedside organizer with a watch slot. Sketch the compartments before you cut anything — the layout drives every dimension downstream.
How Do You Plan the Compartment Layout?
Sketch the compartments to scale first, then size the outer tray to fit them plus divider thickness. Measure the actual objects — a pen is about 0.5 inch, a phone about 0.35 inch thick — and add a little clearance. Plan the layout before cutting, because the tray dimensions are driven by the compartments, not the other way around.
This is where a desk organizer is more design than craft. I lay the actual objects on paper and trace around them with clearance — a pen channel wants to be about three-quarters of an inch wide so pens drop in easily, a phone slot wants the phone’s thickness plus a couple millimeters so it stands without wedging. Add up your compartment widths, add the thickness of each divider between them, and that total is your tray’s internal length. Do the same for depth. Only then do you cut the outer blank.
Divider height is a design choice worth thinking about. Full-height dividers that reach the rim make rigid, separate boxes; shorter dividers that stop below the rim keep the tray feeling open while still sorting things. I like my pen channel divider full height so pens stay corralled, and my catchall divider a bit shorter so the bay reads as open. There is no rule here — but decide it on the sketch, because the divider height affects how you anchor them. For repeatable layouts I lay the whole pattern out and cut it on the desktop machine; a CNC-cut pattern keeps the divider slots and the tray floor perfectly registered, which matters when dividers have to seat in exact positions.
What Leather Weight for a Divided Desk Tray?
Use 6–7 oz veg-tan (2.4–2.8 mm) for the outer tray so the taller desk-tray walls stand firm, and 4–5 oz for the internal dividers so they are easy to stitch in without bulking up the seams. Matching a slightly lighter divider to a firmer body is the pairing that works.
The outer tray carries the structure, so it wants enough weight to hold walls that are often taller than a shallow catchall’s — a desk organizer commonly has two-inch walls to stand a phone, and that height needs 6–7 oz to stay square. My full reasoning on matching weight to wall height is in best leather weight for trays, and a desk organizer sits at the taller-walled end of the tray range. Go too thin on the body and the whole organizer flexes when you pick it up loaded.
The dividers, by contrast, want to be a touch lighter — 4–5 oz — so they are easy to punch and stitch through when you anchor them, and so the seams where they meet the floor and walls do not bulk up. A full-thickness 7 oz divider stitched to a 7 oz wall makes a fat, stubborn seam; dropping the divider to 5 oz keeps it clean. This is the same weight-pairing logic I use anywhere two pieces join. A 6–7 oz veg-tan piece for the body plus lighter scrap for dividers covers the whole build.
As an Amazon Associate I earn from qualifying purchases.
How Do You Build the Outer Tray?
Build the outer tray exactly like a molded valet tray: case the 6–7 oz veg-tan, fold the walls up against a rectangular form block, and bone the four inside corners crisp. Let it dry clamped for 24–48 hours before adding dividers, so the body is fully set and square first.
There is nothing new here versus a plain molded tray, which is why I recommend building a valet tray before this one. Case the blank to an even dampness — dunk, then rest under a damp towel until the moisture equalizes — fold the walls against a form sized to your planned internal dimensions, and bone the corners with a modeling spoon until the inside radius is defined. The full corner technique is in wet-forming crisp corners on a tray, and it applies identically to a rectangular desk tray.
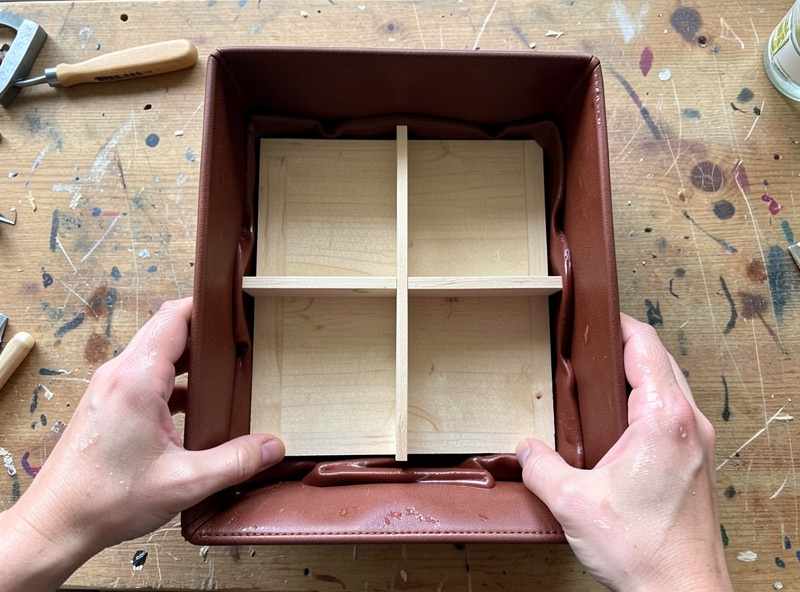
Get the body fully dry and set before you touch the dividers. If you try to fit dividers into a still-damp tray, the walls move as you work and the divider positions drift. I clamp the molded tray to its form and leave it a full 48 hours, then check it is square before proceeding. A body that dried slightly racked will fight every divider you try to fit, so it is worth confirming the tray is true first — the same patience the corners demanded.
How Do You Add the Internal Dividers?
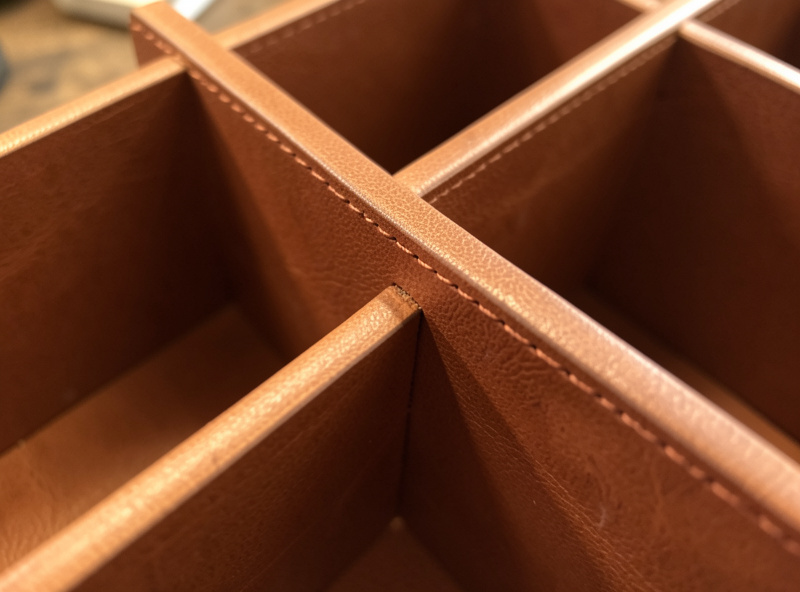
Cut each divider to the internal width and desired height, then anchor it either by stitching through the tray walls into the divider ends, or by wet-forming small tabs on the divider that glue and stitch to the floor. Fit the divider dry, mark its position, then punch and saddle-stitch it in. Precise fitting before stitching is what keeps compartments square.
There are two honest ways to anchor a divider. The cleaner one for me is to stitch through the outer wall into the end of the divider: mark where the divider meets each wall, punch matching holes through the wall and the divider edge, and saddle-stitch them together so the stitch line shows as a neat vertical row on the outside. This is essentially a box-stitched corner turned inward, and the same clean-corner thinking from a box stitch applies. The other method is to leave a small folded tab at the base of the divider, glue it to the floor, and stitch through — useful for a divider that does not run wall to wall.
Fit everything dry first. I cut the divider a hair oversized, sand it down until it drops snugly between the walls, mark its exact position in pencil, and only then commit to punching holes. You can feel a divider that is a hair too long before you can see it — a faint resistance as it presses in, the wall bowing almost imperceptibly outward instead of staying flat. That resistance is your cue to sand it down further, not force it home. The mistake I made early was stitching a divider in before checking the fit, and it bowed the tray wall outward because it was a few millimeters too long. Fit, mark, then stitch — in that order — and the compartments come out square. Match your thread to the leather weight so the stitch seats flush; I run 0.8 mm waxed polyester on holes set with a fine European-pitch iron, consistent with the rest of my small goods.
How Do You Finish a Desk Organizer?
Bevel and burnish every exposed edge — the rim and the top edges of the dividers — then dye before burnishing if you want color, and seal. Because a desk organizer sits in view all day and has many edges, edge finishing is even more important here than on a simple tray.
Count the edges on a divided organizer and you will see why finishing matters: the rim, plus the top of every divider, plus any exposed internal seams. Each one is at eye level on a desk. I bevel them all with a #2 edger, sand up through the grits, and slick with Tokonole using a printed slicker profile matched to the edge weight — those 3D-printed edge slickers earn their keep on a piece with this many edges. The full sequence is in leather edge finishing.
Dye before you burnish and before you stitch in dividers, if you can — a sealed edge and cluttered compartments both dye unevenly. Fiebing’s Pro Oil gives even color on veg-tan; you can read the product details from Fiebing’s directly. I finish with a light conditioner so the leather does not dry brittle in a heated room, and a coat of neutral resist to keep desk grime from soaking in. The tanneries I trust for the even temper that molds and stitches predictably are the usual pair, including Wickett & Craig. Finished well, a desk organizer is the piece visitors pick up and ask about.
What I’d Do Starting Today
Sketch your actual desk clutter to scale, size a tray around it in 6–7 oz veg-tan, mold the body and let it fully set, then fit and stitch one divider at a time — checking the fit dry before every stitch. Start with just two compartments; you can always build a more complex one once the divider-anchoring feels natural. The first organizer you make will immediately reveal what you want the second one to hold.
What leather weight is best for a desk organizer?
Use 6 to 7 oz veg-tan for the outer tray so the taller desk-tray walls stand firm, and 4 to 5 oz for the internal dividers so they stitch in cleanly without bulking up the seams. The firmer body plus lighter dividers is the pairing that works.
How do you attach dividers in a leather tray?
Either stitch through the outer walls into the ends of the divider, or fold small tabs at the base of the divider and glue and stitch them to the floor. Fit each divider dry and mark its position first, then punch and saddle-stitch it in for square compartments.
How do you plan a leather desk organizer layout?
Measure the actual objects you want to store, sketch the compartments to scale with clearance, then size the outer tray to fit those compartments plus the divider thicknesses. The compartment layout drives the tray dimensions, so plan it before cutting any leather.
Do you build the tray or the dividers first?
Build and fully set the outer molded tray first, letting it dry clamped for 24 to 48 hours until it is square. Only then fit the dividers. Adding dividers to a still-damp tray lets the walls move and the divider positions drift out of alignment.
Further Reading
- Leather Valet Tray Making Guide
- Wet-Forming Crisp Corners on a Tray
- Best Leather Weight for Trays
- How to Make a Leather Dice Tray