The leather box stitch joins two panels that meet at a right angle by punching stitch holes through the face of each panel so they align when held…
The leather box stitch joins two panels that meet at a right angle by punching stitch holes through the face of each panel so they align when held perpendicular, then saddle-stitching through both so the thread wraps the outside corner and pulls it into a crisp 90-degree join. It is how a flat piece of veg-tan becomes a tray, box, or valet catchall.
This is the technique that unlocks three-dimensional work, and it trips up makers who can stitch a flat wallet seam perfectly. The corner is a different problem: the two edges are not lying flat against each other, they meet at an angle, and the holes have to be planned so the stitch closes that angle. Once you understand how the holes register, box-stitched trays and boxes become some of the most satisfying pieces you can build. Here is exactly how the corner works.
What the Box Stitch Actually Is
A box stitch is a saddle stitch used to join two leather panels at a right angle to form a 3D corner. Instead of stitching two edges lying flat against each other, you stitch two faces that meet perpendicular, with the holes punched through the panel faces near the edge so the thread wraps the external corner and draws the join tight.
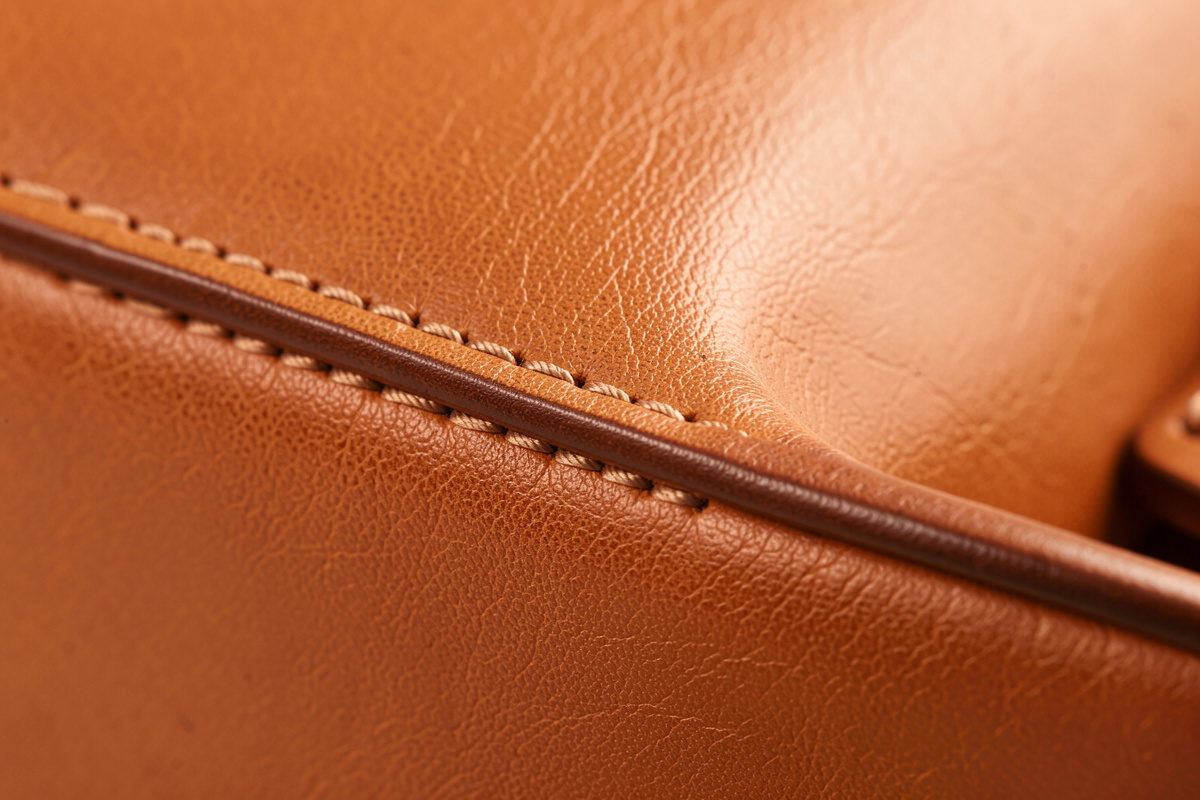
The key mental shift is that the holes go through the face of the leather, not into the cut edge. On a flat seam the chisel punches straight down through stacked layers; on a box corner each panel is punched separately, a set distance in from its edge, so that when you stand panel B up perpendicular to panel A, hole 1 on A lines up with hole 1 on B. The saddle stitch then passes between the two, and each pull cinches the perpendicular edges together. The result is a row of stitches running right along the outside corner, holding the box square.
Everything else about the stitch is the same two-needle saddle stitch you already know from the saddle stitch tutorial — same lock, same tension discipline. The box stitch is not a new stitch so much as the saddle stitch applied to a geometry that builds structure instead of closing a flat seam, and it’s recognized as its own named stitch category for exactly this reason (International Leather Club’s overview of leather stitch types covers where box stitch sits alongside saddle, cross, and baseball stitch).
Why Veg-Tan Holds the Box
Use vegetable-tanned leather for anything that must hold a box shape. Veg-tan has the firmness and body to stand up as walls and keep a square corner, and it can be wet-formed and creased along fold lines so the structure holds. Chrome-tan stays soft and floppy, so a chrome-tan box slumps no matter how well you stitch it.
This is the same leather-for-the-job logic that runs through all structural leatherwork: veg-tan is the leather that tools, molds, burnishes, and holds a form, while chrome-tan is the one that stays supple for soft goods (Tanner Bates’ veg-tan vs chrome-tan comparison confirms the same firm-and-structured vs soft-and-pliable split). A valet tray, dice tray, or desk catchall wants firm veg-tan in roughly 4 to 6 oz for small trays and 6 to 8 oz for larger boxes that need to stand on their own. The full breakdown of weights and tannages is in the types of leather guide — but the short version for boxes is veg-tan, every time.
Weight also drives how the corner behaves. Heavier leather makes a stiffer, more architectural box but a bulkier corner that needs wider hole spacing; lighter leather gives a finer corner but a softer box. For a first box, 5 to 6 oz veg-tan is the forgiving middle — firm enough to hold square, thin enough that the corner stitches pull clean.
Two Ways to Build the Box
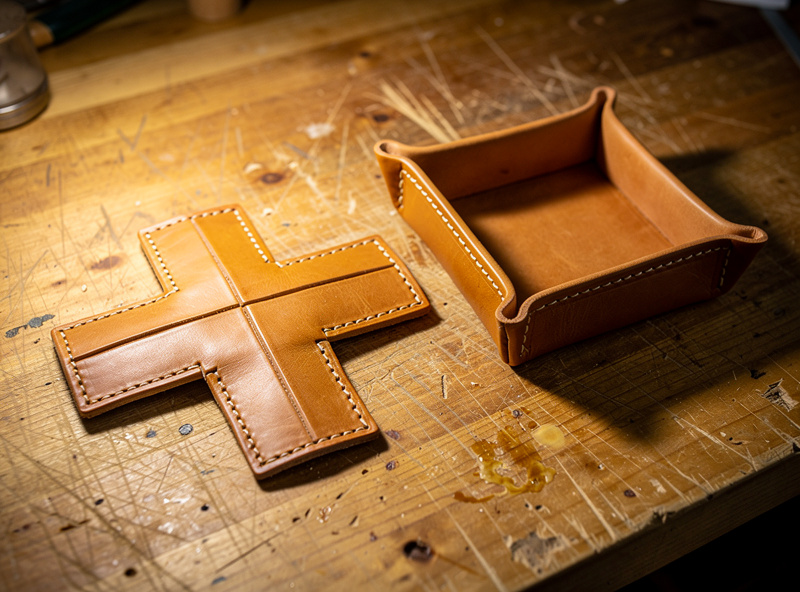
There are two construction routes: the single cross-piece method, where the base and four walls are cut as one plus-shaped piece that folds up, and the five-panel method, where the base and four walls are cut separately and box-stitched together. The cross-piece is simpler and has fewer seams; the five-panel is more flexible and stronger.
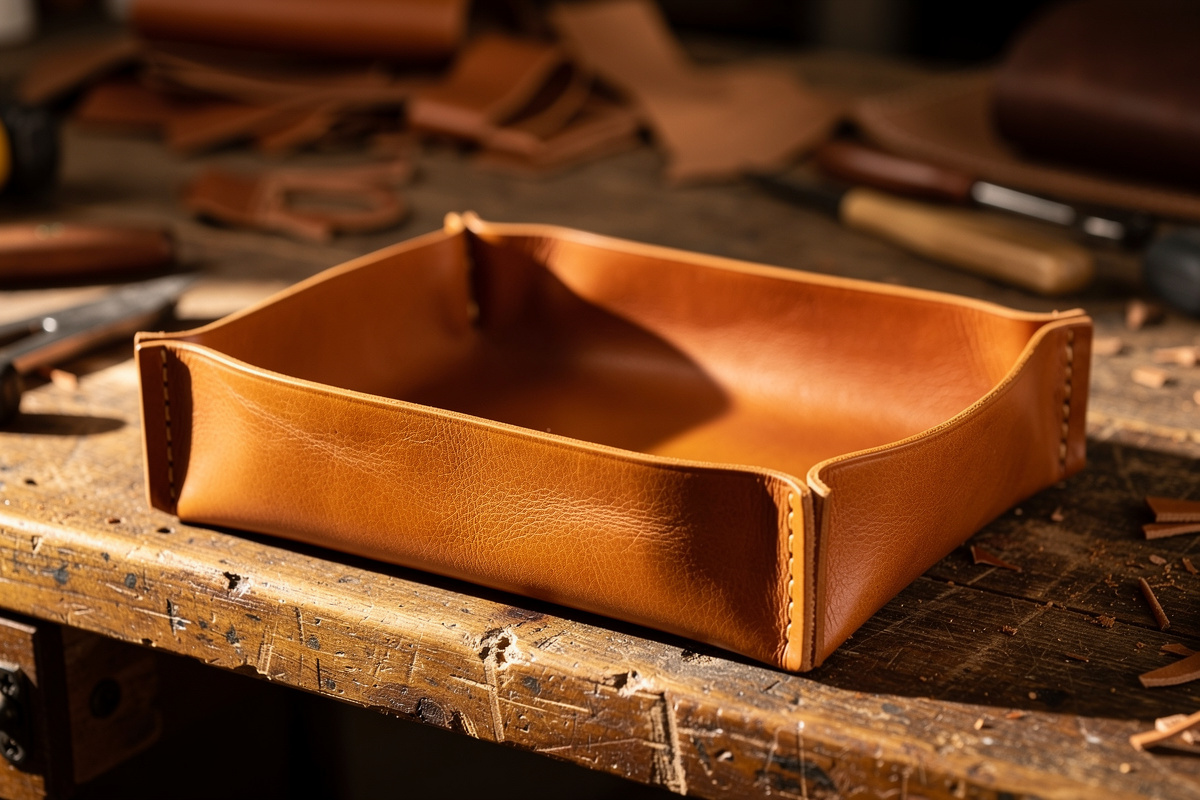
The single cross-piece (or “plus”) method cuts the tray as one shape: a square base with a wall extending from each side. You bevel or groove the four fold lines on the flesh side so the walls fold up cleanly, stand them perpendicular, and box-stitch only the four vertical corner seams where adjacent walls meet. Fewer seams, faster build, and the base has no stitching at all. This is the route I default to for valet trays and catchalls because it is clean and quick.
The five-panel method cuts a separate base and four walls, then box-stitches every join — four base-to-wall seams plus four vertical corners. It takes far more stitching but lets you use different weights for base and walls, build deeper boxes, and make true cubes. It is the route for structured boxes, watch boxes, and anything that needs to be more rigid than a folded tray. Beginners should start with the cross-piece; it teaches the corner without eight seams of practice. Both are good first beginner leather projects once you can stitch a flat seam.
Punching and Stitching the Corner
Punch each panel separately a consistent distance in from the edge — usually 3 to 4 mm — using a 2-prong chisel so you can follow the corner and keep the hole count identical on both mating panels. Matching hole counts is the whole game: if one edge has eight holes and the other has nine, the corner will never close square.
Work the corner in three moves. First, mark and punch panel A’s edge holes, then use it as the template to mark panel B so the counts match exactly. Second, hold the two panels perpendicular — a small bench vise, a corner jig, or just firm fingers — and start the saddle stitch from the top of the corner, leaving a tail to lock later. Third, stitch down the corner pulling each stitch to firm, even tension so the two edges cinch together; the thread will visibly wrap the outside corner as you go. A 2-prong chisel is essential here because the corner turns too tight for a long chisel to follow.
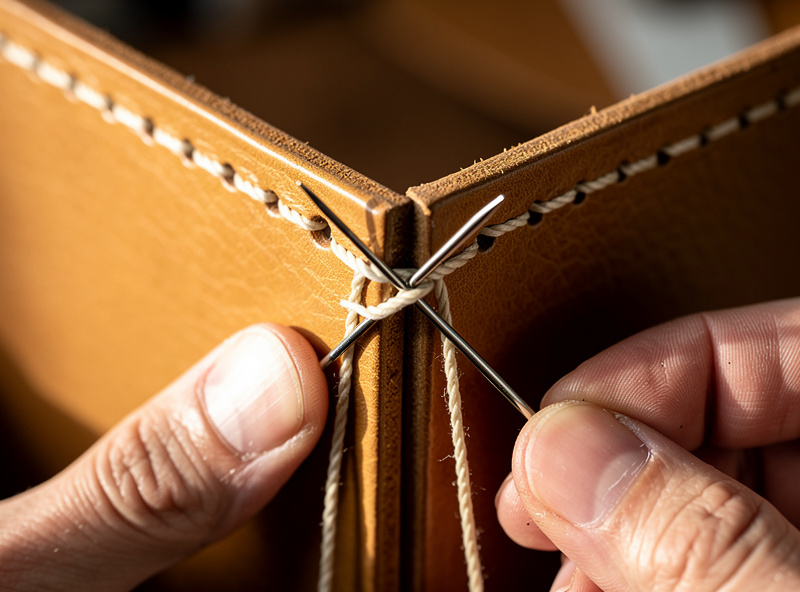
Finish each corner the same way you finish any saddle stitch: backstitch the last two to three holes, trim flush, and seal the ends, exactly as in the seam finishing guide. On a box, hide the start and end tails on the inside face where they will not show. If the corner gaps slightly at the top, your hole counts drifted — re-punch rather than trying to stitch out the difference, because a forced corner always looks forced.
Box-Corner Methods Compared
The box stitch is the strongest and cleanest corner, but it is not the only way to turn a corner in leather. The table below compares the realistic options so you can match the method to the piece.
| Corner method | How it joins | Strength | Look | Best for |
|---|---|---|---|---|
| Box stitch (face holes) | Saddle stitch wrapping the corner | Very high | Clean stitched corner | Trays, boxes, valets |
| Folded cross-piece | Fold walls up, stitch vertical corners only | High | Seamless base, four corners | Catchalls, dice trays |
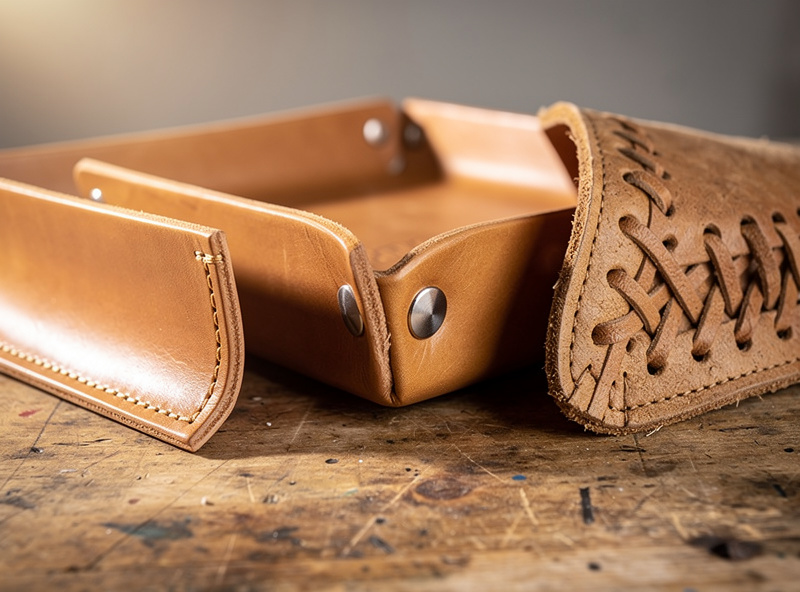
| Snap corners | Snaps join the corner flaps | Low to medium | Visible hardware, collapsible | Travel trays, knockdown |
| Laced corners | Leather lace woven through holes | Medium | Rustic, Western | Decorative, heritage style |
| Wet-formed tray | Molded over a form, no corner seam | Medium | Soft rounded corners | Trays, no sharp edges |
For a square, durable, refined box, the box stitch wins on every axis except speed. Snap corners are the right call only when you want the tray to collapse flat for travel; wet-forming is for soft rounded trays with no sharp corner at all. The wet-form route uses a form block — and the same printed tooling and form blocks that shape molded trays can also serve as corner jigs to hold panels square while you box-stitch.
As an Amazon Associate I earn from qualifying purchases.
The Tools That Make Clean Corners
Box stitching needs the same stitching kit as a flat seam plus one tool that matters more here: a 2-prong chisel to follow the tight corner turns. Everything else — needles, thread, an awl for any hole that did not punch clean — you already use on flat work.
A matched set of leather stitching chisels that includes a 2-prong is the one purchase that makes corners possible — the 2-prong walks the turn where a 6 or 10-prong cannot follow. Use a firm waxed polyester thread that holds the corner under tension, and keep a diamond awl on the bench to open any corner hole that did not punch fully through both panels. That is the entire box-stitch kit on top of what you already own.
Frequently Asked Questions
What is a box stitch in leatherwork?
A box stitch is a saddle stitch used to join two leather panels at a right angle to form a 3D corner. The stitch holes are punched through the face of each panel near the edge so they align when held perpendicular, and the thread wraps the outside corner, cinching the two edges into a square 90-degree join.
What leather is best for a box stitch tray or box?
Vegetable-tanned leather, because it has the firmness to stand up as walls and hold a square corner, and it can be wet-formed and creased. Use roughly 4 to 6 oz for small trays and 6 to 8 oz for larger boxes. Chrome-tan stays soft and slumps, so it cannot hold a box shape.
How do you stitch a 90-degree corner in leather?
Punch matching stitch holes through the face of each panel a set distance from the edge, hold the two panels perpendicular, and saddle-stitch from the top of the corner down. Pull each stitch to firm, even tension so the thread wraps the outside corner and draws the edges square, then backstitch and seal the end.
Should I cut a leather box as one piece or separate panels?
For a beginner, cut it as one cross-shaped piece: a base with four walls that fold up, so you only box-stitch the four vertical corners and the base has no seams. Use separate panels when you want a deeper, more rigid box or different weights for base and walls, which means stitching every join.
Why does my leather box corner gap at the top?
Almost always mismatched hole counts between the two mating edges. If one edge has more holes than the other, the corner cannot close square. Punch one panel first and use it as the template to mark the second so the counts match exactly, and re-punch rather than forcing a drifted corner.
What chisel do you use for box stitch corners?
A 2-prong stitching chisel, because it can follow the tight turn of a corner where a longer 6 or 10-prong chisel cannot. Punch each panel separately a consistent 3 to 4 mm in from the edge, keeping the hole count identical on both mating panels so the corner closes square.
Can you box stitch with snaps instead?
You can join corners with snaps, but it is structurally weaker and shows hardware. Snap corners are worth it only when you want a travel tray that collapses flat for packing. For a permanent, square, refined box, the stitched corner is far stronger and cleaner, and it is what gives a tray its finished look.
Related Articles
- Leather Stitching Techniques: Saddle Stitch and Beyond
- How to Saddle Stitch Leather by Hand
- Backstitch and Finish a Leather Seam
- Leather Stitching Chisels Guide
- Leather Projects for Beginners