To finish a leather seam, backstitch through the last two to three holes (four on high-stress seams), trim the threads flush to the grain, and seal the ends…
To finish a leather seam, backstitch through the last two to three holes (four on high-stress seams), trim the threads flush to the grain, and seal the ends — heat-melt polyester to a small bead, or cement and trim linen, which does not melt. A clean backstitch is what stops a saddle stitch from ever unravelling.
The stitching itself gets all the attention, but the start and the finish are where seams actually fail. I have re-sewn pieces that looked perfect down the run and then unravelled because the maker tied an ugly knot or backstitched a single hole. This guide is only about the two ends of the seam — how to start it with no visible knot and how to lock it so it never lets go. For the two-needle motion in between, see the saddle stitch tutorial.
What a Backstitch Is and Why It Locks the Seam
A backstitch in leatherwork means reversing direction at the end of a seam and re-sewing back through the last two to three holes you already stitched. This doubles the thread in those holes, and because the saddle stitch already locks each loop independently, the overlap mechanically jams the thread so the end cannot pull free.
This is different from a backstitch in fabric sewing, where it anchors a machine line. In hand saddle stitching, the seam is already strong along its length — the vulnerability is only at the two ends, where the thread can start to work loose. Backstitching fills the last holes with a double pass of waxed thread that wedges tight, and then you trim and seal. Skip it, or backstitch only a single hole, and you get the most common end-failure I see: the seam slowly unzips from the corner. The hub’s troubleshooting list flags exactly this — a backstitch covering fewer than two holes is why ends unravel.
The rule scales with stress. Two to three holes is plenty for a wallet seam or anything low-load. Step up to four holes on high-stress seams — belt billets, bag handle attachments, holster mouths — where the thread sees constant pull. More than four adds bulk without meaningful strength, so do not overdo it.
Starting the Seam With No Visible Knot
Start a seam by leaving a six-inch tail of thread loose at the first hole, stitching forward three or four holes, then threading the tail back through one of those holes from the opposite side and pulling it snug. This locks the start invisibly — no bulky knot, no lump under the leather, just a clean beginning that matches the finished end.
The reason to avoid a starting knot is both strength and looks. A knot sits proud, shows through thin leather, and is actually a weaker anchor than a buried tail because it concentrates stress on one point. By stitching a few holes first and then tucking the tail back through, you spread the anchor across several stitches the same way the backstitch does at the other end. I aim to make the two ends of a seam look identical so you cannot tell where I started.
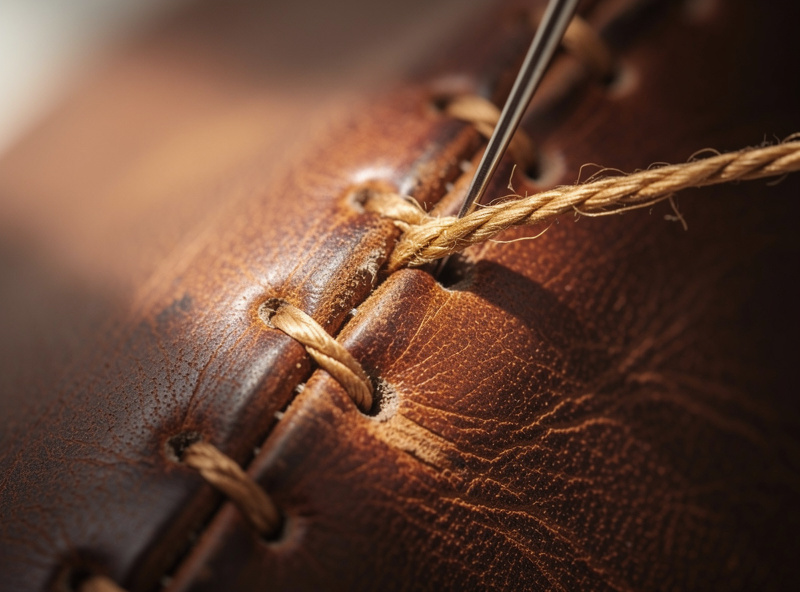
Cut enough thread before you start so you never have to splice mid-seam: roughly four times the seam length. Running out forces a join that always shows. If you do have to add thread, the cleanest fix is to treat the splice exactly like a seam end and a seam start — backstitch the old thread in, then start the new thread with the tuck-back technique a couple of holes earlier so the overlap doubles up. It is fiddly, which is why cutting enough thread up front is the better habit.
Ending and Locking the Seam
To end the seam, stitch to the final hole, then reverse and backstitch back through the last two to three holes (four on high-stress seams). Bring both needles to the back, or to the less-visible face, and cut the threads close to the leather. The doubled thread in those last holes is what locks the saddle stitch permanently.
The detail most beginners miss is which face the tails end on. Plan the backstitch so both threads exit on the back or inside face of the piece, never the show face, so the trimmed ends are hidden. On a lined wallet that means finishing where the lining will cover; on an unlined belt it means the flesh side. Pull each backstitch with the same firm tension as the rest of the seam — a loose backstitch looks like an afterthought and the whole point is that the end should be indistinguishable from the middle of the run.
Trim the threads flush to the grain with sharp flush-cutting snips, not by sawing with scissors at an angle that leaves a stub. A clean flush cut is what lets the next step — sealing — disappear into the surface rather than leaving a visible nub. This is the kind of detail that separates a piece that looks made from one that looks bought, the same standard the edge finishing guide applies to edges.
Sealing the Thread Ends
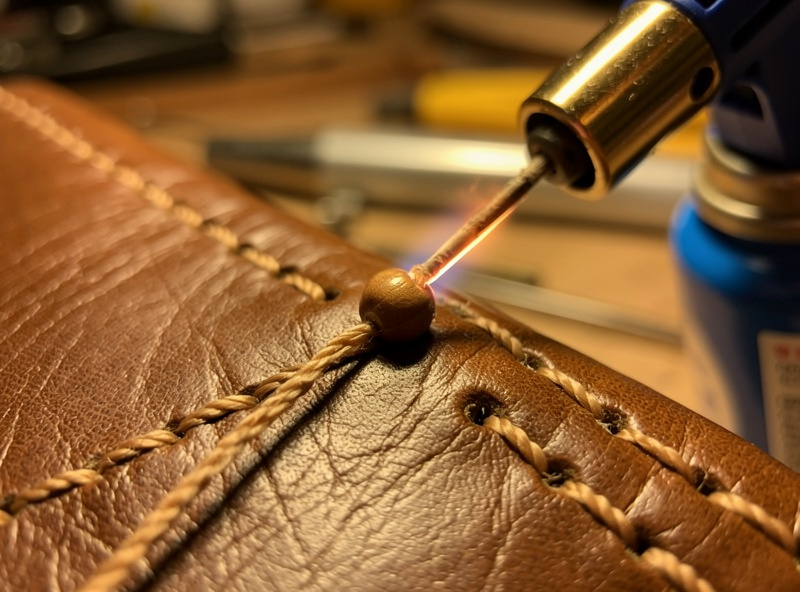
Seal polyester thread ends by touching them with a flame or a hot tool until they melt into a small bead that locks the cut and prevents fray. Linen does not melt, so seal linen ends instead with a dab of contact cement on the trimmed tail. The sealing step is what guarantees the backstitch never works loose over years of use.
For polyester (Ritza Tiger, Vinymo), a quick pass of a butane micro-torch flame or the tip of a soldering iron near the cut end melts the fibers into a tidy bead — Mr. Lentz Leather Goods’ own backstitch-finishing tutorial recommends a dedicated thread-burning tool over an open lighter for exactly this reason, since a bare flame is easier to drag too far down the line and weaken the next few stitches. Keep the heat away from the leather itself — a half-second is enough, and lingering scorches the grain. The melted bead is both a seal and a tiny mechanical stop that wedges against the hole. This is why I default to polyester on anything that gets handled hard: the heat-seal is genuinely more secure than any knot.
Linen needs the cement route because heat only chars it. After the backstitch and flush trim, a tiny dab of contact cement worked into the cut end with a fingertip locks the tail. It is less dramatic than the torch but just as durable on traditional pieces. The fiber differences that drive this choice — and why polyester melts while linen does not — are laid out in the leather thread guide.
Recessing the Stitch Line for Protection
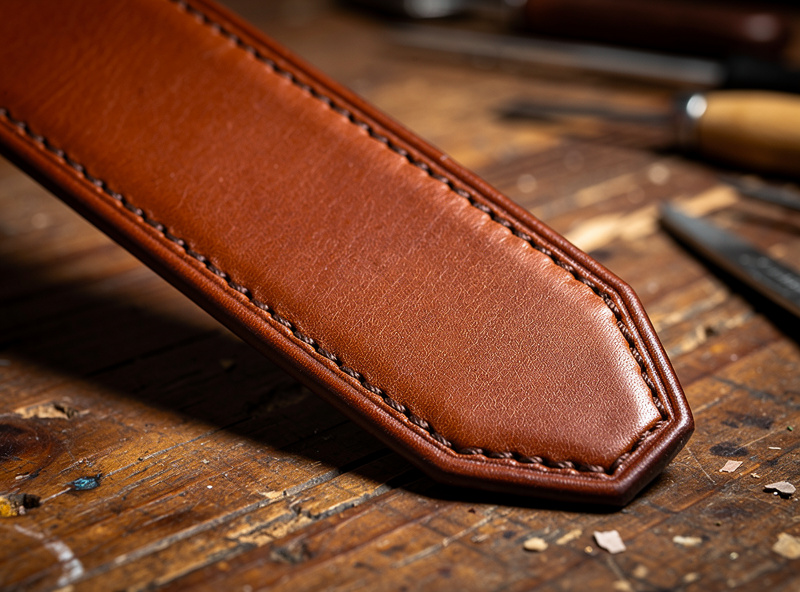
On hard-use pieces, run a stitching groove along the line before you punch so the finished stitches sit slightly below the surface. A recessed stitch line is protected from abrasion — the thread cannot catch and wear because it lies in a channel rather than proud of the grain. This is optional on small goods but worth it on belts and sheaths.
A stitching groover (or a stitch-and-groove tool, like the adjustable groovers The Leather Guy sells) cuts a shallow channel a set distance from the edge, and you punch your chisel holes into the bottom of that channel. The stitches then nestle into the groove, flush with or just under the surface. On a belt that drags against trouser loops thousands of times, that recess is the difference between a stitch line that lasts decades and one that abrades through. It also gives a crisp, deliberate look. The same wing-divider-and-groove discipline keeps the line straight and a consistent distance from the edge — wandering stitch lines are a separate problem covered in the common leatherworking mistakes guide.
Seam-Finishing by Thread and Stress Level
The table below is the finishing spec I follow by project. Match the backstitch length to the stress and the seal method to the fiber.
| Project / seam | Backstitch holes | Thread | End seal method | Recess groove? |
|---|---|---|---|---|
| Card holder / slim wallet | 2 holes | 0.6 mm polyester | Heat-melt to bead | Optional |
| Bifold wallet | 2 to 3 holes | 0.6 mm polyester | Heat-melt to bead | No |
| Belt | 4 holes | 0.8 mm polyester | Heat-melt to bead | Yes |
| Bag handle attachment | 4 holes | 0.8 mm polyester | Heat-melt to bead | Yes |
| Knife sheath / holster | 4 holes | 0.8 to 1.0 mm polyester | Heat-melt to bead | Yes |
| Traditional / Western piece | 3 holes | Waxed linen | Cement (no melt) | Optional |
The pattern is consistent: more stress means more backstitch holes and a recessed groove; linen always means the cement seal instead of heat. Get those two variables right and the seam end is as strong as any point in the run.
As an Amazon Associate I earn from qualifying purchases.
The Small Kit That Makes Clean Ends
Finishing a seam well takes almost nothing beyond your stitching kit: the right thread, sharp needles, and a way to seal the ends. The gear that actually matters here is a flush trim and a clean seal, not anything expensive.
Use a quality waxed polyester thread that heat-seals cleanly, and rounded harness needles that carry the backstitch back through tight doubled holes without fraying. For recessing the line on belts and sheaths, a leather stitching groover cuts the channel that protects the thread from abrasion. A butane micro-torch or a soldering iron for the heat-seal you may already own. That is the whole finishing kit, and it is what turns a competent stitch line into a seam that survives the piece.
Frequently Asked Questions
How do you finish a leather stitch so it does not come undone?
Backstitch through the last two to three holes (four on high-stress seams) to double the thread, trim the ends flush to the grain, and seal them. Heat-melt polyester into a small bead with a flame or hot tool; cement linen ends since linen does not melt. The doubled thread plus seal locks the saddle stitch permanently.
How many holes should you backstitch on leather?
Two to three holes for normal seams like wallets and small goods, and four holes on high-stress seams such as belts, bag handles, and holsters. Fewer than two holes is the main reason seam ends unravel. More than four adds bulk without meaningful strength, so do not overdo it.
How do you start a leather seam without a visible knot?
Leave a six-inch tail at the first hole, stitch forward three or four holes, then thread the tail back through one of those holes from the opposite side and pull it snug. This buries the anchor across several stitches instead of a bulky knot, and makes the start match the finished end.
How do you seal the ends of leather thread?
For polyester thread, touch the trimmed end with a butane micro-torch flame or a hot soldering iron tip until it melts into a small bead, keeping the heat off the leather. For linen, which only chars, work a tiny dab of contact cement into the cut end instead. The seal stops the backstitch from working loose.
Should you burn or glue leather thread ends?
Burn polyester and glue linen. Polyester and nylon melt cleanly into a sealing bead with heat, which is the more secure finish. Linen does not melt, so it must be sealed with a dab of contact cement after the backstitch and flush trim. Match the method to the fiber you stitched with.
What is a stitching groove and do I need one?
A stitching groove is a shallow channel cut along the stitch line with a groover, so the finished stitches sit recessed below the surface and are protected from abrasion. It is optional on small goods but worth it on belts and sheaths that take hard wear, where a proud stitch line would otherwise wear through.
Which side should the thread tails end on?
Plan the backstitch so both threads exit on the back or inside face of the piece, never the show face, so the trimmed and sealed ends stay hidden. On a lined wallet, finish where the lining covers; on an unlined belt, finish on the flesh side. Pull the backstitch at full seam tension so it disappears into the run.
Related Articles
- Leather Stitching Techniques: Saddle Stitch and Beyond
- How to Saddle Stitch Leather by Hand
- Best Thread for Leather Stitching
- Leather Edge Finishing: Bevel to Burnish
- Common Leatherworking Mistakes Beginners Make