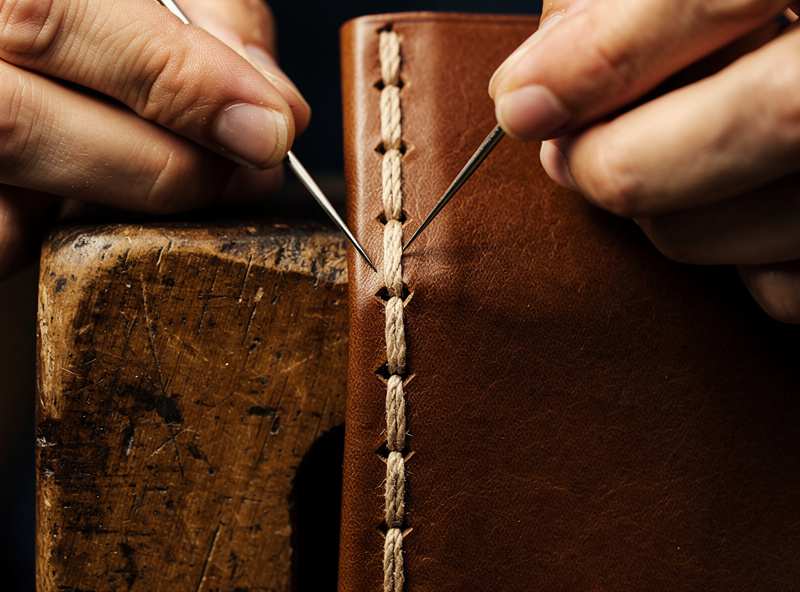
Leather stitching techniques are dominated by one stitch — the saddle stitch — that uses two needles on one waxed thread to lock each loop independently, producing a…
Leather stitching techniques are dominated by one stitch — the saddle stitch — that uses two needles on one waxed thread to lock each loop independently, producing a seam stronger than any machine equivalent. Master that one technique and you can build any hand-stitched leather project ever made; the variations are mostly differences in stitch length, thread weight, and chisel spacing rather than entirely different stitches.
This guide covers every stitching decision a leatherworker faces: which needles and thread to buy, how to set chisel spacing for wallets vs belts vs bags, the saddle-stitch motion that produces consistent tension, why machine stitching is structurally weaker even when it looks identical, and the eight common stitching failures and their fixes. Linked deep-dives walk through specific techniques.
The single piece of stitching advice I wish someone had told me on day one: pull every stitch with the same tension, count the beat, and commit to one needle-first method. I spent my first year alternating the needle order randomly and my stitch lines looked like a seismograph reading. Deliberately counting “one-two-pull-tighten” for every single hole fixed it within 30 minutes of practice on scrap leather. The saddle stitch comparison and spacing tables below cover what matters and what is just preference.
As an Amazon Associate I earn from qualifying purchases.
Why the Saddle Stitch Dominates Hand Work
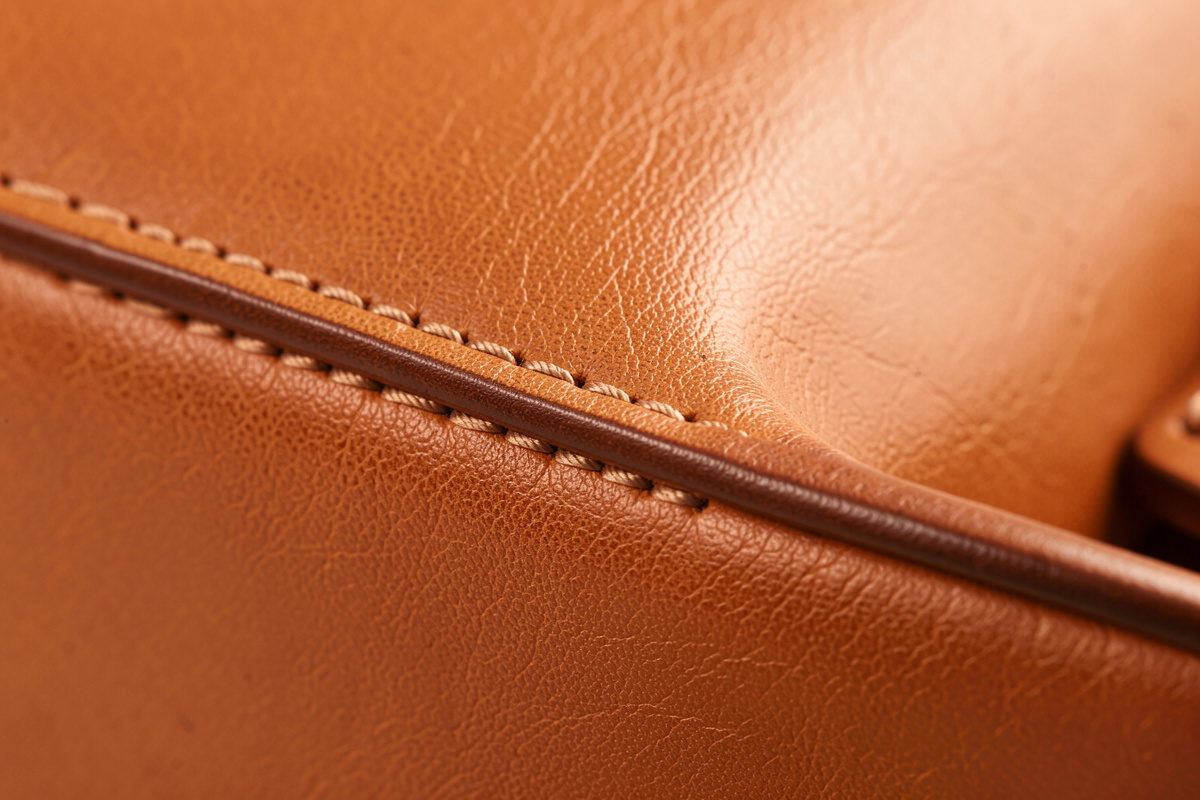
The saddle stitch threads one waxed thread through a hole, then threads the SAME thread back through the same hole from the opposite direction. Each stitch loop crosses the previous loop inside the leather, locking it mechanically. Cut a saddle stitch and the rest of the seam holds because every stitch is independent. Cut a machine stitch and the seam unravels because all loops are interconnected through one continuous thread.
That structural difference matters more than aesthetics. A saddle-stitched wallet that takes a knife slash on the spine continues holding cards together because the surrounding stitches lock independently; a machine-stitched wallet with the same damage spills cards immediately. For high-stress applications (belts, holsters, dog leads, bag handles), the saddle stitch is the only acceptable choice — even production leather workshops still hand-stitch the high-stress areas of machine-sewn pieces.
Speed-wise, hand saddle-stitching runs about 60-100 stitches per hour for a beginner; 200-300 for a practiced maker. A bifold wallet (96 stitches) takes 30-90 minutes of stitching depending on skill. Machine stitching covers the same work in 4-6 minutes but requires $700-5,000 of machine investment plus the skill to set tension on heavy-thread industrial machines. For under 30 projects per year, hand stitching is faster end-to-end.
The saddle stitch tutorial walks through the basic technique with photo sequences for the needle motion. The leather working for beginners hub covers the broader skill stack that stitching fits into. Stitching is core skill 4 of 6, learned after cutting and edge work and before dyeing.
Needles and Thread Selection
A beginner leather stitching kit bundles harness needles, waxed thread, and a basic pricking iron into one purchase — a sensible starting point before upgrading each tool individually.
The needle-thread combination determines stitch quality more than any other variable. Use the wrong needle and the thread frays during stitching; use the wrong thread and the stitch line shows tension drift even from a steady hand. The standard combination for leather work is harness needles (eye sized for waxed leather thread) plus polyester braided or waxed-linen thread — Ritza 25 Tiger’s real size range runs 0.6mm to 1.2mm, and Vinymo MBT’s numbered sizes run from about 0.3mm up through 1.0mm+. The term “harness” refers to the original application of these needles — saddlery and harness-making, where Latigo and harness leather are the dominant hide types and tight, consistent hand-stitching is a structural requirement.
Harness needles come in sizes from #000 (very fine) to #1 (heavy duty). Most leather work uses #002 or #00 — they thread 0.6 to 0.8 mm thread and pierce leather without splitting fibers. The eye is rounded rather than sharp like sewing needles, which prevents thread fray during repeated passes through the same hole. Buy two needles per stitching project (the saddle stitch requires two simultaneously); replace when the eye burrs (typically every 3-4 projects).
| Thread Type | Material | Diameter | Best For | Color Range |
|---|---|---|---|---|
| Ritza Tiger | Polyester braided | 0.6 to 1.2 mm | Universal — wallets, bags, belts | 50+ colors, expensive |
| Vinymo MBT | Polyester braided | 0.3 to 1.0 mm | Wallets, watch straps | Wide range, mid-priced |
| Aerial Polyester | Polyester braided | 0.6 to 1.0 mm | Belts, bags, heavy work | Limited, cheap |
| Linen waxed | Natural linen | 0.5 to 1.0 mm | Heritage style, classic look | Natural plus dyed |
| Crawford waxed | Linen heavy-wax | 0.6 to 1.0 mm | Western and saddle work | Limited natural tones |
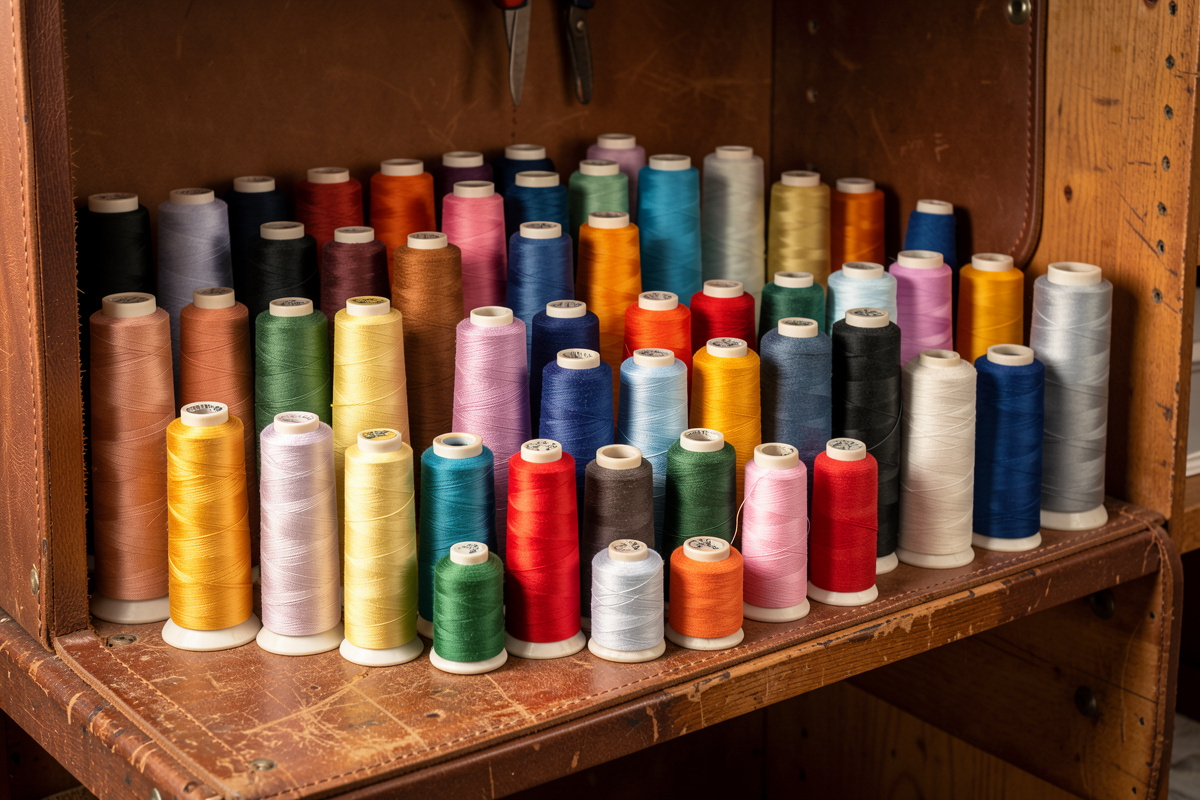
Thread diameter matters for visibility. 0.6 mm thread shows clearly as a structural line on a wallet; 0.4 mm thread disappears into the leather; 1.0 mm thread reads as a deliberate decorative element. For first projects, 0.6 mm or 0.8 mm Ritza Tiger or Vinymo in a contrasting color (natural thread on dyed leather, or contrast tan on natural leather) is the most forgiving combination — the visible thread line forgives small tension errors.
The single mistake every beginner makes with thread: using cotton sewing thread or synthetic upholstery thread instead of leather-specific thread. Cotton lacks abrasion resistance and breaks within months on flex points; synthetic upholstery thread has no wax coating and fuzzes after passing through leather a few times. Spend the $4-8 extra for purpose-made waxed leather thread on every project. For the full waxed linen vs polyester vs nylon breakdown, see the best thread for leather stitching guide.
Chisel Spacing: SPI and Stitch Length Math
Stitching chisels punch the holes that the saddle stitch passes through. The spacing between teeth on the chisel determines stitch density. Standard spacings are 3 mm (8 SPI — fine, decorative), 3.85 mm (6.5 SPI — wallets), 4 mm (6 SPI — most common), 5 mm (5 SPI — belts), 6 mm (4 SPI — heavy duty). SPI = stitches per inch.
The best stitch length for leather guide covers the head-to-head comparison: wallets in the 6-8 SPI range, belts in the 5-6 SPI range, bags varying by purpose. Tighter spacing (more SPI) produces a denser stitch line that reads as more refined; looser spacing (fewer SPI) reads as more rugged. Consistency matters more than absolute density — varying spacing within a single project always looks worse than any single consistent spacing.
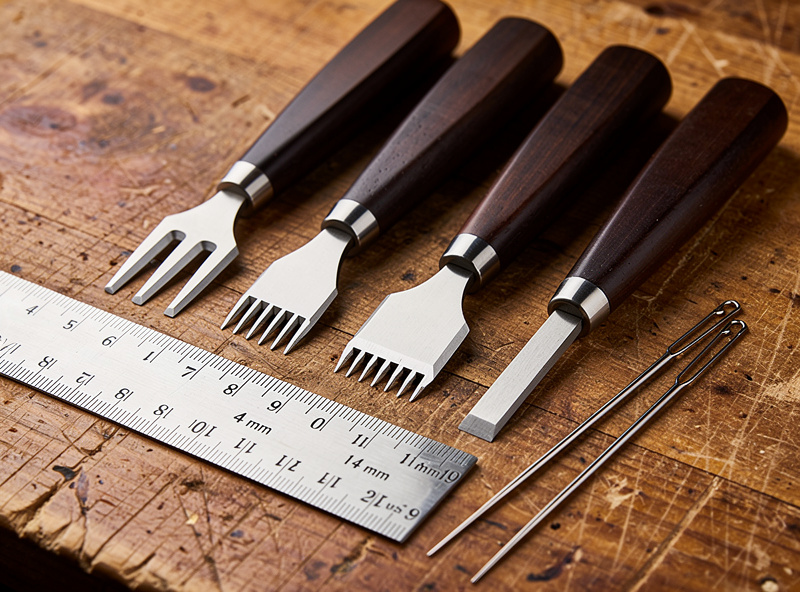
Buy pricking irons in matched sets of three: 2-prong (for corners and tight curves), 4-prong (for short straight runs), 8 or 10-prong (for long straight runs). Most wallets stitch with the 4-prong for the body and 2-prong for the corners; belts often use the 6-prong or 10-prong because the runs are long and straight. Single-prong “scratch awls” exist but produce inconsistent spacing and are not recommended. For the full chisel-versus-pricking-iron comparison, prong counts, and how to keep spacing even, see the leather stitching chisels guide.
European-style chisels (KS Blade, Crimson Hides, Wuta) have angled teeth that produce a slanted stitch line, the visual signature of European leather goods. Asian-style chisels (Tandy, Seiwa, Kyoshin Elle) have straight teeth that produce a straight stitch line. For first projects, pick whichever style fits your aesthetic preference; do not switch mid-project because the lines look different. Some makers print their own custom-spaced chisels — see 3D-printed leather tooling for printable chisel jigs and stitch-line guides.
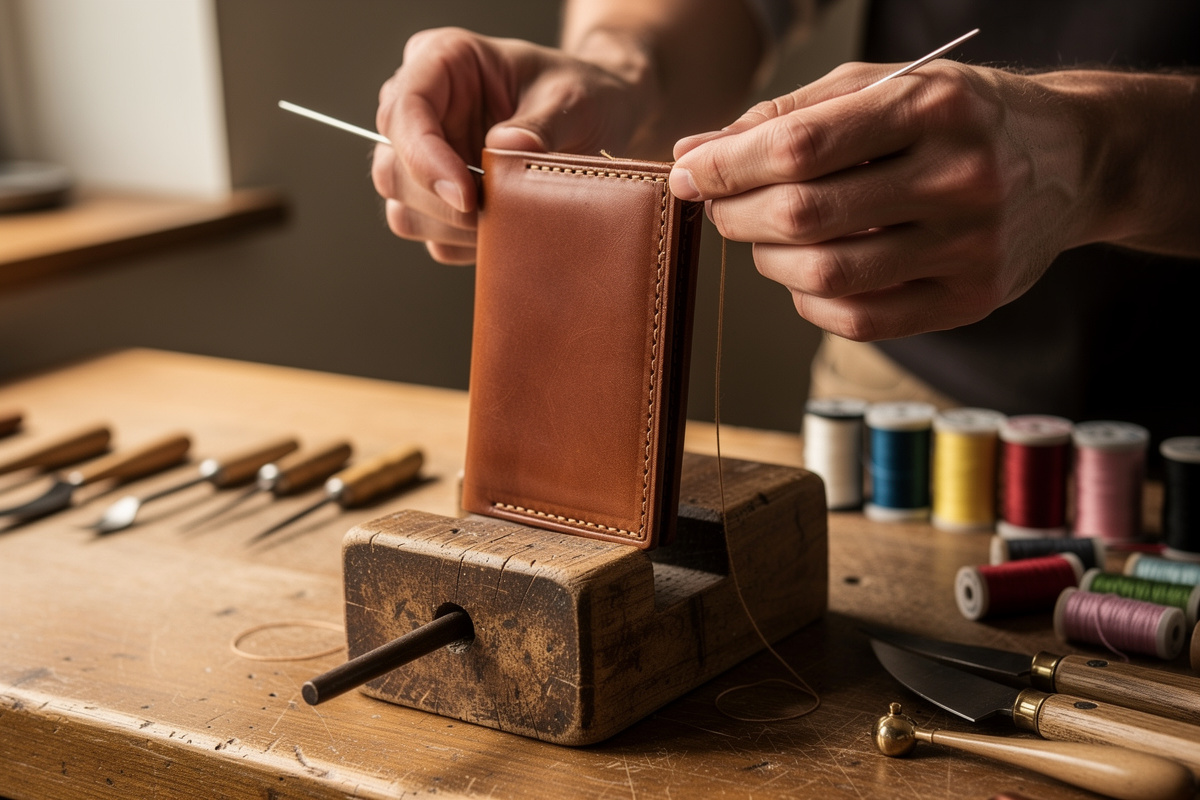
The Saddle Stitch Motion: Step by Step
The saddle stitch motion has six discrete steps that repeat for each hole: thread the back needle through, pull both threads tight, thread the front needle through (over or under the back thread depending on side), pull both threads tight again, count one beat, repeat. Variation in any step produces visible inconsistency in the final seam.
The “over or under” decision matters more than beginners realize. Always thread the front needle the same way (always over the back thread, or always under, never alternating) for the entire seam. The standard convention is the front needle over the back thread on the front side of the leather; this produces a slight slant matching the chisel angle. Switching mid-seam shows immediately as a different-looking stitch.
Tension is the variable that separates beginner work from expert work. Pull each stitch with the same tension every time. The trick most beginners miss: tension is set by the second pull, not the first. Threading both needles at moderate tension and then pulling both simultaneously to firm tension produces consistent results; threading one tight and the other loose produces drunken-looking lines. Practice the second pull motion on scrap leather for 30 minutes before stitching a real project.
Speed scales with practice. The first 100 stitches of your first project will take an hour; the same 100 stitches at month 6 take 15 minutes. Most beginners try to speed up too early — slow stitching with consistent tension produces better results than fast stitching with variable tension. Speed compounds naturally once muscle memory locks in around month 2-3.
Stitching Pony, Clamps, and Workholding
A stitching pony is a wooden workholding device that clamps leather vertically while you stitch with both hands free. Without a pony, you must hold leather with one hand and stitch with the other — slow, awkward, and error-prone. A pony costs $25-80 and pays back in time savings within the first three projects.
The stitching pony vs stitching clamps comparison covers the head-to-head: ponies are faster to load and unload but less stable on long runs; clamps are slower to load but more stable on belts and long bag straps. For first projects, a basic wooden stitching pony is the right call; upgrade to a heavy-duty clamp at month 6+ if you start building belts and longer pieces regularly.
Pony jaw lining matters. Most ponies ship with bare wood jaws that can mark soft leather. Line the jaws with adhesive felt or leather scrap (1-2 mm thick) to protect dyed surfaces. Re-line every 2-3 years as the felt wears. The light protection prevents the dark compression marks that appear on the back of finished pieces from poorly-set ponies.
Some advanced makers use specialized clamps for specific projects: belt clamps (long, flat, multi-point grip), bag clamps (curved profile for 3D bag construction), pocket clamps (small, light for delicate work). These are optional purchases for project specialization; the standard wooden pony covers 90% of beginner-to-intermediate work. The leatherworking starter kit guide covers the foundation tools (pony, knife, ruler, chisels, needles, burnisher) at the right buy-order for new makers.
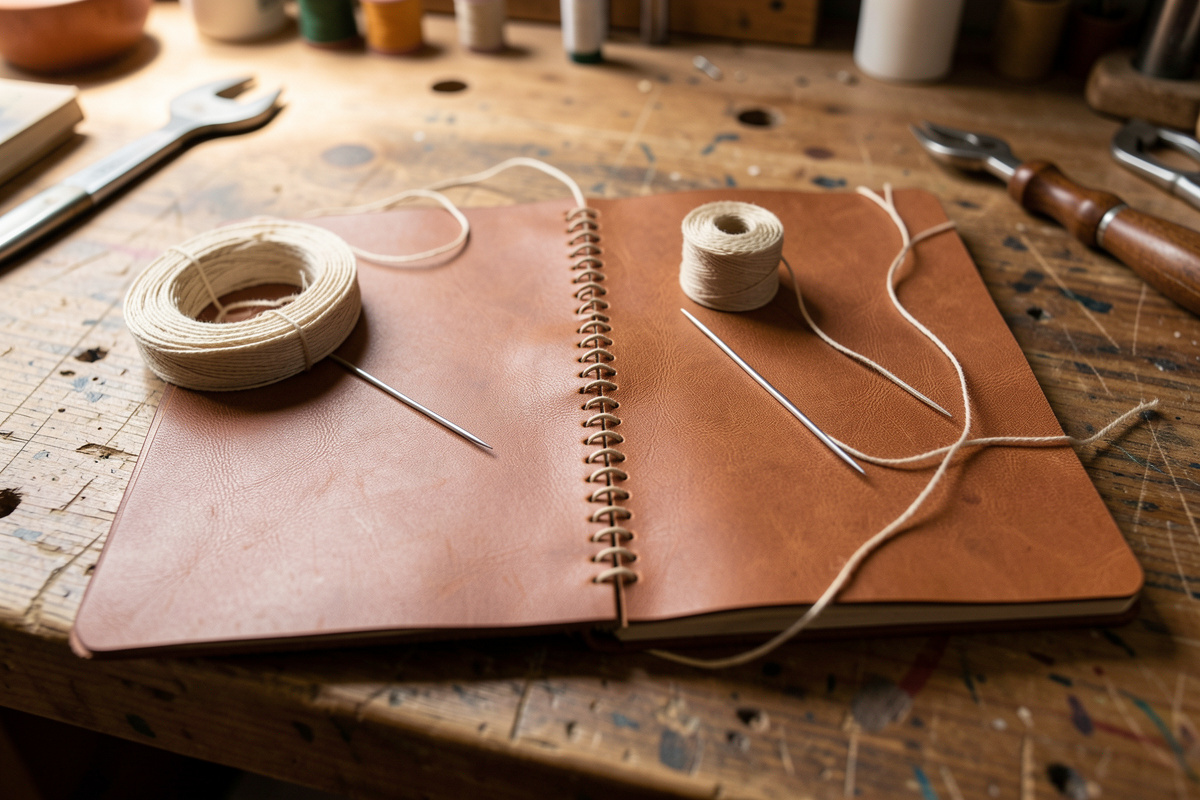
Thread Length, Knot Tying, and End Management
Cut thread roughly 4 times the perimeter you intend to stitch. A bifold wallet with 24 inches of stitch line needs 96 inches of thread. Cutting too short forces a mid-stitch knot (looks bad and weakens the seam); cutting too long wastes material but is otherwise harmless. Veterans add 6 inches of margin to be safe.
The starting knot: leave 6 inches of tail thread loose at the start, stitch 3-4 holes, then thread the tail through one of the existing holes from the opposite side and pull tight. This locks the start of the seam without a visible knot. The same technique at the end — backstitch through 2-3 existing holes, cut close to the leather surface — locks the end invisibly.
Beeswaxing thread improves grip on the chisel-punched holes and reduces fray during stitching. Pre-waxed thread (Ritza Tiger, Vinymo) ships with adequate wax for most projects; bare thread (Aerial polyester, raw linen) needs a quick rub against a beeswax bar before each use. Re-wax mid-project if the thread starts feeling slick.
Burning thread ends seals the cut surface and prevents fray. Use a butane torch or a soldering iron tip lightly touched to the thread end after final cut. The thread melts and forms a small bead that locks the cut. Skip this step on linen thread (which does not melt) and use a tiny dab of contact cement instead. The complete start-to-seal routine — tuck-back start, backstitch length by stress, trimming and sealing — is in the backstitch and finish a leather seam guide.
Advanced Stitching Techniques
Once the basic saddle stitch is reliable, three advanced techniques expand the range. Each is built on the saddle-stitch foundation; they are stylistic and functional additions, not replacements.
The Baseball stitch (or whip stitch) handles edges where two pieces meet at right angles, common in 3D bag construction. Two pieces are held together with their grain faces touching at the join; thread loops around the join through holes punched in both pieces. The visible thread on the outside forms diagonal lines like the lacing on a baseball — hence the name. Used for cuff joins and structured bag corners. For building trays and boxes with crisp square stitched corners from veg-tan, see the leather box stitch technique guide.
The Pricking-iron-and-awl technique replaces stitching chisels with a marking-only iron plus a separate awl that you use to pierce each hole one at a time during stitching. This is the traditional European saddler method and produces marginally cleaner stitch lines but requires sharpening skill and roughly double the stitching time. Beginners should master the chisel-and-needle method first; the awl method is a year-2+ skill.
Decorative stitching (running stitch, cross stitch, faux machine stitch) layers visual elements onto the structural saddle stitch. Used in Western and tooled leather work where the stitching itself is part of the design. Run on top of completed saddle-stitched seams; never used as the primary structural stitch.
When Machine Stitching Makes Sense
Machine stitching is the production-scale solution for items where hand-stitching time becomes the bottleneck. The standard leather machines are walking-foot industrial sewing machines (Juki, Cobra, Cowboy) costing $1,200-5,000 used. They sew through 8 oz leather without fuss, run at 200-300 stitches per minute, and use #138 or #207 bonded nylon thread that approximates 0.6-0.8 mm hand thread weights.
Machine stitching is structurally weaker than saddle stitching because the lock-stitch interconnects all loops through one continuous thread. Cut one stitch and the seam unravels several stitches in either direction. For low-stress items (handbags, jacket linings, cushions), this is acceptable; for high-stress items (belts, holsters, dog leads), the saddle stitch remains the standard even at production scale. The full strength, speed, and cost breakdown is in the saddle stitch vs machine stitch comparison.
Hybrid construction (machine-stitched non-stress seams plus hand-saddle-stitched stress points) is the approach used by most production leather workshops. The bag exterior is machine-stitched for speed; the handle attachments and load-bearing seams are hand-stitched for strength. This requires both the machine and hand-stitching skills.
For most beginners, machine stitching makes sense at year 2-3 once you have established repeat-pattern projects with predictable production volume. Buying a machine before that is premature optimization — you spend $1,500-5,000 to save labor on projects you have not yet built reliably. If you are evaluating production scaling, the handmade leather pricing formula shows what hand-stitching time costs in real dollars — that is the math that justifies (or rules out) machine investment.
Eight Common Stitching Failures
Hand stitching fails in predictable ways. Diagnose first, then fix. The full symptom-cause-fix diagnostic, plus how to unpick and re-stitch a bad line, is in the leather stitching mistakes and fixes guide.
Failure 1: Drunken stitch line on the back of the project. Cause: inconsistent tension on the second pull. Fix: practice second-pull motion on scrap; pull both threads simultaneously to firm tension at every stitch.
Failure 2: Stitches loose and droopy. Cause: thread not waxed enough, or chisel holes too large. Fix: re-wax thread; check chisel size matches thread diameter (rule: thread = 1/2 chisel hole width).
Failure 3: Thread breaks mid-stitch. Cause: thread too thin for project, or chisel burr cutting fibers. Fix: switch to next thread weight up; check chisels for burrs and replace any with damaged points.
Failure 4: Stitch line wanders away from edge. Cause: chisel holes punched at inconsistent distance from edge. Fix: future projects, mark stitch line with a wing divider before chiseling; always punch at the same offset. How far that offset should be — the 3 to 4 mm rule and scaling it to leather thickness — is covered in the stitching distance from edge guide.
Failure 5: Holes do not align between layers. Cause: pieces shifted during chiseling, or chisels not punched all the way through. Fix: clamp pieces firmly before chiseling; use a granite or marble slab to back the chisel and ensure full penetration.
Failure 6: Visible needle marks on the leather surface near holes. Cause: needle eye too large for the hole, or pulling thread too aggressively. Fix: use smaller needles (drop one size); pull tension steadily, not jerkily.
Failure 7: Backstitch unravels at the seam end. Cause: backstitch covers too few holes (less than 2). Fix: backstitch at least 2-3 holes for normal seams, 4 holes for high-stress seams (handles, belt billets).
Failure 8: Stitch line shows different colors on the front and back. Cause: thread wear during repeated passes through the same hole. Fix: this is mostly normal — front-side thread sees more handling friction. To minimize, finish the project promptly after stitching.
Stitching Spec By Project Type
Each project type has a typical stitching specification. Use the table below as a starting point.
| Project | Chisel Spacing | Thread Diameter | Thread Color Strategy | Notes |
|---|---|---|---|---|
| Card holder (3-slot) | 3.85 mm (6.5 SPI) | 0.6 mm | Match or contrast | Tight stitch line for refined look |
| Bifold wallet | 4 mm (6 SPI) | 0.6 mm | Contrast for visibility | Standard wallet density |
| Belt (1.5 in) | 5 mm (5 SPI) | 0.8 mm | Match for traditional look | Heavier thread for visibility |
| Watch strap | 3 mm (8 SPI) | 0.4 mm | Match exactly | Fine stitch hidden look |
| Tool roll | 4 mm (6 SPI) | 0.6 to 0.8 mm | Contrast tan or olive | Heritage rugged aesthetic |
| Bag (small messenger) | 4 mm (6 SPI) | 0.6 mm | Match for clean look | Match thread to leather color |
| Holster (pancake) | 5 to 6 mm (4 to 5 SPI) | 0.8 to 1.0 mm | Match heavy thread | Maximum strength stitching |
| Key fob | 4 mm (6 SPI) | 0.6 mm | Contrast for visibility | Short run, easy to learn on |
Linked deep-dives for projects in this matrix: card holder pattern, bifold wallet build, wallet leather guide. The stitch length guide covers head-to-head comparisons of 6 SPI vs 8 SPI on identical wallets so you can pick spacing by aesthetic preference.
Frequently Asked Questions
What is the best stitch for hand-sewing leather?
The saddle stitch. Two needles on one waxed thread thread through the same hole from opposite sides, locking each loop independently. Cut one stitch and the rest of the seam holds. Saddle stitching is structurally stronger than any machine equivalent and is used in all hand-stitched leather work.
What size needles do you use for leather?
Harness needles in size 002 or 00 for most leather work. They thread 0.6 to 0.8 mm waxed thread and pierce leather without splitting fibers. The eye is rounded rather than sharp, preventing thread fray during repeated passes through the same hole.
What is the best thread for leather?
Ritza Tiger or Vinymo MBT polyester braided thread in 0.6 to 0.8 mm diameter. Both are pre-waxed, abrasion-resistant, and available in 50-plus colors. Use 0.6 mm for wallets and watch straps; 0.8 mm for belts and bags. Avoid cotton sewing thread and unwaxed synthetic upholstery thread.
How many stitches per inch for leather?
6 to 8 stitches per inch (4 mm to 3 mm chisel spacing) for wallets and small goods. 5 to 6 stitches per inch (5 mm to 4 mm spacing) for belts and bags. 4 to 5 stitches per inch (6 mm to 5 mm spacing) for holsters and heavy work. Tighter spacing reads more refined; looser reads more rugged.
Is hand stitching stronger than machine stitching for leather?
Yes, structurally. The saddle stitch locks each loop independently, so cutting one stitch does not unravel the seam. Machine lock-stitch interconnects all loops through one continuous thread, so a single cut unravels several stitches in either direction. For high-stress leather goods, hand stitch is the standard.
Do I need a stitching pony for leather work?
Effectively yes. A stitching pony clamps leather vertically while you stitch with both hands free, doubling stitching speed compared to one-handed stitching. Costs 25 to 80 dollars and pays back in time savings within the first three projects. Clamps are an alternative for long pieces.
How long does it take to hand-stitch a leather wallet?
A bifold wallet has roughly 96 stitches at standard 6 SPI spacing. First wallet takes 60 to 90 minutes of stitching; speed compounds to 30 minutes by month 3 and 20 minutes by month 6. Plus chiseling, edge prep, and assembly time, total wallet build is 8 to 12 hours.
Related Guides
- How to Saddle Stitch Leather by Hand
- Best Stitch Length for Leather
- Stitching Pony vs Stitching Clamps
- Leather Working for Beginners: Complete Starter Guide
- How to Make a Leather Bifold Wallet