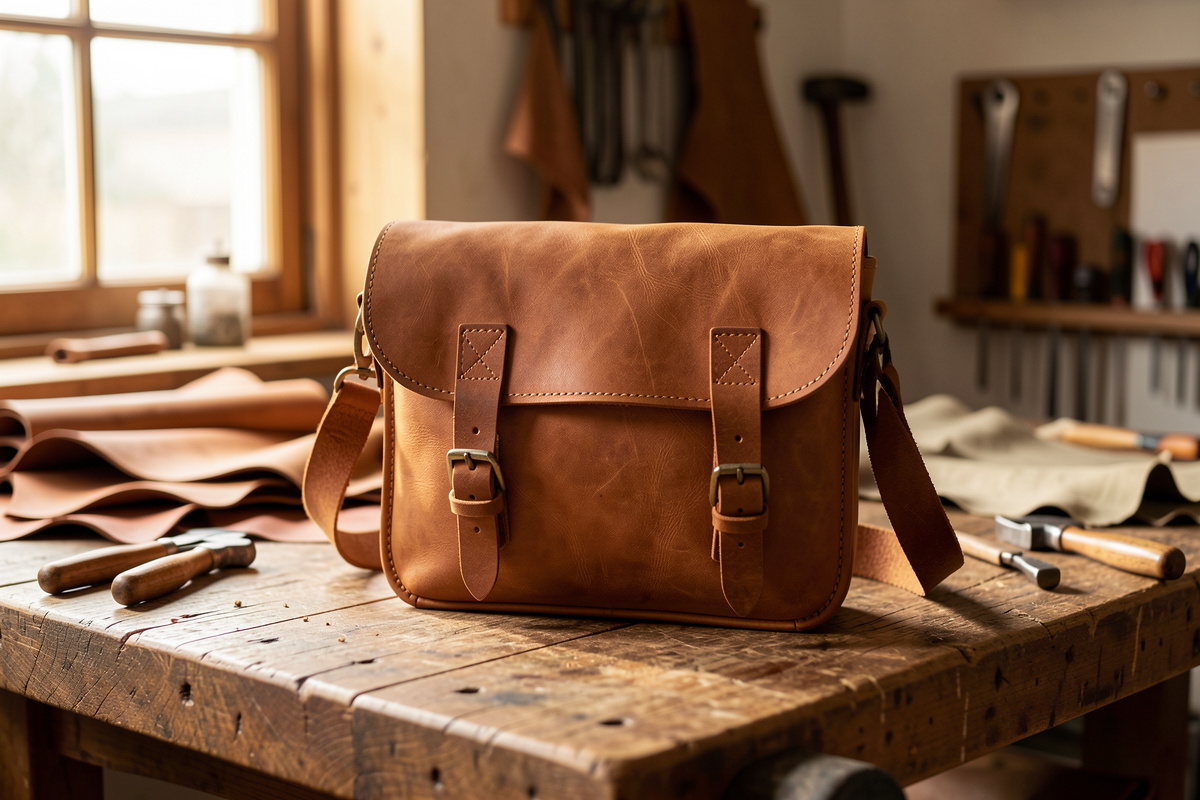
Making a leather bag is the point where everything else on the bench finally has to work together at once. A wallet forgives a wandering stitch line; a…
Making a leather bag is the point where everything else on the bench finally has to work together at once. A wallet forgives a wandering stitch line; a bag does not, because a bag carries weight, swings on a strap, and gets opened a hundred times a week. This leather bag making guide is the map I wish I had when I cut my first tote: it walks the whole job from leather weight and pattern through cutting, construction, straps, lining and edge finish, so the piece you build looks made rather than bought. A typical hand-stitched bag in 5–6 oz veg-tan runs 18–30 hours of bench time across a week, and the leather alone for a medium bag is a 12–16 square-foot side.
I hand-stitch on a dedicated low-dust bench in Sweden, walled off from the metal-and-grinding side of the workshop so swarf never lands in a finish coat. Bags are where I send people once they have a wallet and a belt behind them, because a bag is just those skills — saddle stitch, beveled edges, set hardware — scaled up to panels big enough to punish sloppiness. Nothing here is mysterious. It is mostly patience, the right leather weight for the job, and not skipping the steps the influencer videos cut away from.
What Makes Bag Leather Different From Wallet Leather
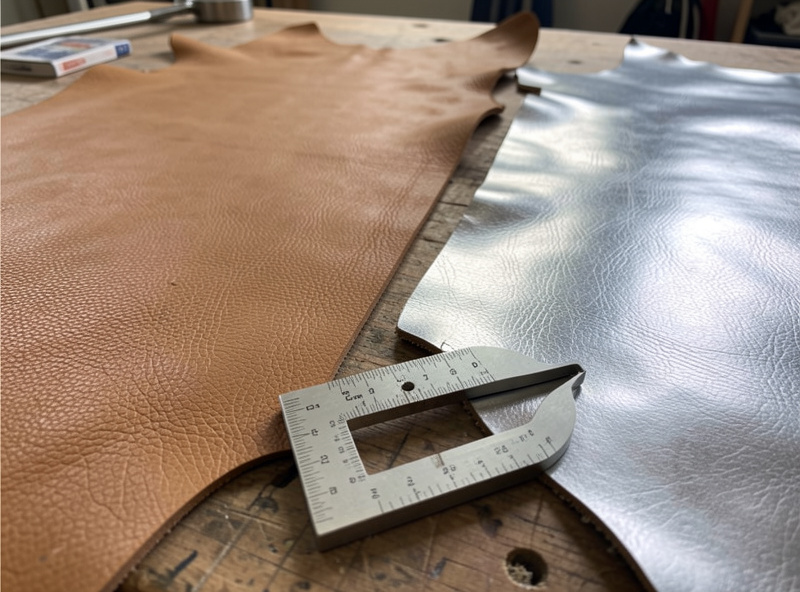
The honest answer: a bag has to hold a shape under load, so the leather selection question changes from “what feels nice” to “what carries weight without sagging or cracking.” For a structured bag I reach for 5–6 oz (2.0–2.4 mm) veg-tan; for a soft, slouchy body I use chrome-tan or chrome-tan offcuts that drape instead of standing up. The two tannages are not interchangeable, and the single most common beginner mistake is building a soft-bag pattern in stiff veg-tan, or a structured pattern in floppy chrome-tan, then wondering why it fights back.
Veg-tan is the leather that tools, molds, dyes and burnishes — it takes a beveled, slicked edge that looks turned, and it holds a wet-formed shape. Chrome-tan stays soft, resists water better, and will not slick the same way, so its edges usually get folded, painted, or bound rather than burnished. I keep both classes on the rack and never confuse which job each is for; if you want the full breakdown, my chrome tan vs veg tan comparison and the broader types of leather guide cover tannage, grade and weight in detail.
Choosing Leather and Weight by Bag Type
Weight is the decision that quietly determines whether your bag works. Too light and a tote collapses every time you set it down; too heavy and a messenger flap becomes a board that will not fold cleanly over its buckle. I size leather to the panel’s job, not to the project as a whole — a single bag often uses two or three different weights: a heavier body, a lighter gusset, and a thin lining. The table below is the starting point I actually use at the bench before I adjust for the specific design.
| Bag type | Body weight | Best tannage | Typical hide need | Construction |
|---|---|---|---|---|
| Structured tote | 5–6 oz (2.0–2.4 mm) | Veg-tan | 12–15 sq ft | Stitched, edges slicked |
| Slouchy hobo / market bag | 3–4 oz (1.2–1.6 mm) | Chrome-tan | 10–14 sq ft | Stitched, folded edges |
| Messenger / satchel | 5–7 oz (2.0–2.8 mm) | Veg-tan or bridle | 14–18 sq ft | Stitched + riveted stress points |
| Laptop / briefcase | 6–8 oz (2.4–3.2 mm) | Veg-tan, lined | 16–20 sq ft | Stitched, padded lining |
| Straps & handles | 8–10 oz (3.2–4.0 mm) | Bridle / latigo | 1–2 sq ft per strap | Doubled or single, edged |
Notice the straps row jumps to 8–10 oz. A strap carries the entire load through a narrow band, so it needs the firmest leather in the build — the stuffed strap leathers like latigo and harness exist for exactly this. I cut straps from the bend (the firm spine of the hide), never from the soft belly, and I go deeper into sizing, doubling and edging in the dedicated leather bag strap guide. Getting the strap right is half of whether a finished bag feels reassuring on the shoulder or feels like it might let go.
For sourcing, a good general-purpose body leather is a veg-tan shoulder in 5–6 oz; you can find workable double-shoulders on Amazon’s veg-tan shoulder listings, though a local tannery off-cut bin — or a known house like Wickett & Craig or Hermann Oak — will usually beat them on quality per square foot. As an Amazon Associate I earn from qualifying purchases.
The Tools You Actually Need (And What You Don’t)
You can build a real bag with a surprisingly short tool list, and most of the catalog you see advertised is for production speed, not quality. The non-negotiables are a way to cut straight, a way to make even stitch holes, two needles, thread, and edge tools. Everything else is comfort. My leatherworking tools guide sorts the whole catalog into three tiers of buy-in; for bags specifically, here is the short version of what earns its place on the bench.
For cutting, a heavy steel straightedge and a sharp head or rotary knife beat any gadget — clean panels start with a clean cut, which is its own skill worth practicing on scrap first (see cutting leather straight). For stitch holes I use pricking irons in a fine European pitch with a diamond awl I keep stropped razor-sharp, rather than punching all the way through with chisels. Pricking irons mark the line and angle; the awl opens each hole as you stitch so the thread seats tight instead of swimming in an oversized hole. A good starter set of pricking irons will outlast a decade of bags.
Then thread: I run waxed polyester (the Ritza 25 “Tiger” type) in 0.8 mm for bag-weight seams, matched to the iron pitch so the stitch fills the channel. The crossover tools are where my bench differs from most leather blogs — I print my own edge slickers in PETG on the workshop FDM printer and laser-engrave veg-tan panels when a design calls for it. Same workshop, different bench; the printer that makes a reservoir lid one afternoon makes a slicker profile the next. If that interests you, the DIY edge slicker write-up shows the printed profiles I run.
Pattern: From Idea to Cardstock Template
A bag lives or dies on its pattern, and the pattern is where most of the thinking should happen — before any leather gets cut. I draft on graph paper, transfer to cardstock or thin chipboard, and build the whole bag in that stiff paper first as a mock-up taped together. Paper is cheap; a 14-square-foot side is not. Catching that your gusset is 1 cm too short, or that the flap does not clear the buckle, costs nothing in cardstock and costs a panel in leather.
The core pieces for most bags are the same family: a front, a back (often one wrapped panel), two side gussets or one boxed bottom gusset, a flap, straps, and any pockets. I add seam allowance deliberately — for a turned (sewn inside-out) chrome-tan bag you need allowance for the fold, while for a veg-tan bag stitched edge-to-edge with the grain showing you stitch right on the marked line with a consistent setback from the edge. That setback matters: too close and the stitches tear out under load, too far and the edge flaps. My stitching setback guide covers the distances I use for each leather weight.
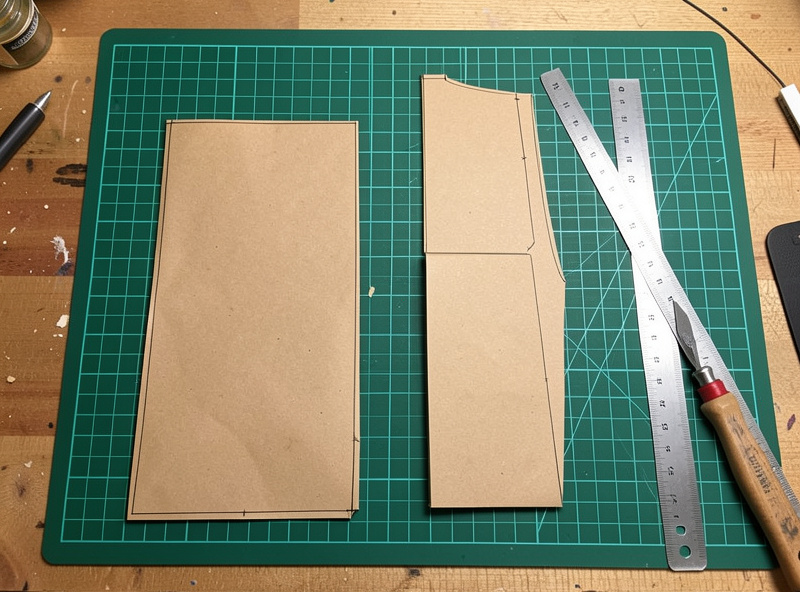
If you want a fully worked example before designing your own, two project guides on the site take you start-to-finish: the leather tote bag pattern and full build is the cleanest first bag, and the leather messenger bag pattern guide adds a flap, gusset and buckle closure. Building one of those from a known-good pattern teaches the moves faster than designing blind, and you can adapt the templates afterward. I keep my own patterns as cut chipboard, labelled and hung on a nail, because a pattern you can re-use is worth the hour it took to perfect.
Cutting and Skiving the Panels
Cutting is where a bag’s accuracy is won or lost, because two panels that are stitched together have to be the same length or the seam puckers. I weigh the pattern down on the grain side, score once with a light pass, then commit with a firmer second pass — sawing back and forth frays the edge and you will pay for it later when you try to slick it. On long straight runs I clamp the steel straightedge so it cannot creep. For curves I cut wide and refine to the line, because you can always remove more leather and you can never add it back.
Skiving is the step beginners skip and regret. Anywhere two layers overlap — a folded edge, a strap end, a gusset seam — the doubled thickness makes a lump that looks clumsy and stitches badly. I skive those overlaps thinner with a French skiver or a paring knife kept scary-sharp, taking the underside down so the joint lies flat. A bag with skived overlaps reads as considered; one without reads as a kit. The skiving knife guide covers the blades and the sharpening that makes them work, because a dull skiver tears rather than pares and that is the whole frustration people blame on the technique.
Assembly: Riveted vs Stitched Construction
Every bag is held together by stitches, rivets, or both — and choosing where each one belongs is a real design decision, not a style preference. A hand saddle stitch is stronger over a long seam than machine stitching and it does not unravel if one stitch fails, because each pass locks against the last. Rivets are mechanical, fast, and brilliant at concentrated stress points — a strap anchor, a handle root, the top of a gusset — where a stitch line alone would slowly work loose under repeated load.
My default is to stitch the structural seams and rivet the stress points, which gives you the longevity of hand stitching and the bombproof anchoring of a rivet exactly where the bag gets yanked. I lay out the full argument — strength, repairability, looks and where each fails — in the riveted vs stitched leather bags comparison, which is worth reading before you commit a construction method to an expensive hide. For the saddle stitch itself, two needles and the lock, my saddle stitch tutorial is the technique foundation, and saddle stitch vs machine stitch explains why I hand-stitch small goods by choice.
Thread choice matters more on a bag than anywhere else because the seams are long and load-bearing. I match thread diameter to iron pitch — 0.8 mm waxed poly for most bag seams — and tension every stitch the same so the line looks like a machine made it even though a hand did. If you are unsure which thread to run, the thread comparison weighs linen against poly and nylon, and best stitch length covers SPI for bags versus wallets.
Hardware: Rivets, Buckles, Snaps and D-Rings
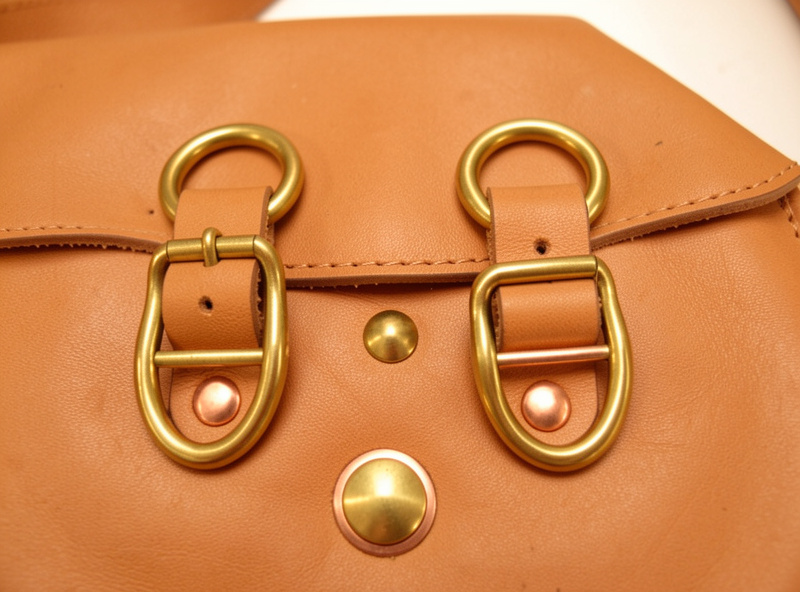
Hardware is the part most people under-budget, and it is what your bag is judged on at arm’s length. A bag full of thin pot-metal rivets and a stamped buckle will look cheap no matter how good the leather is; solid brass, copper or stainless in the right size reads quality instantly. I size rivets to the leather thickness — the post has to be long enough to set cleanly but not so long it mushrooms over — and I always test-set on a scrap of the exact stack before committing to the bag.
For rivets specifically, the choice between copper, brass and stainless is about both looks and load; my best rivets for leather breakdown covers sizing and which metal for which job, and the broader leather hardware guide covers snaps, buckles and setting tools. A basic assortment of copper rivets with a setter covers most bag stress points. Whatever you buy, set one on scrap first — a rivet set badly is worse than no rivet, because it tears the hole and you cannot un-punch it.
Lining a Leather Bag
A lining does three quiet jobs: it hides the flesh side and the seam backs, it adds structure and a place to mount interior pockets, and it stops keys and pens from scuffing the grain from the inside. Not every bag needs one — a rugged veg-tan tote can run unlined with a slicked interior — but a laptop bag or a dress satchel almost always wants a lining for the finished feel and the padding. The choice is leather lining, fabric lining, or a thin pigskin, and each changes the weight, cost and drape of the bag.
The trick most people get wrong is gluing the lining flat and trapping a wrinkle, or lining before they have planned the pockets, which then have to be retrofitted badly. I plan the interior first — pockets, pen slots, a zip if it earns its place — then line, then assemble, in that order. The full method, including how to handle the top edge where lining meets body, is in the lining a leather bag guide, and the leather dopp kit build is a smaller project that teaches lining and gussets on a forgiving scale before you risk a full bag.
Edge Finishing: The Detail That Reads as Quality
If I could make every new bag-maker obsess over one thing, it would be the edges. The beveled-sanded-slicked-waxed edge is the single biggest tell between a piece that looks made and one that looks bought — more than the stitch, more than the leather, more than the hardware. A raw cut edge announces “hobby project” from across a room; a burnished edge that looks turned rather than cut announces the opposite. And it is almost entirely free — it costs time and technique, not money.
The sequence on veg-tan is fixed: bevel both edges of the panel to knock off the sharp corners, sand up through the grits from coarse to fine, wet the edge with Tokonole or gum tragacanth, then slick it hard with a profiled slicker until the fibers lay down and gloss up, and finish with a wax pass. I run slickers I printed in PETG sized to specific edge weights, which is the kind of dialed-in control most benches do not bother with. Chrome-tan edges are a different problem — they do not slick the same way and usually get folded or painted instead. The full sequence, grit progression and compounds live in the leather edge finishing guide; do not skip it, because a great bag with raw edges is a good bag wearing the wrong shoes.
Dyeing and Conditioning the Finished Bag
Most of my bags are veg-tan dyed at the panel stage, before assembly, because dyeing flat panels is far easier than dyeing a stitched bag with shadowed corners you cannot reach evenly. I dye, buff, condition, then seal — the stack order matters and skipping the buff between coats is how you get rub-off on someone’s white shirt. For an even field on a large panel I reach for the airbrush and a thinned dye; a sponge or dip works for smaller pieces. Custom colors within one family — mahogany, oxblood, tan — I mix and record so I can match a second panel later.
After dye comes a light conditioning with neatsfoot oil to put suppleness back into leather the dye dried out, then a seal — a neutral acrylic like Fiebing’s Resolene, or a carnauba creme — to lock color and shrug off rain. The full chemistry, coat counts and the why-veg-tan-and-chrome-tan-take-color-differently is in the leather dyeing guide. One caution from experience: condition lightly and let it rest overnight before sealing, because oil that has not absorbed will bloom under a topcoat and you will be stripping it back with deglazer.
Common Mistakes That Ruin a First Bag
Almost every first-bag failure I have seen traces back to one of a handful of mistakes, and all of them are avoidable once you know to watch for them. The biggest is mismatched panel lengths — two pieces stitched together that are not actually the same length, which puckers the seam and torques the whole bag out of square. Cut your mating panels from the same pattern piece flipped, and check them edge-to-edge before you punch a single hole.
The second is the wrong leather weight, usually too light: a tote that collapses or a flap that will not hold a fold because someone built a structured pattern in 3 oz when it wanted 5–6 oz. The third is unskived overlaps that bulk up the seams into lumps. The fourth, and the one that haunts the most otherwise-good bags, is raw edges — hours of stitching undone by skipping the bevel-sand-slick sequence. And the fifth is setting hardware on the bag without testing on scrap first, then tearing a hole you cannot repair on a near-finished piece. None of these are skill ceilings; they are just steps that get skipped under impatience. Slow down at the cut, the skive, and the edge, and a first bag comes out looking like a fifth.
Project Roadmap: Which Bag to Build First
If you are standing at the start of this with a side of leather and a stack of tools, build in this order. Start with a tote — flat panels, simple seams, no closure to fuss, and it teaches cutting, stitching and edge finish at bag scale without a flap or buckle to get wrong. Then build a messenger, which adds a gusset, a flap and a buckle, then a laptop bag, which adds a lining, padding and tighter tolerances. By the third bag, the strap, the hardware, the lining and the edges are all habits, and you are designing your own patterns instead of following mine.
That progression is deliberate — each bag adds exactly one new hard skill on top of the last, which is how you build competence without the discouragement of attempting everything at once. Leatherwork is the patience-discipline hobby: slower than welding, faster than dry-aging beef, and demanding the same steady focus all three reward. A bag is the project where that patience finally shows up as something you carry every day.
Frequently Asked Questions
How much leather do I need to make a bag?
A medium structured bag needs roughly 12 to 18 square feet, which is one full side or double-shoulder of veg-tan. Straps and handles come from the firm bend at 8 to 10 oz, separate from the body leather. Always buy 20 percent extra for cutting mistakes and grain defects.
Should a leather bag be veg-tan or chrome-tan?
Use 5 to 6 oz veg-tan for a structured bag that holds its shape and takes a burnished edge. Use 3 to 4 oz chrome-tan for a soft, slouchy body that drapes. Veg-tan tools, molds and slicks; chrome-tan stays soft and gets folded or painted edges instead.
Do I have to hand-stitch a leather bag, or can I rivet it?
Most durable bags use both. Hand saddle stitch the long structural seams because it outlasts machine stitching and will not unravel if one stitch fails, and rivet the concentrated stress points like strap anchors and handle roots where a stitch alone slowly works loose.
How long does it take to make a leather bag by hand?
A first hand-stitched bag in 5 to 6 oz veg-tan typically takes 18 to 30 hours spread across a week, including pattern work, cutting, skiving, stitching, hardware and edge finishing. Edge finishing alone can be several hours, and it is the step that most separates a made bag from a bought one.
Does a leather bag need a lining?
Not always. A rugged veg-tan tote works unlined with a slicked interior. A laptop bag or dress satchel benefits from a lining for padding, hidden seam backs and mounted interior pockets. Plan the interior pockets before lining, then assemble, or you will retrofit pockets badly.
What is the most important step for a professional-looking bag?
Edge finishing. The bevel, sand, slick and wax sequence is the single biggest visual tell between a bag that looks made and one that looks bought, more than the stitch or the hardware, and it costs only time. Raw cut edges read as a hobby project instantly.
Related Guides
- How to Make a Leather Tote Bag: Pattern and Full Build
- Leather Messenger Bag Pattern Guide
- Leather Laptop Bag Making Guide
- Leather Bag Strap Guide
- Riveted vs Stitched Leather Bags
- Lining a Leather Bag Guide



