
A laptop bag has a job most leather bags do not: it has to protect an expensive, fragile machine from drops, corners and rain, while still looking like…
A laptop bag has a job most leather bags do not: it has to protect an expensive, fragile machine from drops, corners and rain, while still looking like something you want to carry into a meeting. This leather laptop bag making guide covers the build that gets both right — sizing the sleeve to the machine, padding the lining so it actually cushions, choosing a heavier 6–8 oz veg-tan that resists crushing, and finishing it cleanly. Get the internal dimensions wrong by even a centimeter and the laptop either rattles loose or will not slide in; this is the one bag where measuring twice is non-negotiable.
I build laptop bags as the graduation project after a tote and a messenger, because they combine everything: structure, a lining, padding, tight tolerances and hardware that has to feel trustworthy. The leather is heavier, the stakes are higher, and there is no room for the slop a rugged tote forgives. If you have not built a structured bag before, start with the leather bag making guide for the fundamentals, then come back — this one assumes you can already cut clean panels and saddle stitch a straight seam.
Measure the Machine First
Everything in a laptop bag starts from the exact dimensions of the laptop, in its case if you use one, measured with calipers or a steel rule: width, height and crucially thickness, because thickness is what people forget. Then add clearance for the padding and the lining — I add about 8–12 mm to each internal dimension so the machine slides in without forcing but does not swim. A bag built to the bare laptop dimensions will not close once the padding takes up space; a bag built too generous lets the machine shift and slam against the bottom seam on every step.
The table below is the starting-point internal sizing I use before adjusting for a specific machine and padding thickness. Always verify against your actual laptop — screen sizes are diagonal measurements and do not tell you the footprint, which varies by brand and bezel.
Before cutting a single piece of leather, I build the whole bag in cardstock and slide the actual laptop in and out of the mock-up. This catches the dimension you will otherwise discover only after stitching: whether the opening is wide enough for the machine to clear the lip without scraping, and whether the depth lets the flap close over a fully loaded bag. A paper mock-up costs nothing; recutting an 8 oz body panel costs the best leather on your bench. I keep the corrected cardstock as a labelled template so the next bag for the same machine starts from a known-good pattern.
| Laptop size | Typical footprint | Internal width | Internal height | Body leather |
|---|---|---|---|---|
| 13 inch | ~30 x 21 cm | 32 cm | 23 cm | 6 oz veg-tan |
| 14 inch | ~32 x 22 cm | 34 cm | 24 cm | 6–7 oz veg-tan |
| 15–16 inch | ~36 x 25 cm | 38 cm | 27 cm | 7–8 oz veg-tan |
| 17 inch | ~40 x 28 cm | 42 cm | 30 cm | 8 oz veg-tan, reinforced |
Choosing Leather and Padding
A laptop bag wants the heaviest body leather of any bag in this cluster — 6–8 oz (2.4–3.2 mm) veg-tan — because the leather itself is the first line of crush protection. I cut the body from a firm tannery side — Hermann Oak publishes its weight ranges, so a 6–8 oz side is a known quantity rather than a gamble. Lighter leather flexes and lets a corner impact reach the screen; heavier leather spreads and absorbs it. For a 17-inch machine I go to a full 8 oz and reinforce the bottom panel with a doubled, skived layer, because the bottom takes every set-down impact.
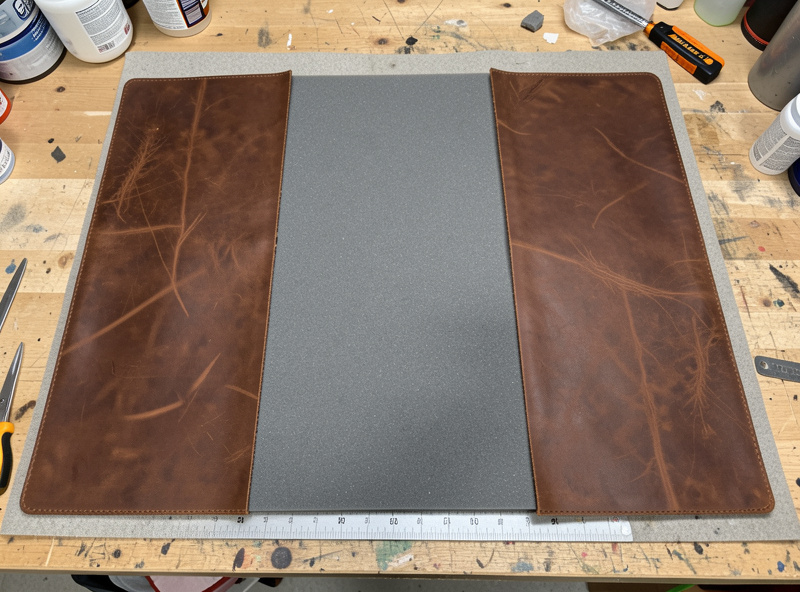
Padding is the second line of defense and it goes in the lining, not the leather. I use a closed-cell foam (the kind that does not compress permanently) cut to line the front, back and bottom, sandwiched between the body leather and a soft lining. Avoid soft open-cell foam — it crushes flat within months and stops protecting. The lining choice matters here too; a brushed pigsuede or a smooth chrome-tan lining slides the laptop in without scuffing. The veg-tan versus chrome-tan breakdown explains why I use chrome-tan for the lining and veg-tan for the body.
Building the Padded Lining
The padded lining is what separates a laptop bag from a leather box you put a computer in. I build it as a sub-assembly: foam cut to the internal panel dimensions, bonded to a thin lining leather, then this padded panel mounted inside the body before the bag is closed up. The order matters — you cannot insert a proper padded lining into a finished bag, so the lining goes in while the body panels are still open and reachable. This is the same plan-the-interior-first discipline every good bag needs.
Mount interior pockets to the lining at this stage too: a slim document sleeve on the back wall, a row of pen slots, maybe a padded divider if you carry a tablet alongside the laptop. Use a lighter 3–4 oz leather for these so the bag does not balloon in weight. The full method for handling the top edge where lining meets body, and the material trade-offs, will be covered in the dedicated lining guide; for a smaller practice run, the leather dopp kit teaches lining and gussets on a forgiving scale.
Assembly: Stitch the Structure, Rivet the Stress
With the padded lining built and pockets mounted, the bag assembles like any structured bag — but the seams here are carrying a heavier, denser load, so I do not cut corners on the stitch. Saddle stitch the structural perimeter by hand with two needles and 0.8 mm waxed polyester thread, opening each hole with a stropped awl so the thread seats tight. The hand stitch matters more here than anywhere: a seam that fails on a bag holding a 2 kg laptop is a dropped machine, and a saddle stitch will not unravel from a single broken stitch the way a machine lock can.
Rivet the stress points — the strap anchors and the top corners of the gusset where the loaded bag pulls hardest. Set rivets on scrap of the exact stack first; the laptop bag’s doubled, padded panels make for a thick stack that needs a longer rivet post than a wallet ever would. My saddle stitch tutorial covers the stitch, the hardware guide covers setting rivets in thick stacks, and stitch length covers the SPI I run on heavy bag seams.
Vertical or Horizontal, and the Closure
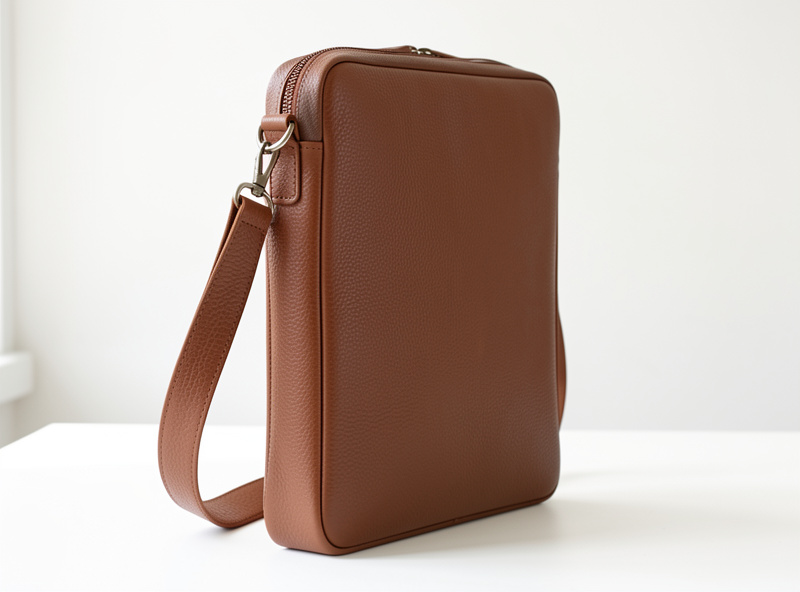
Laptop bags come in two basic orientations and the choice changes the whole pattern. A horizontal briefcase-style bag slides the laptop in flat along its width — classic, professional, and easy to access on a desk. A vertical satchel carries the machine on its short edge, which makes a more compact footprint on a crowded train but means the laptop drops toward the bottom seam, so the bottom padding has to be that much better. I default to horizontal for anything 15 inches and up, because a heavy large machine standing on its edge puts more stress on the bottom corner.
The closure has to keep the laptop secure without being slow to open at a security checkpoint or a desk. A full flap with a buckle is the most protective and the most weatherproof, covering the top opening completely; a magnetic-snap flap is faster but less secure; a zip-top is fast and keeps rain and pickpockets out but adds a hardware failure point and is harder to install cleanly in heavy leather. I lean toward a buckled flap on veg-tan bags because it ages into the leather and seals the opening against weather, which a laptop bag genuinely needs.
Strap, Handle and Carry
A loaded laptop bag is heavy, so the strap and handle have to be built for real weight, not decoration. I cut the strap from firm 8–10 oz bridle, wide enough to spread the load on the shoulder — 4–5 cm — and anchor it through riveted-and-stitched D-rings on reinforced patches so it pivots and the load spreads. A top handle, doubled and stitched, lets you grab the bag quickly without unshouldering the strap. I cover strap construction, doubling and adjustment in detail in the broader bag making guide’s strap section, and the same firm bend leather rules apply: strap from the bend, never the belly.
Whatever hardware you choose, oversize it slightly for a laptop bag. A buckle or D-ring that looks fine on a light tote can be the weak link under 2–3 kg of machine and accessories. Solid brass or stainless, sized up, reads reassuring and performs that way.
One detail worth planning: where the charger and cables live. A loose charger bouncing against the laptop inside the same compartment is how screens get pressure-cracked over time. I build a separate padded or gusseted pocket for the brick and cables, divided from the laptop sleeve, so the heavy charger cannot slam into the machine. It is a small addition at the lining stage and a large difference to how the bag protects over years of daily carry.
Edge Finishing and Weatherproofing
Heavy veg-tan takes a beautiful slicked edge, and on a laptop bag the thick edges are prominent, so the bevel-sand-slick-wax sequence really shows. I bevel both edges of every panel, sand up through the grits, wet with Tokonole and slick hard with a profiled slicker, then wax. On 8 oz leather the edge is broad enough that a sloppy finish is glaring and a clean one is striking. The full sequence is in the edge finishing guide.
Because a laptop bag goes out in the rain, I seal it more thoroughly than a tote — a neutral acrylic topcoat such as Fiebing’s Resolene, or a carnauba creme, over dyed veg-tan, with extra attention to the bottom panel that meets wet ground. For body leather, a heavier veg-tan side is the right buy; you can browse 8 oz veg-tan sides on Amazon for the body weight, though no topcoat makes leather fully waterproof — it buys you time to get inside, not a submarine. As an Amazon Associate I earn from qualifying purchases.
Build a laptop bag well and it becomes the piece people ask you about — heavier leather, tighter tolerances and a padded lining add up to something that protects a real machine and looks the part doing it. It is the most demanding bag in this cluster, which is exactly why it is the one worth building once your tote and messenger are behind you. Take the measurements seriously, pad with closed-cell foam, and finish the edges, and the bag will outlast several of the laptops it carries.
Frequently Asked Questions
What leather weight is best for a laptop bag?
Use 6 to 8 oz veg-tan for the body, the heaviest of any everyday bag, because the leather itself is the first line of crush protection. For a 17-inch machine go to a full 8 oz and reinforce the bottom panel with a doubled, skived layer that takes every set-down impact.
How much clearance should I add for laptop fit?
Add about 8 to 12 mm to each internal dimension over the laptop’s actual size measured in its case, to allow for padding and lining. Build to the bare laptop dimensions and the bag will not close; build too generous and the machine shifts and slams the bottom seam.
What padding should I use in a leather laptop bag?
Use closed-cell foam that does not compress permanently, cut to line the front, back and bottom, sandwiched between the body leather and a soft lining. Avoid soft open-cell foam, which crushes flat within months and stops protecting the machine.
Should a laptop bag be lined?
Yes. A laptop bag needs a lining to hold the padding, hide seam backs, mount interior pockets and give a smooth surface the machine slides against without scuffing. A brushed pigsuede or smooth chrome-tan lining works well. Build the padded lining before closing the bag.
Is a hand-stitched laptop bag strong enough for a heavy machine?
Yes, and it is stronger than machine stitching for this job. A hand saddle stitch will not unravel from a single broken stitch the way a machine lock can, which matters on a seam carrying a 2 kg laptop. Rivet the strap anchors and gusset corners where load concentrates.
Further Reading
- Leather Bag Making: The Complete Guide
- Leather Messenger Bag Pattern Guide
- Leather Edge Finishing: Bevel to Burnish
- Types of Leather: Tannage, Grade and Weight
- Leather Bag Strap Making Guide



