Leather projects for beginners follow a difficulty curve that turns a complete novice into a confident builder of wallets, belts, and small bags within 30 to 50 hours…
Leather projects for beginners follow a difficulty curve that turns a complete novice into a confident builder of wallets, belts, and small bags within 30 to 50 hours of practice. The smartest first three projects are a pen sleeve, a 3-slot card holder, and a bifold wallet — that sequence covers all six core skills (cut, edge, stitch, dye, hardware, pattern), uses under $40 of materials combined, and produces three usable items rather than three practice scraps.
This guide covers every project decision a beginner faces: which project to start with, why “beginner” project lists on most blogs are wrong, how to read a pattern, what to build after the first wallet, and which projects are secretly intermediate (holsters, structured bags, tooled belts). Linked deep-dives walk through specific builds end-to-end.
The right first project determines whether someone stays with leatherworking or quits. I picked a bifold wallet as my first build and it took 14 hours, came out crooked, and almost made me quit. A pen sleeve or simple card holder finishes in under 3 hours and teaches the same four skills on a piece small enough that mistakes do not waste material. The project order below reflects exactly what I would do differently: card holder first, bifold second, belt third. Every skill stacks.
The First Three Projects, In Order
Most beginners pick their first project from a Pinterest board and end up with something they cannot finish. The right approach is to build three small projects in a specific sequence — pen sleeve, card holder, bifold wallet — then choose your fourth project based on what you actually enjoyed. That sequence gives you a fast win, then a real skill check, then a usable everyday item, in 14 to 20 total hours (2-3 for the pen sleeve, 4-5 for the card holder, 8-12 for the bifold).
Project one is the pen sleeve: a 3-by-6 inch rectangle, two cuts, a fold, and 12 stitches along one edge. Total time 2 to 3 hours; cost under $6 in materials; teaches cutting, edge finishing, and saddle stitch on the simplest possible piece. Most pen sleeves come out usable on the first try, which builds confidence for project two.
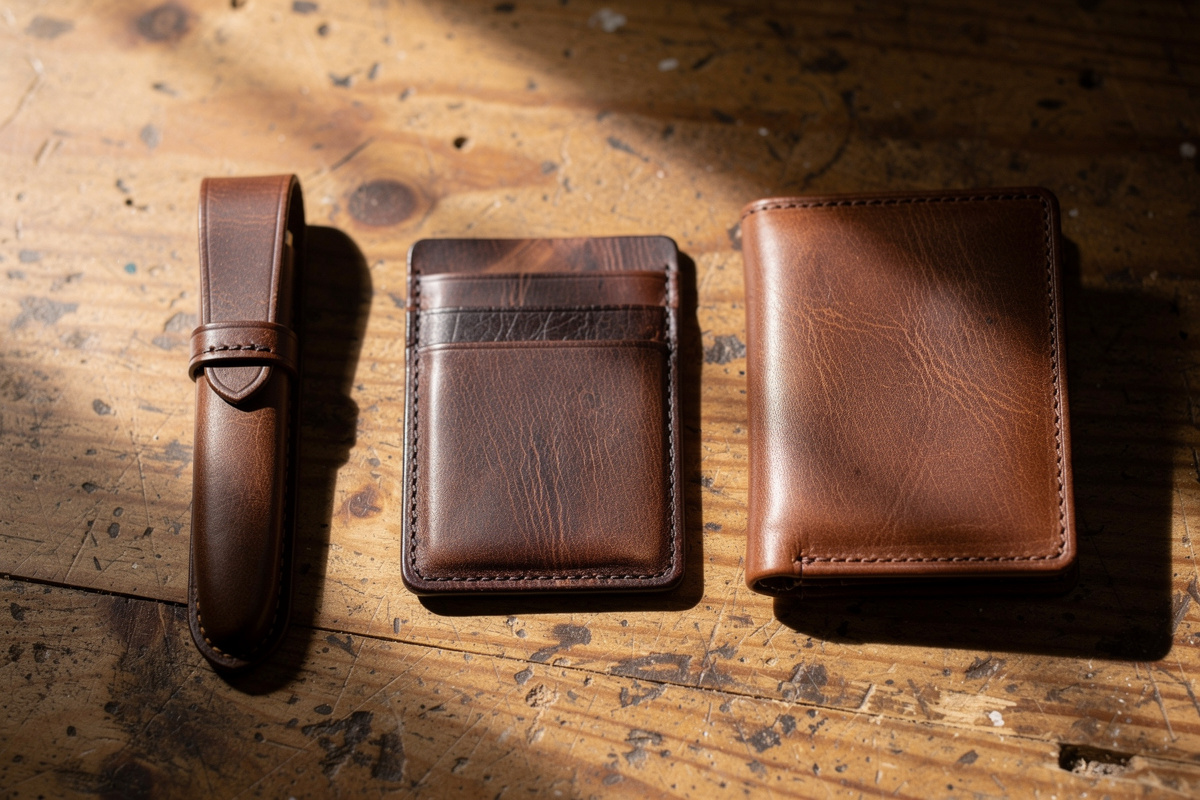
Project two is the 3-slot card holder. Three pieces, four cuts, slot punching for cards, saddle stitching around the perimeter, and full edge finishing. Total time 4 to 5 hours; cost about $11; teaches the fundamentals of pattern alignment, multi-piece assembly, and accurate hole punching. The leather card holder pattern guide covers the exact dimensions and the build sequence.
Project three is the bifold wallet. Five pieces, eight cuts, multiple slot punches, two-layer stitching, and a snap closure. Total time 8 to 12 hours; cost about $22; teaches everything from project two plus interior layering, hardware setting, and folded-edge finishing. The leather bifold wallet build guide walks through the full sequence with photos for each step.
For a refresher on where projects fit in the broader skill stack, the leather working for beginners hub covers the six core skills (cut, edge, stitch, dye, hardware, pattern) in sequence. Each subsequent project repeats those skills with one new variable layered in — the bifold adds hardware and interior layering, the belt adds buckle attachment, the bag adds 3D form construction.
Beginner vs Intermediate: How to Tell Before You Buy Material
“Beginner project” on Pinterest and YouTube is a marketing label, not a skill assessment. A “beginner holster” tutorial assumes you can wet-form leather, set 12 perfectly-aligned rivets, and use a sewing machine. A genuinely beginner project has fewer than 6 cuts, fewer than 4 separate pieces, no curved cuts, no hardware that requires a press, and no skiving or splitting required. Apply that test before starting any project.
| Project | Skill Level | Hours | Cost | Why That Level |
|---|---|---|---|---|
| Pen sleeve | Absolute beginner | 2-3 | $6 | 2 cuts, no hardware, no curves |
| 3-slot card holder | Beginner | 4-5 | $11 | 4 cuts, slot punches, no curves |
| Bifold wallet | Beginner+ | 8-12 | $22 | 8 cuts, slot punches, snap closure |
| Belt with snap-buckle | Beginner+ | 5-8 | $28 | 2 cuts, 1 buckle, 6 rivets |
| Tool roll / pen roll | Beginner+ | 6-9 | $18 | 5 cuts, 2 ties, no hardware |
| Knife sheath (pancake) | Intermediate | 10-15 | $25 | Wet-forming required, curved cuts |
| Backpack | Advanced | 30-50 | $80+ | 20+ pieces, structured form, hardware |
| Holster (concealed carry) | Advanced | 15-25 | $40 | Wet-forming, retention engineering, safety-critical |
The gap between “beginner+” and “intermediate” is mostly about wet-forming and curved cuts. A holster needs to be molded around the actual firearm using water and pressure (an entire skill subsystem); a backpack needs structured pieces that hold their shape under load. Skip these until you have completed at least 8 simpler projects and know your tools cold.
Reading a Leather Pattern
Patterns are the templates you cut leather against. They come in three formats: paper PDF (print, glue to cardstock, cut out), digital SVG (load into design software for laser/CNC cutting), and physical acrylic templates (laser-cut, reusable, $12-25 each). For first projects, paper PDF glued to cardstock is the universal beginner format.
A complete pattern includes: piece outline (shape to cut), grain direction marker (arrow showing which way the leather grain should run), fold lines (where the leather bends, marked with dashes), stitch line markers (small dots or grooves showing where to punch chisel holes), hardware position markers (circles or X marks for rivets, snaps, slots), and a piece-count list (e.g., “Cut 1 exterior, Cut 2 pocket linings”). Patterns missing any of these require interpretation; high-quality patterns are explicit.
The single mistake every beginner makes when reading patterns: ignoring grain direction. Cow leather stretches more across the grain than along it. A wallet exterior cut against the grain will warp and curl after a few weeks of pocket use; cut along the grain, it stays flat. The arrow on the pattern tells you which way to orient the piece on the hide. Always check before cutting.
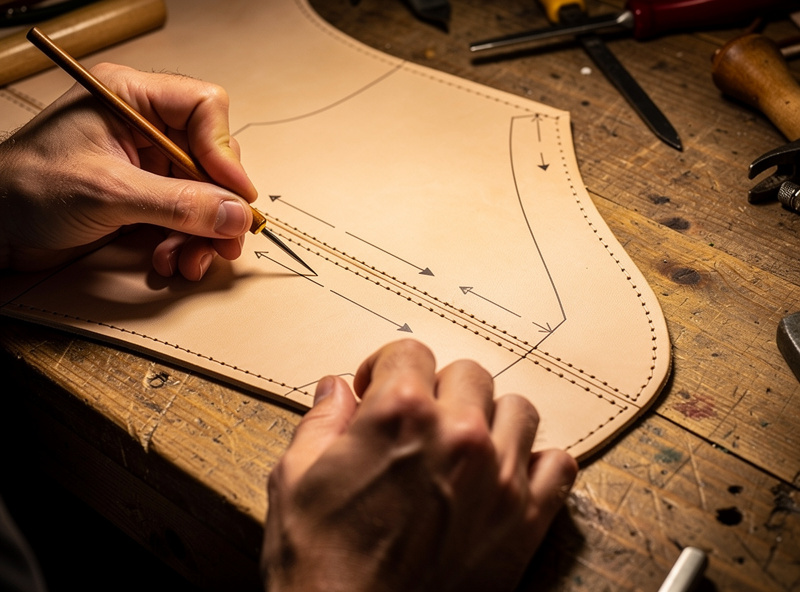
Pattern transfer techniques: trace with a fine awl (scribes a thin line in the leather surface), trace with a silver pencil (rubs off after construction), trace with masking tape (peels off cleanly), or use spray adhesive to glue the pattern directly to the leather (most accurate, requires solvent to remove pattern after cutting). For first projects, fine awl scribe is the most forgiving — the line is visible without being permanent.
Cutting Techniques: Knife, Scissors, Punch, Laser
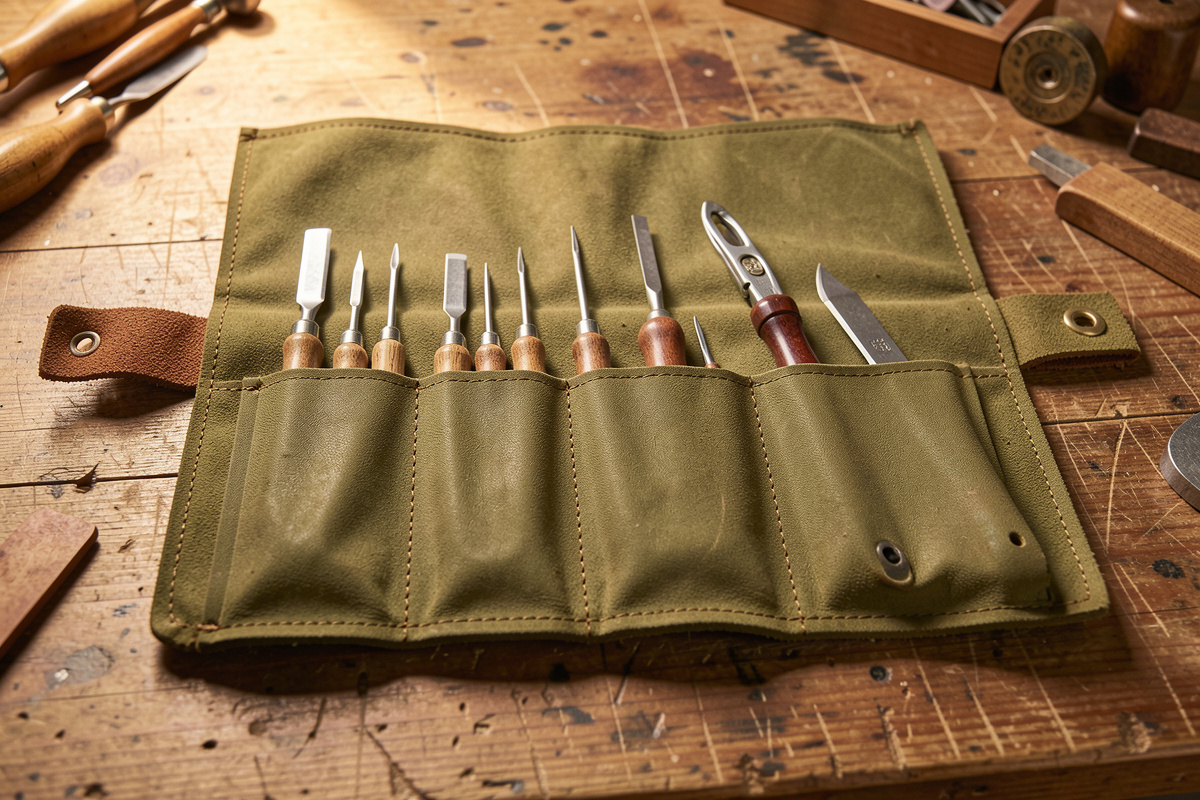
Leather cuts with a sharp utility knife (cheapest, most beginner-friendly), a head knife or round knife (faster on thicker stock, requires sharpening skill), heavy-duty scissors (acceptable for thin lining stock only), strap punches (specialized rectangular punches for slots), or a laser/CNC cutter (production scale). Most beginner projects can be built start-to-finish with a sharp utility knife.
Cut against a steel ruler on a self-healing cutting mat. Make multiple light passes rather than one heavy pass — even very sharp knives drift on heavy leather under heavy pressure. Three light passes produce a cleaner cut than one heavy pass, and reduce the risk of the blade slipping into your fingers. For curved cuts, replace the steel ruler with a flexible plastic curve template or freehand-cut along a scribed line.
The 3D-printed leather tooling guide covers printable cutting jigs, slot punches, and pattern blocks that eliminate measurement errors on repeat projects. The laser engraving veg-tan guide covers the laser-cut option for production-scale cutting; the CNC-cut leather patterns guide covers desktop CNC cutting with a knife mill or drag knife.
Slot punches are the specialized tool for card slots in wallets. Standard sizes are 30 mm wide (credit-card slots), 50 mm wide (longer card and ID slots), and 60 mm wide (large pocket slots). Buy the 30 mm size first; it covers card holders and bifold wallet card pockets. Cheaper alternatives (drilling two round holes and connecting with a knife cut) work but produce ragged ends.
Stitching Project Construction
Hand-stitched leather projects use one stitch (the saddle stitch) and two sequencing decisions: when to stitch in the build order, and how to handle layered pieces. The saddle stitch tutorial walks through the basic stitch; the stitch length guide covers spacing decisions.
Sequence rule: stitch interior pieces first, then attach to exterior, then stitch the perimeter. Stitching exterior first traps interior pieces against the inside surface and produces visible alignment errors. Build inside-out: card pockets onto interior, interior onto exterior, perimeter last.
Layered stitching (where two or three layers meet at one stitch line) requires longer chisels and matching needles. A 4-layer assembly stitches with a 4-prong chisel that punches all four layers at once; trying to stitch each layer separately and then align produces drunken stitch lines from accumulated error. A stitching pony holds the assembly while you punch holes; clamp pressure should be firm enough to prevent slip but light enough not to compress the leather permanently.
Thread length math: for any project, cut thread roughly 4 times the perimeter length you intend to stitch. A bifold wallet with 24 inches of stitch line needs 96 inches of thread. Cutting too short forces a mid-stitch knot (looks bad and weakens the seam); cutting too long wastes material but is otherwise harmless. Veterans add 6 inches of margin to be safe.
Dyeing and Finishing Projects
Most projects benefit from dyeing before stitching, because dye on a stitched piece pools around the thread and produces visible halos. The standard sequence is cut all pieces, dye all pieces flat, dry overnight, stitch assembled, then finish edges. Some advanced techniques (deliberate stitch-halo styling) reverse this; for beginners, dye-first is the safer call.
The best leather dye for veg-tan review covers the 8 main dyes for project work; the dye without streaks tutorial covers application technique. For first projects, Fiebing’s Pro Oil Dye in dark brown is the most forgiving option — wide working window, even penetration, and rich final color.
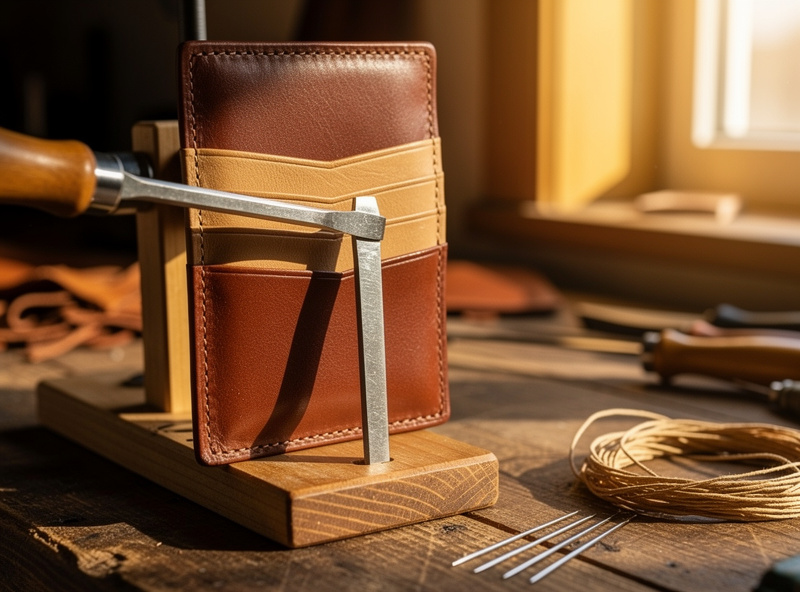
Edge finishing happens after stitching for joined edges and before stitching for open edges. The burnishing tutorial walks through the four-step edge sequence (bevel, sand, dampen, burnish). On wallet exteriors, the open edges of each piece are finished individually before assembly; the joined perimeter edge is finished after stitching.
The hardware step typically comes between stitching and final edge finishing. For projects with hardware (snap on a wallet, buckle on a belt, magnetic clasp on a bag), set hardware after stitching the relevant area is done — this lets you punch hardware holes through pre-stitched leather, which holds the layers in alignment under the punch tool.
Eight Common Project Failures
Beginner projects fail in predictable ways. Diagnose first, then fix.
Failure 1: Pieces do not align after cutting. Cause: pattern shifted during tracing, or knife drifted during cutting. Fix: re-cut from fresh leather using the original pattern pinned at three points to prevent shift.
Failure 2: Stitch line drifts away from edge. Cause: chisels punched at wrong distance from edge. Fix: future projects, mark stitch line at consistent distance with a wing divider before chiseling.
Failure 3: Wallet does not fold flat after construction. Cause: leather grain ran wrong direction (grain pulls to one side). Fix: future projects, always cut wallet pieces with grain running parallel to the long axis.
Failure 4: Slot punches tear during use. Cause: slot too small for the cards (or item) or punched too close to edge. Fix: re-design pattern so slot is at least 8 mm from edge and 1 mm wider than card on each side.
Failure 5: Snap pulls out under daily use. Cause: snap set in too-thin leather. Fix: future projects, reinforce snap area with a 4 oz patch glued to the back of the closure point before setting snap.
Failure 6: Thread breaks mid-project. Cause: thread too thin for the project, or thread damaged by sharp chisel edges. Fix: switch to 0.8 mm thread for medium projects and 1.0 mm for heavy projects; check chisels for burrs.
Failure 7: Edges fuzz after burnishing. Cause: dull beveler tearing fibers. Fix: strop the beveler, sand to 800 grit, re-burnish. See the edge beveler review for selection.
Failure 8: Project looks “homemade” despite all steps done correctly. Cause: inconsistent stitch tension is the most common; second is uneven dye absorption from skipped prep. Fix: practice stitch tension on scrap; oxalic-acid wipe pre-dye on all future projects.
After the Bifold: Where to Go Next
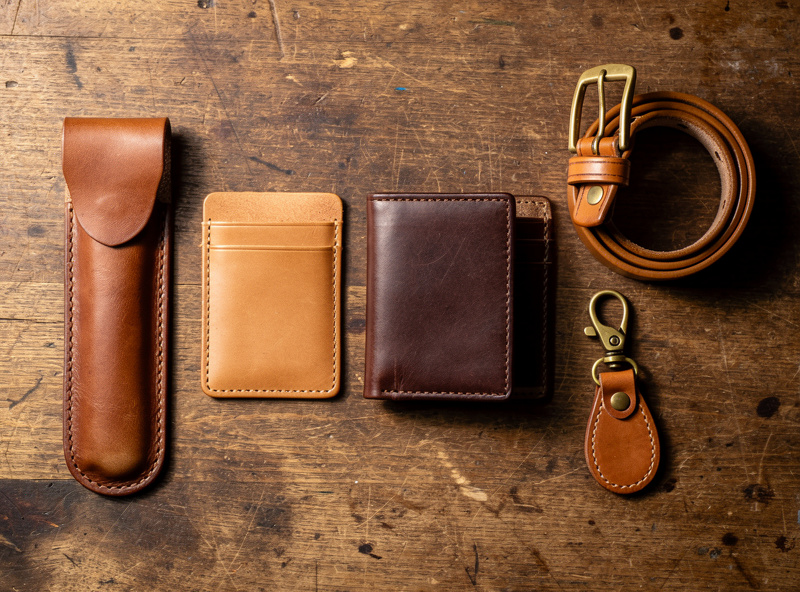
Once you have completed pen sleeve, card holder, and bifold wallet, the next project depends on what you enjoyed. Liked the cutting and pattern work? Try a tool roll or pen organizer. Liked the stitching? Try a small messenger bag or a tote. Liked the dye and finish? Try a tooled belt or a stamped key fob. Liked all of it? Try a structured backpack — it is a 30 to 50 hour project that uses every skill in the stack.
Project four candidates that build on the bifold foundation: a key fob with a swivel snap (introduces hardware and small-piece construction), a watch strap with replaceable buckle (introduces curved cuts and hardware sizing), a simple belt with a snap-on buckle (introduces strap-stock and buckle attachment). All three are 4-to-8 hour projects with $15-30 material cost.
Some advanced projects mix hand-stitched leather with other crafts. Laser-engraved leather project guide covers wallet, patch, and belt designs that combine leather with laser branding. CNC-cut leather patterns and dies covers production-scale cutting for repeat projects. 3D-printed leather tooling covers stamps and burnishers that customize finished pieces. DIY leather edge slickers and burnishers covers printable tooling that improves edge work.
Custom and Specialty Projects
Custom projects diverge from standard patterns to suit specific needs. The most common categories are tooled-Western-style work (stamped patterns, contrasting dye, conchos), audio enthusiast accessories (cable wraps, headphone pad covers, vinyl record sleeves), Everyday Carry (EDC) accessories (knife slips, wallet liners, key fobs), and reenactment / period-correct work (medieval pouches, Civil War accoutrements, frontier holsters).
The custom leather headphone pads guide covers a project that bridges leather work and audio enthusiasm — replacing factory pleather pads on premium headphones with hand-stitched leather. The laser-engraved leather projects guide covers wallet, patch, and belt designs with laser-applied branding. Both are intermediate projects that require completion of the basic three-project sequence first.
Selling custom projects is a separate skill outside the scope of this guide — the how to price handmade leather goods guide and the selling leather goods on Etsy guide cover that territory if it’s ever relevant to you. For now, the focus here stays on building projects you’ll actually use.
For the full tannery ranking and oz-per-part breakdown, the guide to the best leather for wallets covers Hermann Oak, Horween, and Walpier by weight, price, and wallet part.
Frequently Asked Questions
What is the easiest first leather project?
A pen sleeve. It uses a 3-by-6 inch rectangle, two cuts, a fold, and 12 stitches along one edge. Total time 2 to 3 hours; cost under 6 dollars; teaches cutting, edge finishing, and saddle stitch on the simplest possible piece. Most pen sleeves come out usable on the first try.
What can I make with leather as a beginner?
Pen sleeves, 3-slot card holders, bifold wallets, belts with snap-on buckles, key fobs, watch straps, and tool rolls all work as genuine beginner projects. Each requires fewer than 8 cuts, simple hardware, and finishes in under 12 hours. Skip holsters and structured bags until you have completed 8 simpler projects.
In what order should I do beginner leather projects?
Pen sleeve first, then 3-slot card holder, then bifold wallet. That sequence covers all six core skills (cut, edge, stitch, dye, hardware, pattern) in 14 to 20 hours total, produces three usable items, and prepares you to choose your fourth project based on what you actually enjoyed building.
How much leather do I need for a wallet?
A bifold wallet uses about 1.0 to 1.2 square feet of leather including waste. The exterior takes 0.4 sq ft of 4 to 5 ounce stock; the two interior pocket linings take 0.6 sq ft of 2 to 3 ounce stock. Buy a 4 sq ft side and you can build 3 to 4 wallets from it.
What hand tools do I need for a leather project?
Six tools cover the first three projects: utility knife with sharp blades, steel ruler, 4 mm stitching chisel set, two harness needles, stitching pony, and hardwood burnishing slicker. Total cost is closer to 85 to 100 dollars once you price a real stitching pony (Tandy’s own runs about 35 dollars) rather than the roughly 55 dollars sometimes quoted for a bare-minimum set. Add an edge beveler and contact cement for project three (bifold wallet).
How long does it take to make a leather wallet?
A first bifold wallet takes 8 to 12 hours of active work spread over 2 to 3 days (with overnight drying for dye and edge finishing). Time drops to 4 to 6 hours by the third wallet as cutting and stitching become muscle memory. Assembly time is the largest single factor.
Can you make leather goods without a sewing machine?
Yes. Hand-stitched leather goods are stronger than machine-sewn equivalents because each saddle stitch locks independently. A walking-foot industrial leather machine runs roughly 1,500 to 4,000+ dollars new, with entry-level heavy-duty domestic machines starting lower — and is only justified for production volume above 5 to 10 items per week. Hand stitching covers all beginner needs.
Related Guides
- How to Make a Leather Card Holder (Slim Wallet Pattern)
- How to Make a Leather Bifold Wallet
- Custom Leather Headphone Pads
- Laser-Engraved Leather Project Guide
- Leather Working for Beginners: Complete Starter Guide