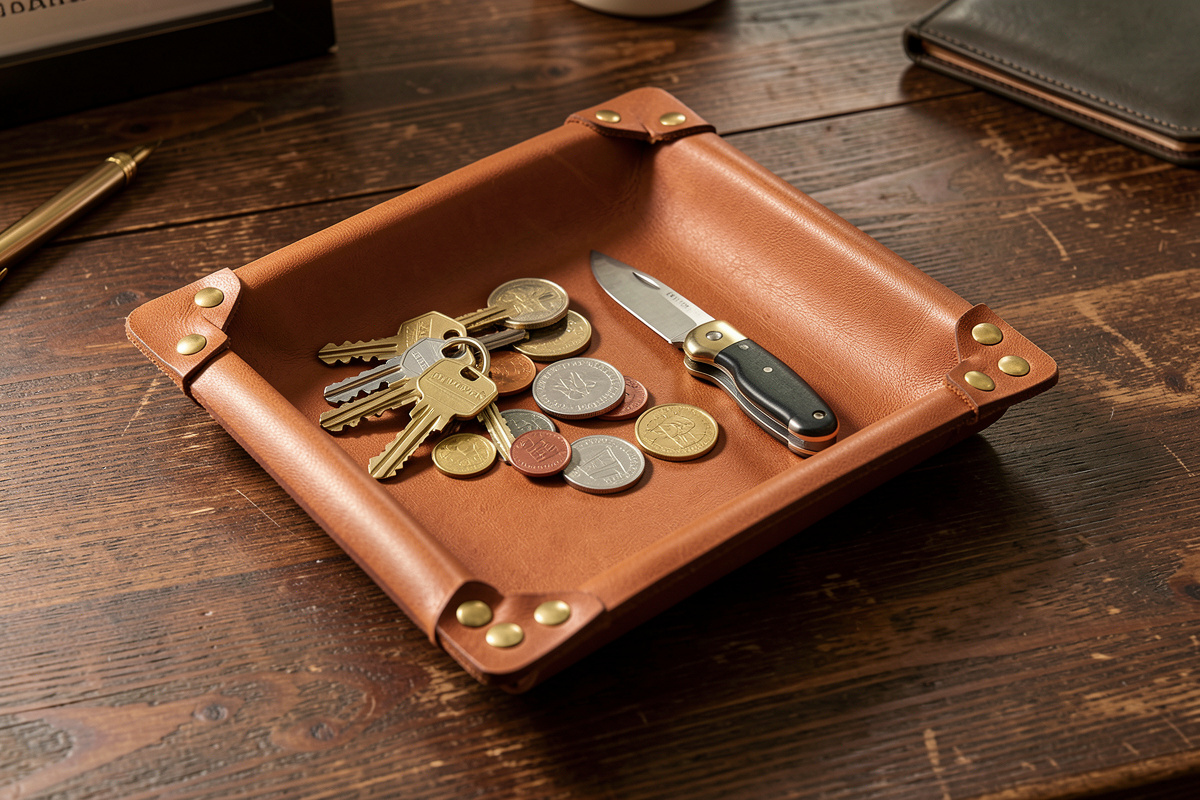
A one-piece leather catchall tray is a cross-shaped blank folded up at four corners and held with a snap at each one. Cut it from 5–6 oz veg-tan,…
A one-piece leather catchall tray is a cross-shaped blank folded up at four corners and held with a snap at each one. Cut it from 5–6 oz veg-tan, skive the corner overlaps, set four line-24 snaps, and you have a tray that folds flat for travel in about an hour of bench time.
This is the project I hand everyone who says they want to try leatherwork but have never cut a piece. There is no lining, no wet-forming, no stitching required — and yet a well-made snap catchall looks like something you would pay forty dollars for in a nice shop. It is also the fastest way to learn two skills you will use forever: skiving a clean overlap and setting a snap that does not tear out. Get those two right on a tray and your wallets will thank you later.
The trap is thinking “it is just four folds, how hard can it be.” The corners are where a catchall is won or lost, and I made mine look homemade for a good while before I understood why. Let me save you those blanks.
Why Make a Catchall From One Piece?
A one-piece catchall has no seams to stitch and no glued joints to fail — the whole tray is a single blank, so its strength comes from the leather and four snaps, not from your stitch line. That makes it the most beginner-proof tray design, and it folds dead flat when you pop the snaps, which a molded tray never will.
The design is genuinely old — cut a plus or cross shape, fold the four arms up, and pin each corner. What makes it clever is that the corners are the only place two layers meet, so that is the only place you have to fuss. Everything else is a flat panel. Because there is no wet-forming, the leather does not even have to be veg-tan for the tray to function, though I still use veg-tan because it holds a crisp fold and takes a burnished edge — a chrome-tan version would flop at the walls and stay floppy. If you are unsure which leather does what, my primer on chrome tan versus veg tan lays out exactly why structure wants veg-tan. This build is one of six in my leather valet tray making guide, and it is the one I would start with. If you would rather skip snaps altogether and let the corners themselves hold the shape, the fully molded approach in wet-forming crisp corners on a tray is the next build up.
What Size and Leather Weight for a Catchall Tray?
For a desk or nightstand catchall, cut a blank around 9 inches square with 1.75-inch walls, from 5–6 oz veg-tan (2.0–2.4 mm). That weight folds cleanly at the corner without cracking and stands up on its own. Go thinner and the walls sag; thicker and the folded corner fights the snap.
Weight is the decision that quietly determines whether your tray looks made or looks sad. I settled on 5–6 oz for catchalls after building a few in 4 oz that could not hold a wall past an inch — they slumped like a soft taco within a day. I also tried 8 oz once, thinking sturdier was better, and the doubled corner was so thick the snap post barely reached and the fold cracked white on the grain. Five to six ounces is the sweet spot for this specific fold-and-snap geometry. The full logic of matching weight to wall height is in best leather weight for trays, and it is worth reading before you cut, because the wall height and the weight have to agree.
Finished footprint is up to you, but keep the walls between 1.5 and 2 inches. Taller than that in 6 oz and the unsupported wall starts to lean; if you want a deep tray, either step up the weight or switch to a molded design. For a first tray, 9 inches square with 1.75-inch walls gives a roughly 5.5-inch floor — big enough for keys, a wallet, a watch, and loose change.
How Do You Cut the One-Piece Blank?
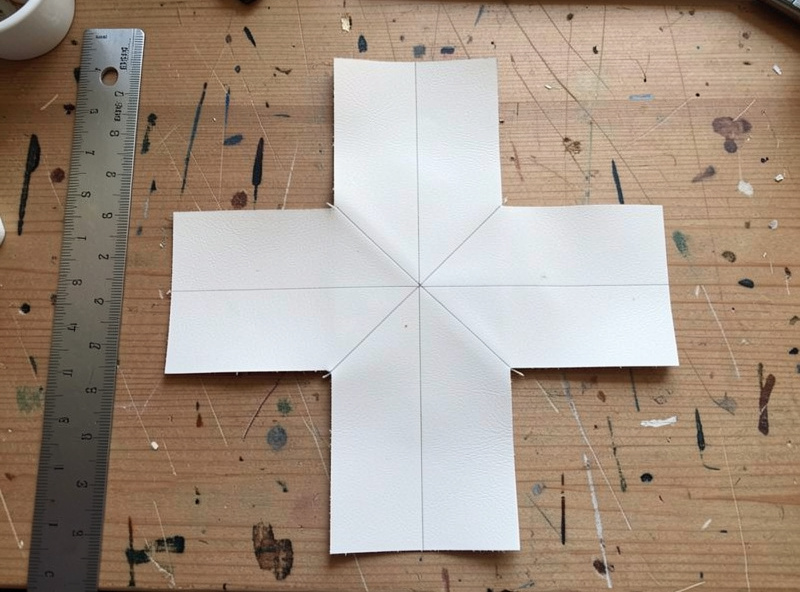
Cut a square equal to your floor size plus twice the wall height, then remove a wall-height square from each corner so the blank becomes a plus shape. For a 5.5-inch floor with 1.75-inch walls, that is a 9-inch square with a 1.75-inch square notched out of each corner. Mark the fold lines and you are ready to skive.
The math trips people up, so here it is concretely. Floor + wall + wall = total blank dimension. A 5.5-inch floor plus 1.75 inches on each side is 9 inches, so start with a 9-inch square. Then, from each of the four corners, cut away a 1.75-inch by 1.75-inch square — the wall height in both directions. What remains is a cross. When you fold the four arms up along the inner lines, the cut corner edges meet, and that meeting is where the snap goes.
I cut mine with a heavy steel straightedge and a sharp rotary cutter on a self-healing mat, scoring twice rather than forcing through in one pass — leather cut cleanly in two light passes has a crisper edge to burnish later. For dead-square repeats I cut a form template on the desktop machine; the same CNC-cut pattern approach means every catchall I make comes out identical, which hand-marking never quite achieves. Score your fold lines lightly on the grain side with a bone folder or the back of a knife so the walls bend on a crisp line, not a vague curve. A groover run at the fold makes the bend even sharper if you want the walls to snap up square.
Why Skive the Corners Before Snapping?
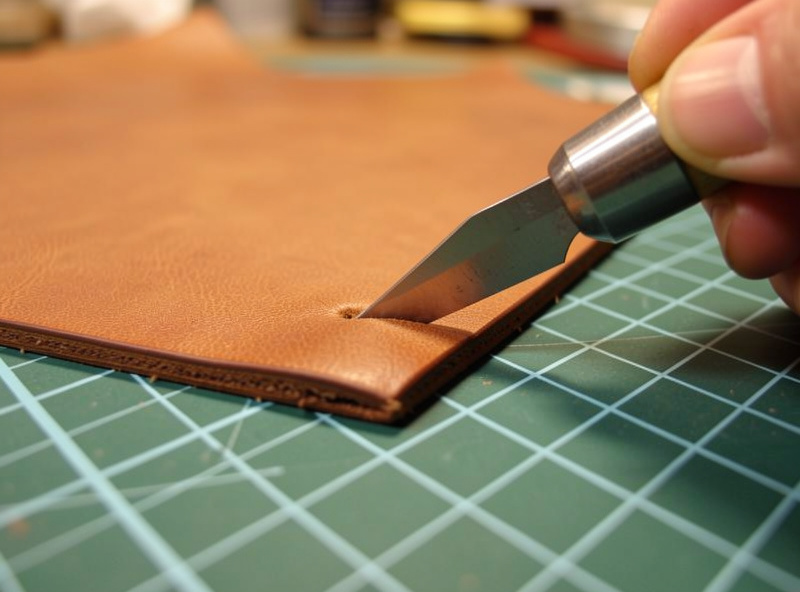
When you fold two adjacent arms up, their cut edges overlap, stacking two layers of leather at the corner. Skive each overlapping face down by about a third so the doubled corner is no thicker than a single wall. Skip this and the snap sits proud, the corner bulks up, and a visible gap opens along the fold.
This is the single detail that separates a crisp catchall from a homemade-looking one, and it is exactly where I went wrong on my early trays. I set snaps through two full-thickness layers of 6 oz and could not understand why the corners gapped and the snaps looked like they were sitting on a little pedestal. The answer is thickness: two layers of 6 oz is effectively 12 oz of leather at the corner, and neither the fold nor the snap is happy with that. Skiving that overlap thinner lets the two faces sit close, the fold stay tight, and the snap post grip properly.
I skive with a French skiver for a controlled, even taper, keeping the blade scary-sharp off the strop — a dull skiving knife tears and drags rather than shaving, and you can feel the difference: a sharp skiver whispers off a translucent curl, a dull one chatters. Thin only the area that will overlap, roughly the corner inch, and taper it so there is no hard step. Practice on a scrap corner first; skiving is a feel you build in ten minutes and keep forever. My deeper notes on getting edges and overlaps clean live in how to bevel leather edges.
How Do You Set the Four Snaps?
Fold two adjacent walls up so their skived edges overlap, punch a single hole through both layers about half an inch down from the rim, and set a line-24 snap through the stack. Repeat at all four corners. The snap both joins the corner and lets the tray disassemble flat.
Line-24 is the size I reach for on catchalls — it has enough post length to reach through two skived layers of 6 oz and a cap big enough to look intentional. Punch your hole with a rotary punch or a drive punch that matches the snap post; too big and the snap spins, too small and you crush the leather setting it. I set mine on a snap setter over a steel anvil, one firm mallet strike rather than a timid tap-tap that leaves the cap crooked. You want the two halves to draw the leather snug so the corner stands square.
Position matters: set the snap about half an inch below the rim and centered on the overlap. Too close to the top edge and the leather can tear out; too low and the corner gaps above the snap. If you want a knock-down tray that folds flat for a bag, the snaps are the whole point — pop them and it lies flat. If you would rather it be permanent, a rivet in the same spot makes it fixed, but you lose the fold-flat trick. A line-24 snap and setter kit is the one piece of hardware this build needs.
As an Amazon Associate I earn from qualifying purchases.
How Do You Finish a Catchall’s Edges?
Bevel every exposed edge, sand from 320 up to 1000 grit, dye if you want color, then burnish the rim with Tokonole and a slicker. On an open tray the rim is at eye level and gets handled constantly, so a slicked, sealed edge is the finishing touch that reads as quality.
Do the edges before you fold and snap, while the blank is flat and easy to work — reaching a beveler into a finished corner is fiddly. I bevel the grain and flesh corners with a #2 edger, sand up through the grits, then slick with Tokonole using one of the profiles I printed on the FDM machine to match the edge weight; those 3D-printed edge slickers let me dial the groove to the exact leather. The whole bevel-to-burnish sequence is in leather edge finishing, and the grit progression that actually works is in how to sand leather edges.
If you are dyeing, do it before you burnish and before you set snaps — a sealed or hardware-cluttered blank dyes unevenly. Fiebing’s Pro Oil gives even color on veg-tan — you can check the product’s own specs at Fiebing’s if you want to know exactly what you’re putting on the grain — and the veg-tan dyeing guide covers application. I cut this build from a Wickett & Craig veg-tan shoulder, whose consistent temper (see Wickett & Craig) is why the fold lines pencil the same every time. A light coat of conditioner at the end keeps the folded corners from drying brittle. Then fold, snap, and you are done — a tray you built in an afternoon that will outlast most of the objects you set in it.
What I’d Do Starting Today
Cut a 9-inch square of 5–6 oz veg-tan, notch 1.75-inch corners, skive those corners on scrap first until the curl comes off clean, finish the flat edges, then fold and set four line-24 snaps. Give yourself an hour and do not rush the skiving — that is the whole game. Build one, use it for a week, and you will immediately see where you want the next one bigger or deeper. That is how the rest of the tray cluster starts.
What size leather blank do I need for a catchall tray?
Add twice your wall height to your floor size. For a 5.5-inch floor with 1.75-inch walls, cut a 9-inch square, then notch a 1.75-inch square from each corner to make a cross shape. Fold the four arms up and snap the corners.
What leather weight is best for a snap catchall tray?
Use 5 to 6 oz veg-tan, about 2.0 to 2.4 mm. It folds cleanly at the corner without cracking and stands up on its own. Thinner leather sags at the walls; thicker leather makes the doubled corner too bulky for the snap to seat properly.
Why do my catchall tray corners gap?
You probably did not skive the corner overlap. When two walls fold up their edges stack two layers of leather. Skive each overlapping face down by about a third so the doubled corner is no thicker than a single wall, and the fold will close tight and the snap will sit flush.
Can I make a catchall tray without wet-forming?
Yes. A one-piece snap catchall needs no wet-forming at all. It holds its shape from the folded corners and four snaps, not from a molded form. That is what makes it the easiest tray for beginners and why it folds flat when you pop the snaps.
Related Articles
- Leather Valet Tray Making Guide
- Best Leather Weight for Trays
- Wet-Forming Crisp Corners on a Tray
- How to Bevel Leather Edges
- Leather Edge Finishing: Bevel to Burnish



