Most beginner leatherwork failures trace back to a short list of repeat causes — buying the wrong tannage, skipping the stitching groove, and using dull blades top the…
Most beginner leatherwork failures trace back to a short list of repeat causes — buying the wrong tannage, skipping the stitching groove, and using dull blades top the list in my own workshop and in the pieces students bring me to look at. I burned through a full Hermann Oak shoulder before I figured out that my utility knife blade was the culprit, not my technique.
Each mistake below has a fix that costs under $20 and takes under 15 minutes. The two most damaging are buying a starter kit with chrome-tan when your project assumes veg-tan, and skipping the saddle-stitch groove so thread tension gradually cuts the leather over time. I learned the back-needle-first method after ruining the back face of my first bifold — looking at the crooked stitch line in my pocket every morning was the best teacher. For the broader progression, the leather working for beginners hub covers the full cut-edge-stitch-dye-hardware-pattern build order.
Mistake 1: Buying Chrome-Tan When You Want Veg-Tan
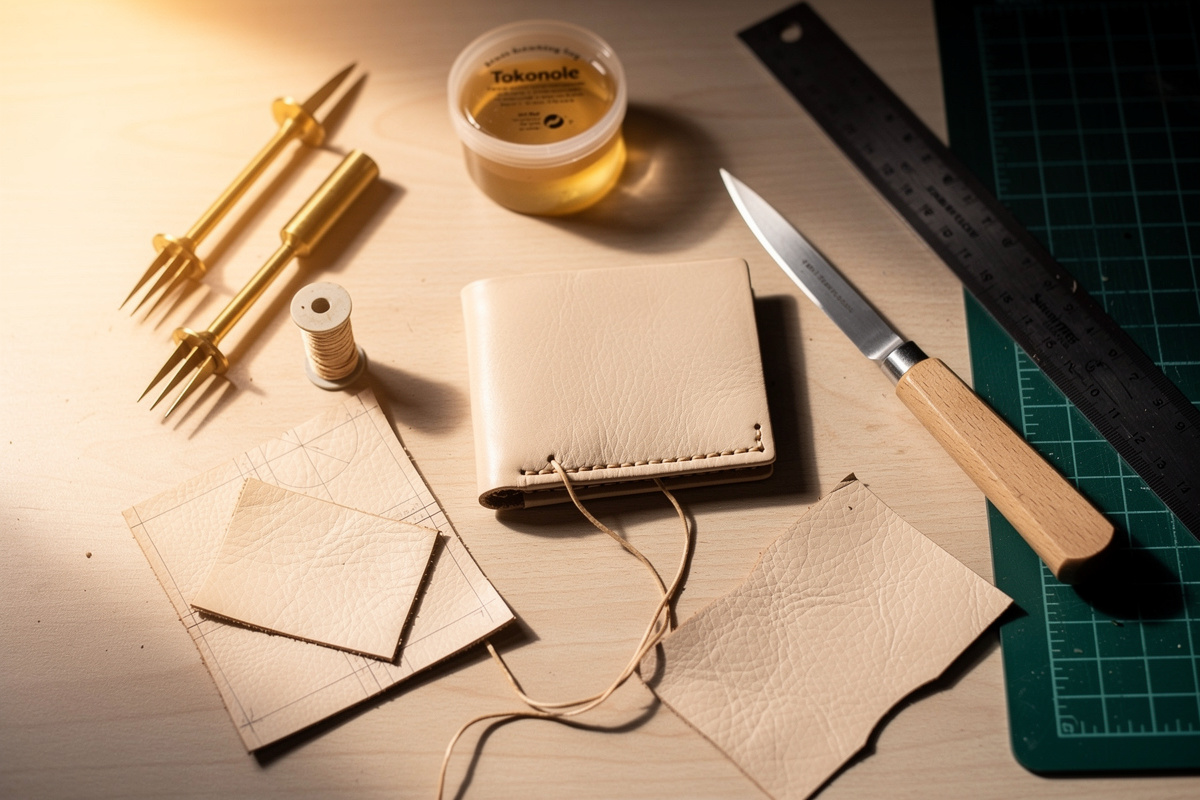
Beginners learn fastest on 4 to 6 ounce vegetable-tanned leather because it tools, dyes, burnishes, and saddle-stitches predictably. Chrome-tan is softer, doesn’t hold a tooled impression, won’t burnish at the edges, and resists most penetrating dyes. If a project tutorial says “burnish the edges with Tokonole,” it assumes veg-tan.
I made this mistake on my very first Tandy order — the “leather craft cuts” bag was chrome-tan and I spent an afternoon trying to burnish edges that just smeared. The water-bead test below would have caught it in 10 seconds. The mistake usually happens at the supplier: a starter pack labeled simply “leather” or “premium hide” is almost always chrome-tan because it’s cheaper to manufacture. Ask suppliers explicitly for “vegetable-tanned 4 to 6 oz” and confirm the tannage on the invoice. I now buy from Hermann Oak and Wickett & Craig exclusively — Tandy’s “Craftsman Oak” line is also reliable veg-tan for beginners. The two processes really do produce different leather at the chemical level — vegetable tanning bonds plant tannins to the hide over weeks and keeps the fiber structure that tools and burnishes, while chrome tanning bonds chromium salts in days and produces a softer, more water-resistant hide that was never meant to hold a tooled impression (Tanner Bates on the tanning difference). For the full list of what you actually need to start, the leatherworking starter kit guide breaks down exactly which 13 tools matter and which 30-piece Amazon bundle items are landfill.
How to test what you have: drop a bead of water on the flesh side. Veg-tan absorbs and darkens within seconds; chrome-tan beads up and rolls off. If you got the wrong tannage, set it aside for lined projects where the soft hand actually helps (bag interiors, watch strap padding) rather than fighting it.
Mistake 2: Skipping the Stitching Groove
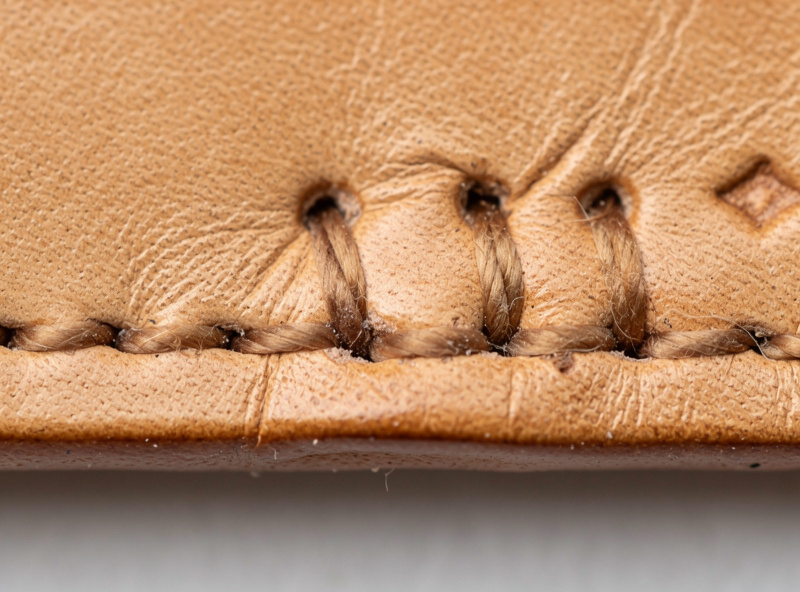
The stitching groove is a shallow channel cut into the leather along the stitch line, usually about 1 mm deep. It seats the thread below the leather surface so foot traffic, abrasion, and shoe leather don’t shave the thread down over time. Beginners skip it because the project still looks fine on day one — the failure shows up in year two.
Cut the groove with a stitching groover set to roughly 4 mm from the edge for wallets and 5 mm for belts. Then mark stitch positions with a pricking iron or diamond chisel inside the groove. Without the groove, the thread sits proud of the leather and the first scuff hits it directly. Belt loops, wallet edges, and sheath welts are where this matters most.
The cheap fix when you forgot to groove: rub the finished stitch line with a beeswax block, then warm it gently with a hairdryer. The wax fills the gap around the thread and gives a few extra years of abrasion resistance. Not a substitute for the groove, but it salvages the piece.
Mistake 3: Using Round Awls Instead of Diamond-Shaped Stitch Holes
A round hole closes back around the thread and grips it, so the saddle stitch sits straight and pulls flush. A diamond or angled chisel hole gives the same grip plus the classic angled stitch line you see on premium goods. Beginners often punch holes with whatever is in the kit, which is usually a round drive punch or a rotary punch — fine for hardware, wrong for stitching.
Diamond-shape stitching irons (also called pricking irons or stitching chisels) cost $25 to $80 for a 2-prong plus 6-prong set in the 3 mm or 4 mm spacing range. KS Blade Punch and Wuta are the value picks; Vergez Blanchard and Kevin Lee sit at the premium end. Buy the spacing that matches your project: 3 mm for small leather goods, 4 mm for belts and bags, 5 mm for heavy work.
If you only own a rotary punch right now, use the smallest diameter (1 mm) and at least mark the stitch positions evenly with a pricking wheel first. The stitch will look round instead of angled, but it’ll be straight, which matters more than the aesthetic for your first wallet.
Mistake 4: Pulling Thread Tension Wrong on Saddle Stitch
The saddle stitch uses two needles passing through each hole in opposite directions. The mistake beginners make is pulling both needles with the same hand sequence every time — this twists the thread loop in the same direction at every hole, and the front and back faces of the stitch start to look different.
The fix is to consciously alternate which needle goes through first. Pick a side (commonly the back-needle-first method): for every hole, the back needle pierces first, then the front needle goes through above it. Done consistently, both faces of the stitch look identical. Done inconsistently, you get the classic “good side / bad side” beginner stitch.
When I first started saddle stitching, I pulled the back needle tighter than the front — my stitch line looked like a seismograph reading. Counting the beat (one-two-pull-tighten) fixed it permanently within 30 minutes of practice on scrap. Keep both threads under steady tension during each pull. Loose thread loops on either side leave gaps that catch on pocket linings and snap over time. A stitching pony or clamp holds the work taut so you have both hands free for needle control — that’s why a stitching pony vs stitching clamps comparison matters even for small projects. For the full stitch technique, the saddle stitch step-by-step guide walks through the exact needle order and tension sequence.
Mistake 5: Over-Burnishing the Edges
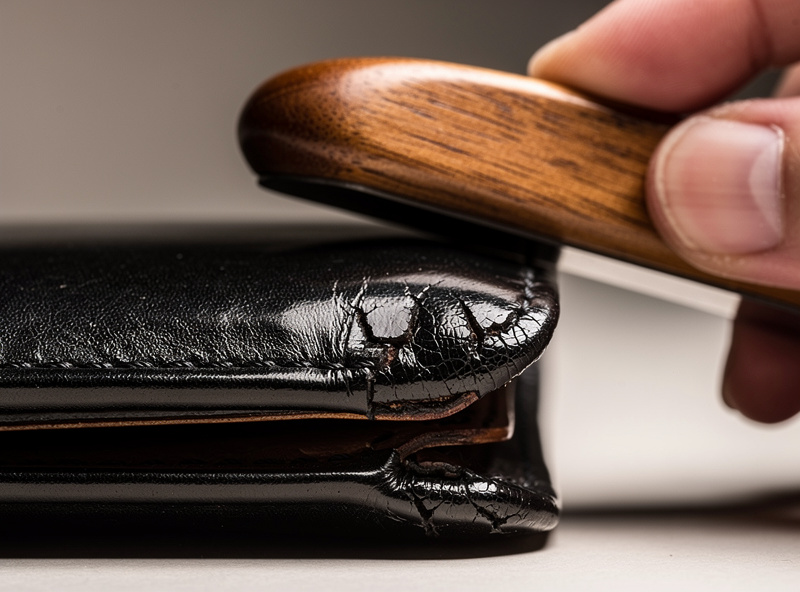
Edge burnishing on veg-tan leather works by rubbing a slicker tool across a damp edge until the fibers compress into a glassy finish. Beginners assume more pressure and more passes equal a better edge. Past about 30 seconds of hard pressure the fibers heat up, scorch, and crack — you end up with a shiny but brittle edge that splits within a few months of use.
The right sequence: bevel the edge with a size 1 or 2 edge beveler, dampen with water or apply Tokonole sparingly, slick with a wooden burnisher in long even strokes for 15 to 20 seconds, let it dry briefly, then repeat once. Stop when the edge is smooth and dark. If it starts squeaking or smoking, you’re past the right amount of pressure.
I scorched my first belt edge with too much pressure and a cheap plastic slicker — the crack appeared 2 months later right where the buckle tongue sits. That’s when I switched to a wooden burnisher and Tokonole and learned to stop at the satin stage, not chase glass. The other half of the mistake is using Tokonole on chrome-tan leather. It won’t burnish — it’ll smear and stay tacky. For chrome-tan, use edge paint (Fenice or Stahl) and let it cure between thin coats. See the leather edge finishing guide for the full bevel-to-burnish sequence with the Tokonole vs gum tragacanth breakdown for choosing the right compound.
Mistake 6: Cutting Without a Sharp Knife
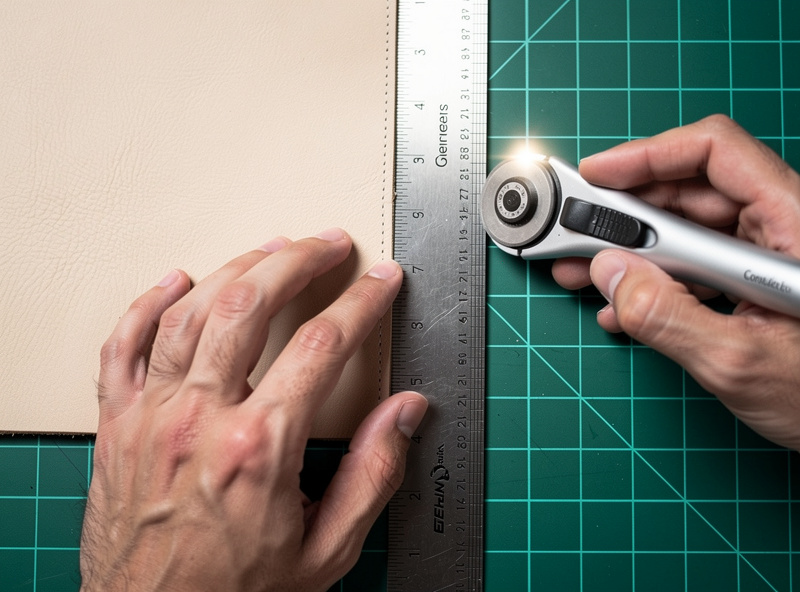
A dull head knife or rotary blade tears leather fibers instead of slicing them, leaving a fuzzy edge that won’t burnish cleanly and a curved cut line that no amount of edging fixes. Beginners often use the original blade for months past its useful life because the blade still “cuts” — but the edge quality is invisibly compromising every project.
Don’t wait for a fixed number of hours — leather dulls a rotary blade faster than fabric ever will, and the honest test is cut quality, not a clock. In my own shop that works out to roughly every 8 to 10 hours of cutting before I swap the blade, but I check the newsprint test below every session rather than trusting the count. Strop a head knife or skiving knife on a leather strop loaded with green compound for 30 seconds before every project — that takes 90 seconds total and keeps the edge surgical. A $15 strop pays for itself within a month if you build twice a week.
Test edge sharpness on a strip of newsprint paper held vertically: a sharp blade slices straight down through it; a dull blade tears or pushes the paper sideways. Sharp tools also reduce hand strain and cut risk — the full safety picture for the workshop is in the leathercraft safety tips guide, which covers blade handling, cutting mat setup, and chemical safety for dyes and finishes. If your blade fails the paper test, strop or replace before cutting another project. Once the blade is sharp, the how to cut leather straight guide covers the ruler, wing divider, and clicker-press techniques for clean consistent lines on thick veg-tan.
Mistake 7: Dyeing Before Conditioning the Leather
Untreated veg-tan absorbs alcohol-based dye unevenly because surface oils, handling marks, and dust create resist patterns. The result: streaks, dark patches around fingerprints, and pale rings where the leather was dry. Beginners apply more dye coats trying to fix it, which makes the patches darker and the streaks worse.
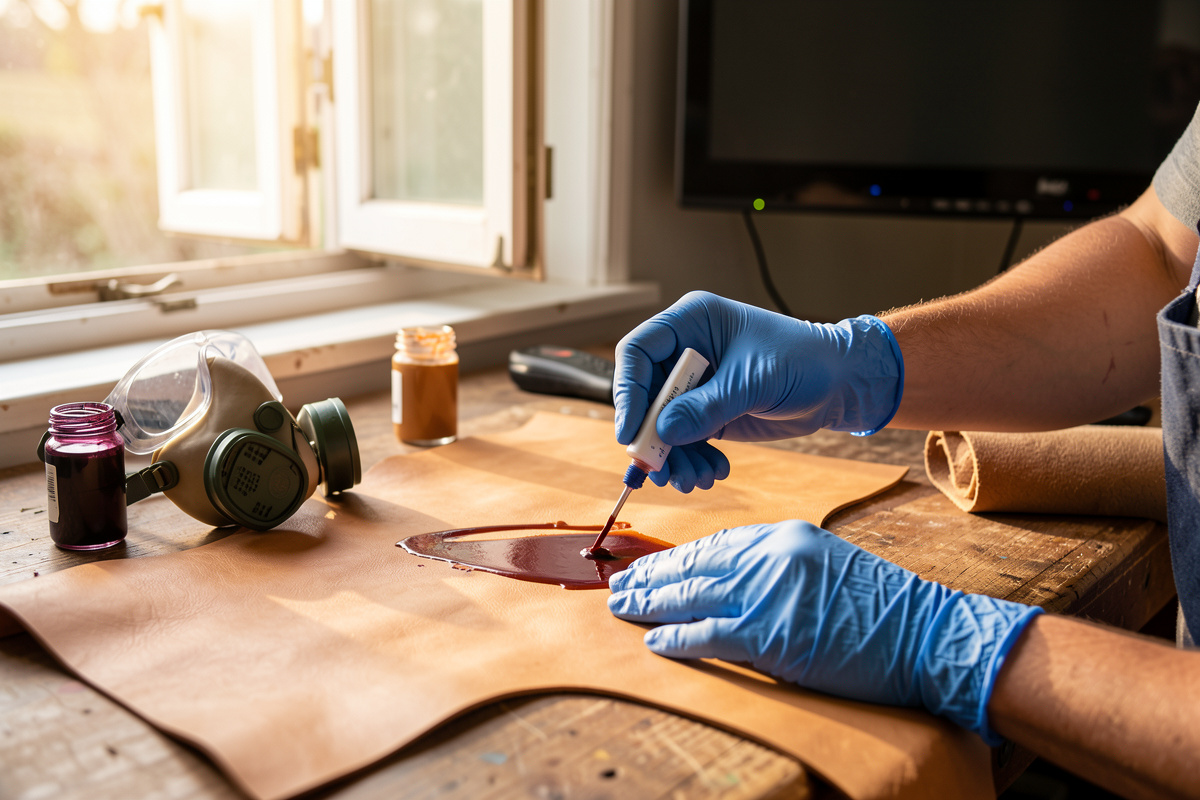
The fix is a brief surface prep before dyeing. Wipe the grain side with a 50/50 deglazer-and-acetone mix on a wool dauber to lift surface oils, let it flash off for 5 minutes, then apply Fiebing’s Pro Dye in long even passes with a wool dauber or sponge. Move continuously — never let dye pool or sit. Two thin coats beat one heavy coat every time.
Deglazer is mostly acetone, and acetone is a flammable solvent that needs real airflow, not a closed room — I do this step with a window open or a fan pulling air across the bench, never over an open flame or near a water heater pilot light, and I keep gloves on for the wipe-down. That’s not workshop paranoia; it’s what the manufacturer’s own safety sheet calls for (Angelus Leather Preparer & Deglazer safety data sheet).
My first dyed wallet bled brown onto a white dress shirt — I still remember pulling it out of my pocket at a wedding and seeing the stain. After the dye cures (24 hours minimum), seal with a single thin coat of Resolene or Tan-Kote diluted 50/50 with water. Untreated dye rubs off on clothing for weeks; sealed dye stops bleeding within a few days. For the dye-family breakdown and the 8-brand leather dye comparison I wish I’d read before buying, see the leather dyeing guide with the full prep-and-seal sequence.
Quick-Reference Mistake Recovery Table
| Mistake | How to Recognize | Cheap Fix |
|---|---|---|
| Wrong tannage | Water beads on flesh side; won’t burnish | Reassign to lined / unstitched projects |
| No stitching groove | Thread sits proud of leather surface | Wax-and-warm to seat thread |
| Round stitch holes | Stitch looks straight not angled | Switch to diamond chisel for next project |
| Inconsistent saddle stitch | One face looks neater than the other | Commit to back-needle-first sequence |
| Over-burnished edge | Glassy with hairline cracks | Fine-sand back, re-bevel, re-burnish gently |
| Dull blade | Fuzzy cut edge, won’t burnish smooth | Strop or replace before next cut |
| Streaky dye | Dark and pale patches across panel | Deglaze first; thin even coats |
The One Investment That Prevents Most of These
If you’re picking a single $50 upgrade to your starter kit, buy a 4 mm diamond stitching iron set (2-prong plus 6-prong) and a wooden edge slicker. Those two tools eliminate Mistakes 3, 4, and 5 outright by making the correct technique easier than the wrong one. A pricking wheel is a distant third because the chisels mark and punch in one step. The leathercraft workspace setup guide covers how to arrange these tools so the work surface actually supports the way leather moves — lighting angle, mat position, and the bench height that stops you hunching.
The next $50 goes to a stitching pony, a beveler in size 1, and a strop with green compound. Once you have basic tools in hand, the fastest way to build skill is to pick small projects that finish in a weekend — the beginner leather projects guide covers five achievable builds that teach the full cut-edge-stitch sequence. That’s the full toolkit for everything in the leatherworking tools guide, and it’ll handle every beginner project including the card holder, bifold wallet, and belt tutorials. My own leatherworking starter kit cost about $120 all-in and still handles 90% of what I build today. For a full breakdown of what first-year leathercraft actually costs — tools, leather, consumables — the leathercraft startup cost guide itemizes every category so you can budget before buying.
Frequently Asked Questions
What is the most common beginner leatherworking mistake?
Buying chrome-tan leather when the project assumes veg-tan. Chrome-tan won’t burnish, won’t tool, and resists most dyes. Always confirm the tannage on the invoice and ask suppliers for vegetable-tanned 4 to 6 oz leather for beginner projects.
Why does my saddle stitch look uneven on one side?
You are alternating which needle goes through each hole inconsistently. Pick one method (commonly back-needle-first) and use it for every hole in every project. Both faces of the stitch will then look identical.
Do I really need a stitching groove?
Yes for any leather goods that get handled or rubbed daily. The groove seats the thread below the leather surface so abrasion doesn’t shave the thread down. Wallets, belts, and sheaths fail at the stitch line within 2 years without it.
Can I use Tokonole on chrome-tan leather edges?
No. Tokonole burnishes by compressing veg-tan fibers, which chrome-tan does not have. Use edge paint such as Fenice or Stahl on chrome-tan instead, applied in thin cured coats.
How often should I replace a rotary cutter blade?
Every 8 to 10 hours of cutting work, or sooner if the blade fails the newsprint test. A dull blade tears leather fibers instead of slicing them, leaving a fuzzy edge that ruins burnishing.
Why are my dye jobs streaky?
Surface oils and dust create resist patterns that block dye absorption. Wipe the grain side with a 50/50 deglazer-acetone mix, let it flash off 5 minutes, then apply two thin Fiebing’s Pro Dye coats with a wool dauber.
Related Articles
- Leather Working for Beginners: Complete Starter Guide
- Leatherworking Tools Guide: Three Tiers of Buy-In
- Leather Stitching Techniques: Saddle Stitch and Beyond
- Leather Edge Finishing: The Bevel-to-Burnish Guide
- Leather Dyeing: The Complete Veg-Tan Guide