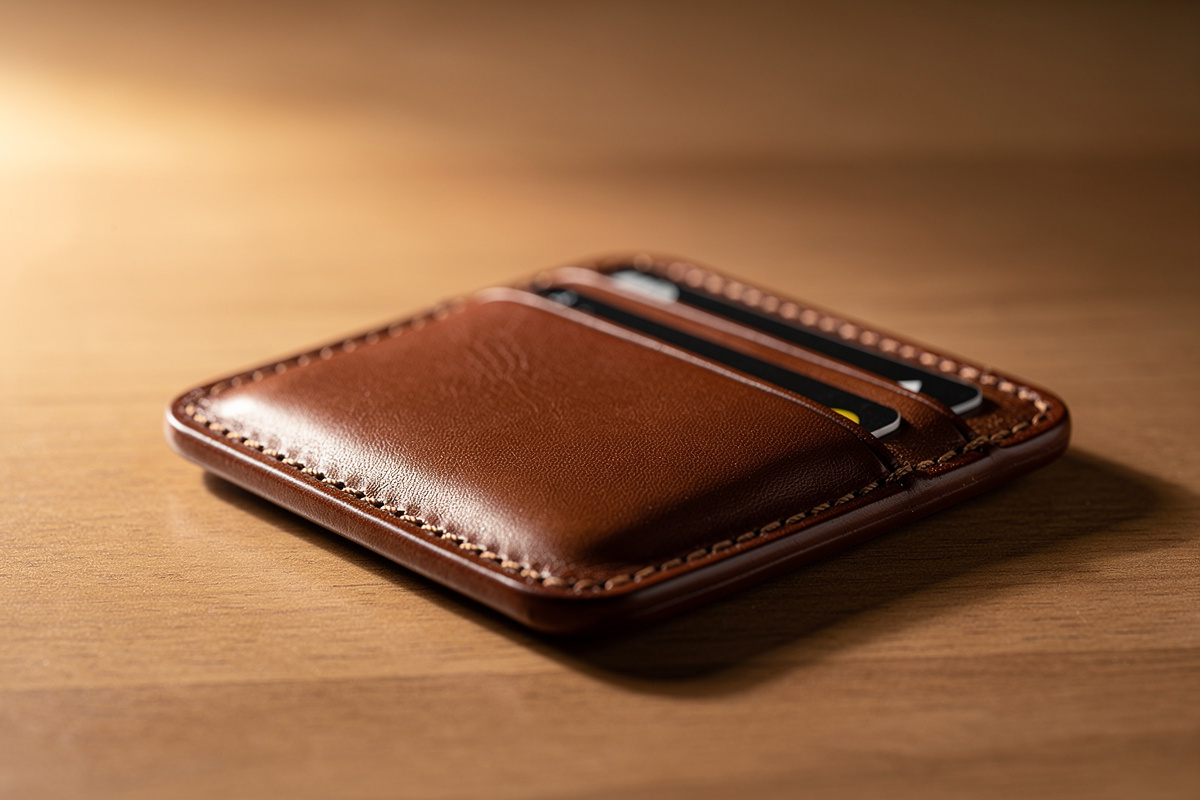
A hand-stitched leather card holder is the smallest practical first project: 3 panels cut from 3 to 4 oz veg-tan leather, glued, edge-bevelled, saddle stitched around the perimeter,…
A hand-stitched leather card holder is the smallest practical first project: 3 panels cut from 3 to 4 oz veg-tan leather, glued, edge-bevelled, saddle stitched around the perimeter, then burnished. Total time from cut to finished is about 90 minutes for a first attempt and 60 minutes once the steps are familiar. The finished card holder fits 3 to 6 cards plus folded cash and weighs roughly 1 oz. For where the card holder fits in the recommended beginner sequence, the leather projects for beginners hub covers the pen-sleeve-then-card-holder-then-bifold progression.
This pattern uses two slip pockets opening upward, a center divider for cash or extra cards, and 4 mm saddle stitching around 3 sides. Skill demands are low: the only technically hard step is gluing the panels straight before stitching. The card holder teaches every fundamental skill — pattern transfer, cutting, gluing, stitch-line marking, saddle stitching, edge bevelling, and burnishing — in a project small enough to finish in one sitting.
I still carry the first card holder I ever made — the stitching is uneven and the edges are darker on one side, but it holds four cards and has outlasted three store-bought wallets. The pattern below is dimensioned exactly from that third-attempt build. What I learned: cut your panels 3 mm oversized so you can trim to final dimension after gluing. The bifold wallet tutorial is the logical next step once this project is in your pocket.
Materials and Tools
Leather: One panel of 3 to 4 oz vegetable-tanned leather, roughly 5 x 8 inches (a $6 to $10 scrap from any leather supplier). Hermann Oak, Wickett & Craig, or Tandy’s Craftsman Oak all work. Avoid chrome-tan for this project — the edges won’t burnish cleanly and the result looks rough.
Thread: 0.6 mm waxed polyester (Tiger thread, Ritza 25 — the finest size Julius Koch makes, right for a small project like this) in a contrasting or matching color. About 30 inches per stitched edge, so plan on 90 inches total for the perimeter. White, natural, and brown are the most popular thread colors for veg-tan card holders.
Tools: Two saddler’s harness needles (size 002), 4 mm diamond stitching chisels (a 2-prong and 6-prong pair), stitching groover, edge beveler size 1, wooden edge slicker, contact cement (Barge or Renia Aquilim 315), 220/400/600 grit sandpaper, Tokonole burnishing gum, steel ruler, rotary cutter or sharp knife, cutting mat, poly mallet. The full toolkit is $80 to $120 if you’re starting from scratch.
The Pattern (Three Panels)
Panel A (back): 4.0 inches wide × 3.0 inches tall. This is the back of the card holder and the largest piece. Panel B (front pocket left): 4.0 inches wide × 1.6 inches tall. Panel C (front pocket right): 4.0 inches wide × 1.6 inches tall. Both front pockets are the same size; they overlap slightly in the center to form a small cash slot.
Round all four corners of each panel with a 5 mm or 6 mm corner radius template (or trace a coin). Square corners look amateur and are fragile — they crack at the corner stitch. Rounded corners are visually professional and stronger. For building and refining your own patterns beyond simple card holders, the leathercraft templates and patterns guide covers drafting from measurements, scaling paper templates, and the card-stock process that gives repeatable cuts every time.
Cut the pattern from cardboard or thin plastic first, lay it on the leather, trace with a silver pen or fine pencil, then cut. A paper template alone shifts during tracing and the pieces come out misaligned — the cardboard or plastic stiffness keeps the trace accurate. Free PDF templates for this exact card holder are linked from the leather projects cluster.
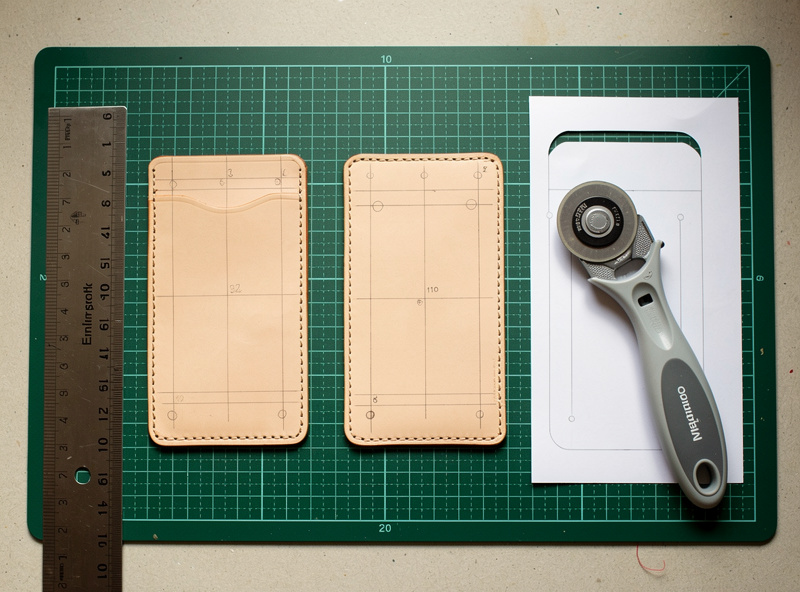
Step 1: Cut the Three Panels
Place the pattern on the leather with the longest edge of each panel aligned along the hide’s natural fiber direction (visible as faint parallel lines on the flesh side). Cutting along the fiber direction gives stronger panels because the fibers run uninterrupted along the longest dimension.
Cut with a sharp rotary blade or head knife, applying steady pressure in one continuous pass. Multiple short passes leave a wavy edge that won’t burnish cleanly. For curved corners, slow down and let the blade follow the template — don’t try to rush the curve. A dull blade is the most common cause of fuzzy edges on first projects (see common beginner mistakes).
After cutting, lay all three panels grain-side up and check that the corners align when stacked. Trim any panel that doesn’t match by laying it under the corresponding panel and trimming to fit. Misaligned panels make stitching nearly impossible and the finished holder looks crooked.
Step 2: Bevel the Top Edges (Pre-Assembly)
Bevel the top edge of Panel B and Panel C — the edges that will form the pocket openings — before assembly. Once the holder is glued and stitched, you can’t reach those edges to bevel them properly. Use a size 1 beveler on both grain side and flesh side, then sand 220 grit then 400 grit, then burnish with Tokonole and a wooden slicker until the edges are glassy.
Pre-burnishing the pocket openings means the only edges left to finish after assembly are the three glued perimeter edges. This is much easier than trying to burnish around an already-stitched perimeter.
Don’t bevel the bottom edges of B and C or the perimeter of A — those edges will be glued to other panels and bevelling them weakens the glue bond. Only bevel edges that will remain exposed in the finished card holder.
Step 3: Glue the Panels Together
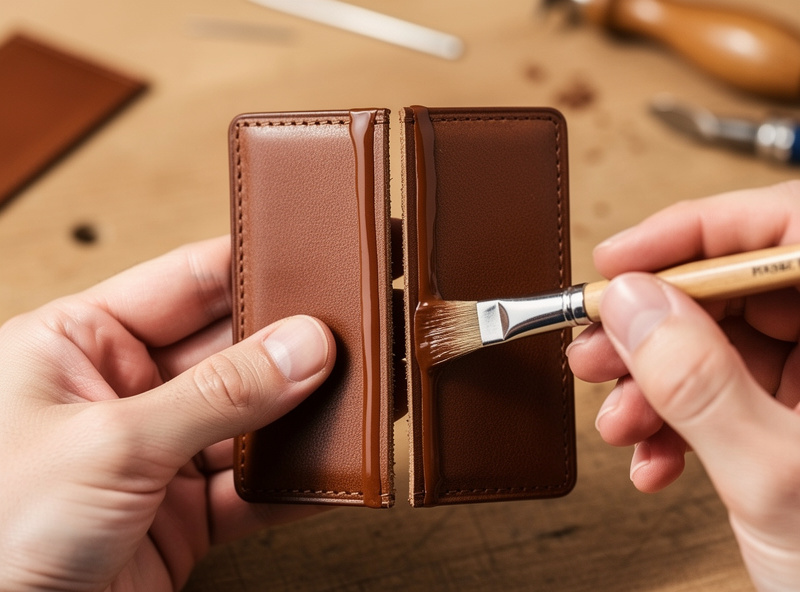
Apply a thin even layer of contact cement to the bottom edge (about 5 mm wide) of Panel A’s grain side, and a matching strip on the flesh side of Panel B’s bottom edge. Let the cement tack for 5 to 10 minutes (it should feel dry but slightly sticky). Press Panel B onto the bottom of Panel A, aligning the bottom and side edges precisely. Press firmly across the entire glued strip — a small hand roller or the back of your edge slicker works.
Repeat for Panel C, gluing its bottom edge to the bottom of Panel A directly behind Panel B. The two front pockets stack on top of each other with their bottom edges aligned, creating two card slots opening upward and a small overlap zone in the middle for cash.
Apply contact cement to the side edges next: a 4 mm wide strip down each side of Panel A’s grain side, matching strips on the flesh side of B and C. Tack 5 to 10 minutes, then press together. Don’t glue the top edges of B and C to anything — those stay open as the pocket mouths.
Step 4: Mark and Punch Stitch Holes
Use the stitching groover to cut a 4 mm groove along the bottom edge and both side edges of the assembled holder (don’t groove the top edges of the pockets — those are already burnished). The groove should sit 4 mm from the outer edge.
Place the assembled holder on a granite stone or hardwood block and use the 6-prong diamond chisel to mark stitch holes in the groove. Strike with a poly mallet, advance with the first prong in the last hole of the previous placement (overlap method), repeat down the entire bottom edge then both sides. Switch to the 2-prong chisel for the corner radii — placing each hole individually around the curve.
Count the total stitch holes: a 4 x 3 inch card holder has roughly 60 to 75 stitch holes around three sides. This is a 25 to 35 minute saddle stitching session for a beginner, or 12 to 15 minutes for someone with practice.
Step 5: Saddle Stitch the Perimeter
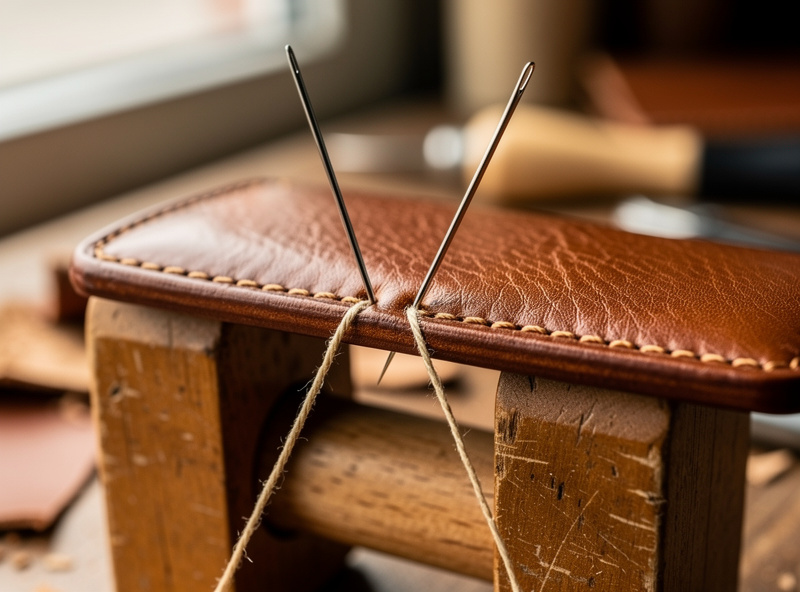
Cut about 90 inches of waxed polyester thread, attach a needle to each end with the saddler’s lock (see the saddle stitch tutorial for the full threading sequence). Clamp the holder in your stitching pony or clamp with the bottom edge facing up.
Pass one needle through the first hole, equalizing thread length on both sides. Then for every hole, the back needle goes through first, then the front needle goes above it. Pull both needles tight after each pass. Continue around the entire 3-sided perimeter, lock the end with two backstitches, trim and burn the thread tails flush.
The starting end gets the same treatment: thread one needle back through 2 stitches in the opposite direction, trim and burn. Both ends are now back-stitched and won’t unravel.
Step 6: Bevel and Burnish the Stitched Edges
Bevel the three stitched perimeter edges (top is already done) on both grain side and flesh side using the size 1 beveler. Be careful around the stitches — bevel up to but not through the thread. Sand the bevelled edges with 220 then 400 then 600 grit, working parallel to the edge.
Dampen the edges with a wet cloth, apply a small amount of Tokonole, and slick with a wooden burnisher in long even strokes for 15 to 20 seconds per section. Two thin Tokonole coats give a glassy finish; see the Tokonole burnishing guide for the full sequence.
Skip burnishing the inside of the pockets — those edges are hidden when cards are inserted, and burnishing inside is awkward and unnecessary. Only finish the visible exterior edges.
Optional: Dye and Seal
If you want a colored card holder rather than natural tan, dye after stitching but before final burnishing. Deglaze the entire holder, apply 2 thin coats of Fiebing’s Pro Dye with a wool dauber, let cure 24 hours, buff, then proceed with the burnishing step. See the dyeing without streaks guide for the full prep sequence.
For the final seal, wipe one thin coat of Resolene diluted 50/50 with water across the entire grain surface. The seal protects the dye from rubbing off on clothing and gives a subtle satin finish. Skip the seal on natural-tan card holders — they develop better patina without it.
Card Holder Project Spec Summary
| Spec | Value |
|---|---|
| Leather | 3 to 4 oz vegetable-tanned |
| Total leather needed | 5 x 8 inch panel (about $6 to $10) |
| Thread | 0.6 mm waxed polyester (Ritza 25 Tiger) |
| Stitch spacing | 4 mm (6.4 SPI) |
| Total stitch holes | 60 to 75 |
| Edge distance | 4 mm from outer edge |
| Card capacity | 3 to 6 cards plus folded cash |
| First-attempt time | 90 minutes |
| Repeat time | 60 minutes |
| Finished weight | ~1 oz |
What This Project Teaches You
Every fundamental hand-leatherwork skill is in this card holder: pattern transfer, sharp-blade cutting, contact-cement assembly, stitch-line grooving, diamond-chisel hole punching, two-needle saddle stitch, edge bevelling, multi-grit sanding, Tokonole burnishing. The next project up — a bifold wallet — uses all the same skills plus interior pockets and an extended fold. You can move directly to that project with no skill gap.
Common first-attempt result: slightly uneven stitch line, one corner radius rougher than the others, top pocket opening shows minor glue residue. None of these are deal-breakers — the finished card holder still functions and looks handmade. By project 3 or 4 these issues disappear with no specific intervention; muscle memory builds fast on small repeated projects.
The card holder is also the best project for trying new variables: different thread color, different leather color, contrasting stitch lines, decorative crease lines, embossed initials. Each variation adds a small skill without the risk of ruining a 4-hour wallet build. The leather projects cluster includes the bifold wallet, knife sheath, and notebook cover next, in increasing complexity from this card holder.
Frequently Asked Questions
How much leather do I need for a card holder?
A 5 x 8 inch panel of 3 to 4 oz vegetable-tanned leather is enough for one card holder with a small margin for trimming. Most leather suppliers sell scrap pieces of this size for $6 to $10. Avoid chrome-tan — the edges will not burnish cleanly.
What thread color is best for a leather card holder?
Natural cream or matching brown for a subtle traditional look; bright white, red, or yellow for visible contrast stitching. White and natural cream are the most forgiving for first-time stitchers because they hide minor stitch length variation better than dark threads.
Do I need a stitching pony to make a card holder?
Not strictly — you can pin the holder under your forearm against a desk for the 60 to 75 stitch perimeter. But a $20 stitching clamp held between knees gives much cleaner results and is worth buying before this first project.
Can I make a card holder without gluing?
Technically yes by stitching all 3 panels in one sequence, but the result looks shifty and unprofessional. Contact cement holds the panels in perfect alignment while you stitch, and once stitched the glue does not affect appearance. Always glue first.
How long does it take to make a leather card holder?
About 90 minutes for a first attempt: 15 minutes cutting, 10 minutes pre-burnishing pocket edges, 15 minutes gluing and pressing, 15 minutes hole punching, 25 minutes saddle stitching, 10 minutes final edge finishing. Repeat builds drop to about 60 minutes.
Will a hand-stitched leather card holder fit in a front pocket?
Yes — finished dimensions are roughly 4.1 x 3.1 inches and the holder weighs about 1 oz with cards inside. It fits in front jeans pockets and chest pockets without bulk. The slim 2-pocket design holds 3 to 6 cards plus folded cash without expanding.
Related Articles
- Leather Projects cluster
- Leather Stitching cluster
- Edge Finishing cluster
- Leatherworking Tools cluster
- Leathercraft for Beginners cluster



