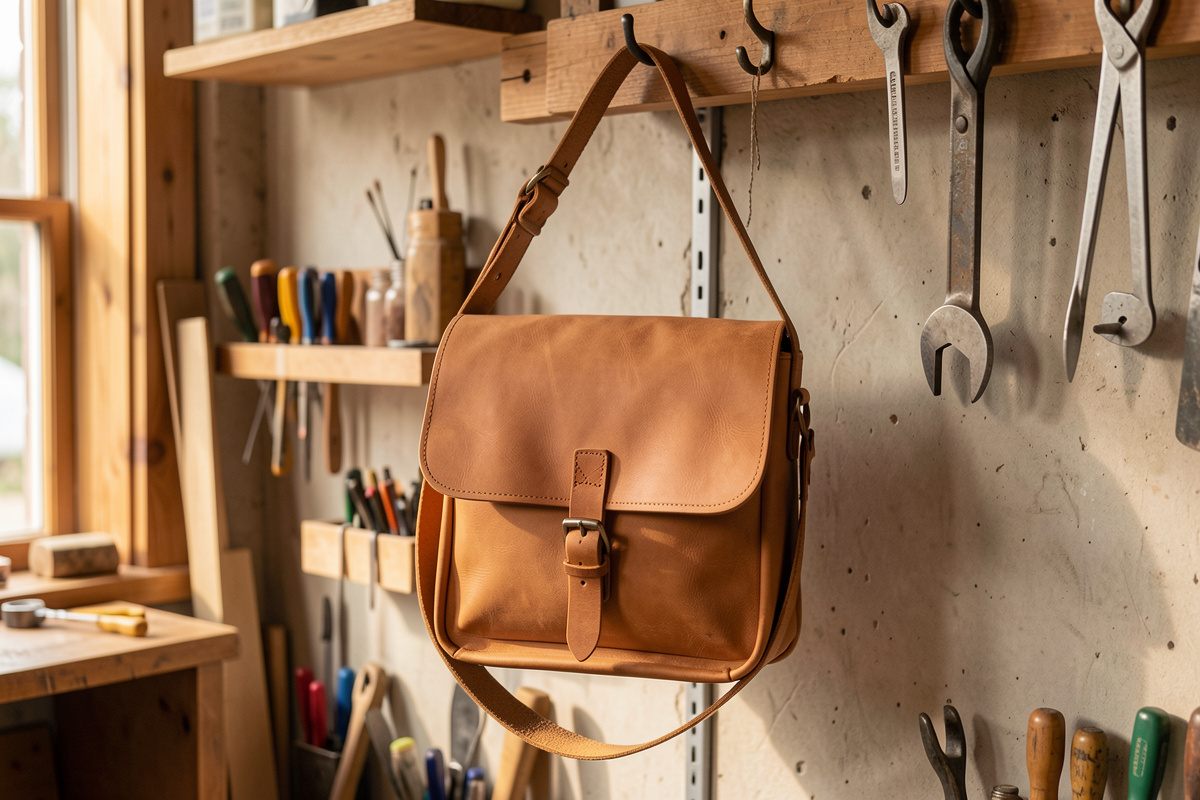
A messenger bag is the project where a leather bag finally gets a personality — a flap, a buckle, a gusset that gives it depth, and a strap…
A messenger bag is the project where a leather bag finally gets a personality — a flap, a buckle, a gusset that gives it depth, and a strap that has to hold up under a daily commute. This leather messenger bag pattern guide walks the whole build from the pattern pieces through cutting, the boxed gusset, the flap closure and the strap, the way I make mine on the bench. A medium messenger in 5–6 oz veg-tan takes about 20–25 hours by hand and needs roughly 14–18 square feet of leather once you account for the strap, flap and pockets.
If a tote is the bag you build to learn cutting and stitching at scale, the messenger is the one that teaches closures and three-dimensional construction. It is still firmly within reach of a hand-stitcher who has a wallet and a belt behind them — nothing here needs a sewing machine — but it asks you to think about how the flap folds, where the strap loads, and how the gusset lets the bag swallow more than its flat dimensions suggest. Start from the broader leather bag making guide for leather-weight and tool decisions, then come back here for the messenger-specific moves.
The Messenger Pattern: Pieces and Proportions
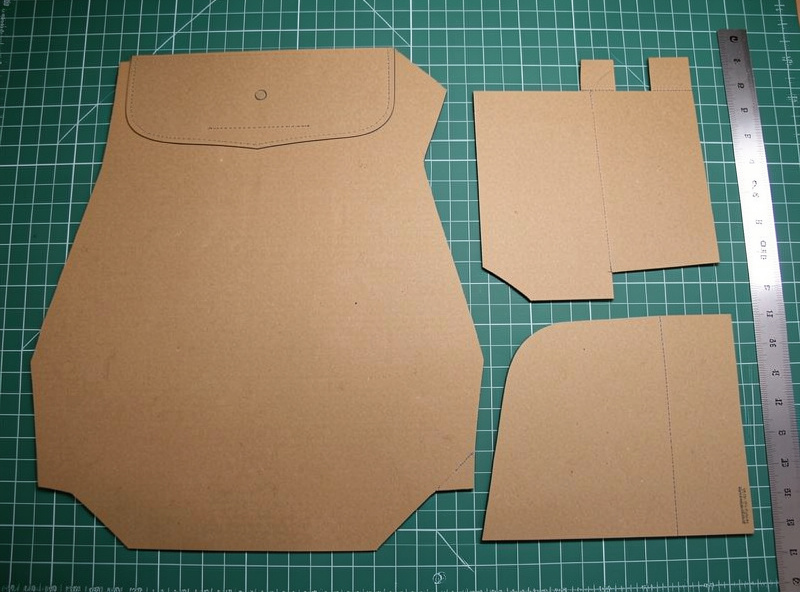
A classic messenger breaks into six pattern families: a wrapped body panel (back, bottom and front in one piece if your leather is long enough), two side gussets or one boxed gusset, a flap, a strap, the buckle billets, and any front pockets. The proportion that matters most is flap-to-body: the flap needs to fall far enough down the front to clear the buckle hardware comfortably, usually a third to half of the body height, or it looks stingy and will not stay closed under a full load.
I draft the whole thing in cardstock first and tape it into a mock-up before any leather is cut, because a messenger has more places to get a dimension wrong than a flat tote does. Gusset depth sets how much the bag holds — 8–10 cm is a usable everyday depth — and it has to match the body perimeter exactly along the seam or you will fight a pucker the whole way around. For the pattern-transfer workflow and seam allowance, the tote bag pattern build covers the basics this build assumes you already have.
Choosing Leather for a Messenger
A messenger wants leather firm enough to hold the flap’s fold and the bag’s shape, but not so heavy it becomes a board. My default is 5–6 oz (2.0–2.4 mm) veg-tan for the body and flap, which holds structure and takes a burnished edge — I buy it as a full side from a tannery like Hermann Oak so the weight stays consistent across the body and flap — with the strap cut separately from firmer 8–10 oz bridle. If you want a softer, slouchier messenger, drop to a 4–5 oz chrome-tan body, but accept that you lose the crisp flap fold and the burnishable edge in exchange for drape.
The flap is the part everyone sees and touches, so it is worth your best piece of leather — the cleanest grain, no brands or scars. I cut the flap with the grain running top-to-bottom so it folds along the natural give. For the difference between the two tannages and why I default to veg-tan for structured bags, the chrome tan vs veg tan comparison lays it out, and the broader types of leather guide covers grade and weight selection in depth.
Cutting, Skiving and the Boxed Gusset
Cut the body panel first and use it to verify your gusset length before committing the gusset leather. The boxed gusset is the part beginners find fiddly: it runs up one side, across the bottom, and up the other side as a single strip, and its length is the full perimeter of the body’s two sides and bottom. Measure that on the actual cut body panel, not on the pattern, because leather stretches a little under the knife and a paper measurement will be optimistic.
Skive every overlap. Where the gusset meets the body, where the strap anchors double up, where the flap hinges — any doubled thickness needs paring thinner so the seam lies flat and stitches clean. A messenger has more overlaps than a tote, so this step pays off more. I take the underside down with a French skiver or a sharp paring knife; the skiving knife guide covers keeping that blade sharp enough to pare rather than tear. Set your stitch line a consistent distance from the edge — the setback guide has the distances I use for bag-weight leather.
Stitching the Body to the Gusset
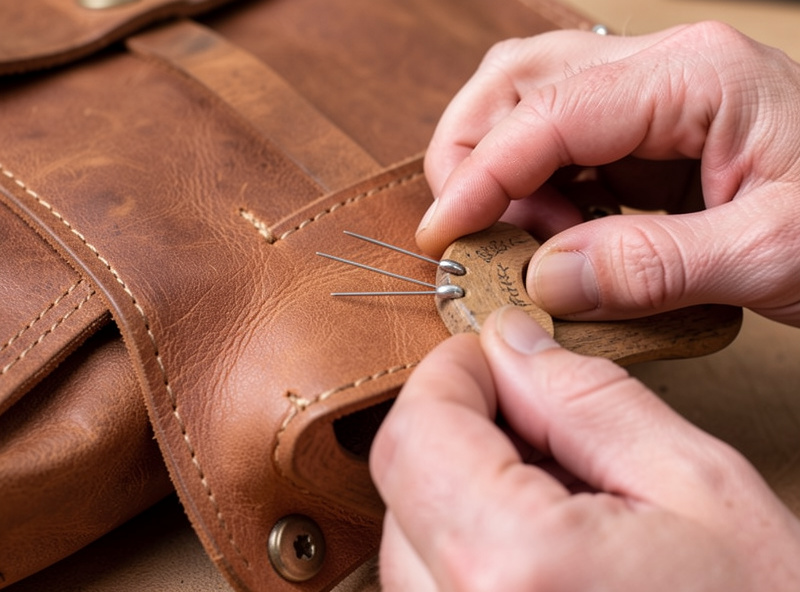
This is the seam that makes or breaks a messenger, because it runs the full curved perimeter and any wander shows. I mark the stitch line with pricking irons in a fine pitch, then saddle stitch by hand with two needles and 0.8 mm waxed polyester thread, opening each hole with a stropped diamond awl as I go so the thread seats tight. Hand stitching here is not nostalgia — a saddle stitch will not unravel if a single stitch abrades through, which on a load-bearing seam that flexes every day genuinely matters.
Work the bag inside-out or right-side-out depending on whether you want the seam hidden or proud; I usually stitch veg-tan messengers right-side-out with the seam edge showing, then bevel and slick that edge so it becomes a feature rather than a flaw. Keep your stitch tension identical on every pass so the line reads machine-even. If you are new to the saddle stitch, my saddle stitch tutorial covers the two-needle method and the lock, and the thread guide explains why I run 0.8 mm waxed poly on bag seams.
The Flap, Buckle and Closure
The closure is where a messenger earns its keep, and you have real choices: traditional buckles on billets, turn locks, magnetic snaps under a flap, or simple straps through D-rings. I favor a buckle-and-billet closure on a working messenger because it is the most secure under a heavy load and it ages beautifully, but it is also the slowest to open, so weigh that against how often you reach into the bag. Whatever you pick, mount the hardware on doubled, skived leather so it cannot tear out. For solid-cast buckles that will not bend under a loaded flap, I size up from a hardware specialist like Buckleguy rather than trusting a thin stamped buckle.
Position the buckles on the body and the billets on the flap so the flap pulls slightly taut when buckled — a loose flap flaps. Set the hardware on scrap of the exact leather stack first to dial in rivet length and buckle placement; a buckle set crooked on a finished bag is a heartbreak you cannot undo. For metal selection and setting technique, the leather hardware guide covers buckles, snaps and D-rings, and best rivets for leather covers sizing the rivets that anchor the strap and billets.
The Strap
A messenger lives on its strap, and the strap is the part most likely to fail because it carries the whole load through a narrow band that flexes every step. I cut messenger straps from firm 8–10 oz bridle or harness leather, from the bend of the hide, never the soft belly, and I size width to the load — 3.8–5 cm (1.5–2 inches) for a bag you will fill. For a long adjustable strap I either buckle it for adjustment or build it fixed-length to the wearer; an adjustable buckle adds a failure point but earns its place on a shared bag.
Anchor the strap to the bag through D-rings riveted and stitched to reinforced patches, not directly to the body panel — the rings let the strap pivot as the bag swings, which spreads the load instead of concentrating it at one stitch line. Strap construction, doubling, edging and adjustment hardware get the full treatment in the dedicated leather bag strap guide, which is worth reading before you cut your strap leather.
Pockets, Pen Slots and Interior Layout
The inside of a messenger is where it stops being a leather box and starts being a tool you actually want to carry. Plan the interior before you assemble, not after — retrofitting a pocket into a stitched bag is awkward and usually looks it. I lay out a full-width back wall pocket for a notebook or tablet, a row of pen slots on the front interior wall, and one slim zip or snap pocket for the small things that otherwise migrate to the bottom. Stitch and rivet these to the panels while they are still flat and reachable, which is the whole reason to plan ahead.
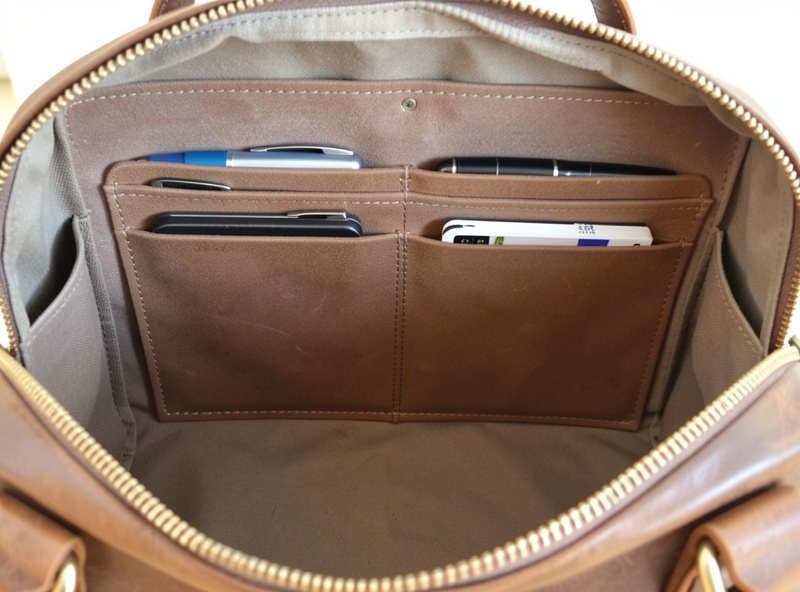
Use a lighter leather for interior pockets than the body — 3–4 oz keeps the bag from getting heavy and stiff inside. If the messenger is going to carry a laptop, this is also where padding earns its place, and the dedicated bag making guide covers padded lining in more depth. Keep the pocket mouths reinforced where fingers tug them open daily; a strip of skived leather behind the top edge stops a pocket from stretching out of shape over a year of use.
Edge Finishing and Final Steps
With the bag assembled, the edges are what separate a made messenger from a kit. On veg-tan I bevel every exposed edge, sand up through the grits, wet with Tokonole and slick hard with a profiled slicker, then wax — the same sequence that turns a raw cut into something that looks turned. The flap edge and the strap edges get the most handling, so they reward the most attention. The full grit progression and compounds are in the edge finishing guide.
If the messenger is veg-tan and you want color, dye the panels before assembly — dyeing a finished bag with shadowed gusset corners is a fight you will lose unevenly. A workable everyday body leather like a veg-tan shoulder is easy to source; you can browse veg-tan sides on Amazon, though a tannery off-cut bin usually wins on price. As an Amazon Associate I earn from qualifying purchases. Condition lightly, seal, and let it rest before you load it.
Frequently Asked Questions
What leather weight is best for a messenger bag?
Use 5 to 6 oz veg-tan for the body and flap so the bag holds structure and the flap folds crisply, with the strap cut separately from firmer 8 to 10 oz bridle. For a softer slouchy messenger, drop to 4 to 5 oz chrome-tan, accepting that you lose the crisp fold and burnishable edge.
How much leather does a messenger bag need?
A medium messenger needs roughly 14 to 18 square feet once you account for the body, flap, gusset, pockets and strap. Buy about 20 percent extra for cutting mistakes and grain defects. The strap comes from firmer bend leather, separate from the body side.
How deep should the gusset be on a messenger bag?
A gusset depth of 8 to 10 cm gives a usable everyday capacity without making the bag bulky. The gusset strip length must match the body perimeter exactly, measured on the actual cut body panel rather than the paper pattern, or the seam will pucker.
What closure is best for a leather messenger bag?
A buckle-and-billet closure is the most secure under a heavy load and ages well, but it is the slowest to open. Magnetic snaps or turn locks open faster but hold less securely. Mount any hardware on doubled, skived leather so it cannot tear out under load.
Should I hand-stitch or machine-stitch a messenger bag?
Hand saddle stitching is stronger on the load-bearing perimeter seam because it will not unravel if one stitch abrades through, which matters on a seam that flexes daily. Rivet the concentrated stress points like strap anchors and billets where a stitch alone would slowly work loose.
How wide should a messenger bag strap be?
Size the strap to the load: 3.8 to 5 cm (1.5 to 2 inches) wide for a bag you will fill, cut from firm 8 to 10 oz bridle or harness leather from the bend of the hide. Anchor it through D-rings so the strap pivots as the bag swings, spreading the load.
Related Guides
- Leather Bag Making: The Complete Guide
- How to Make a Leather Tote Bag
- How to Saddle Stitch Leather by Hand
- Leather Hardware Guide: Rivets, Snaps, Buckles
- Leather Edge Finishing: Bevel to Burnish



