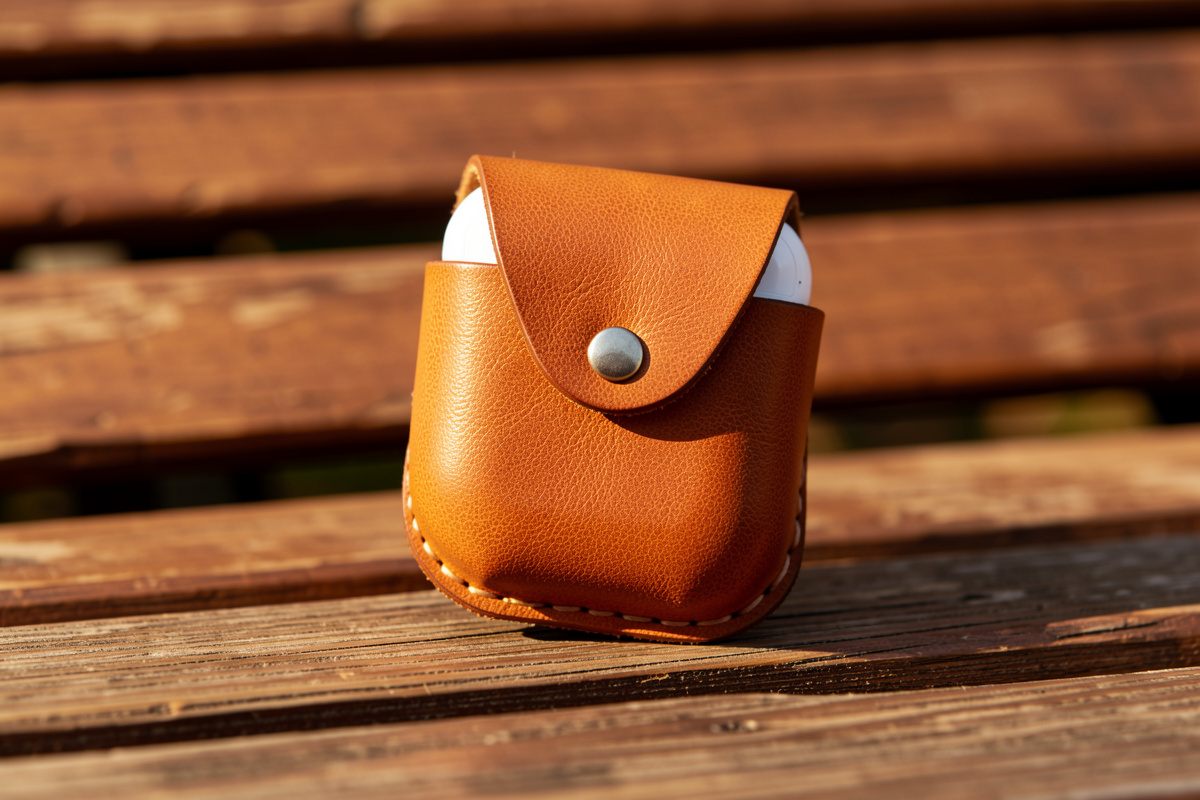
A leather AirPods case is a snug wrap of 4–5 oz veg-tan around the charging case, closed with a single line-20 snap, with a cutout or gap that clears…
A leather AirPods case is a snug wrap of 4–5 oz veg-tan around the charging case, closed with a single line-20 snap, with a cutout or gap that clears the lightning port and lets the lid open. Built to the actual case rather than a spec sheet, it takes an evening and about $6 of leather — and unlike most bought cases, it burnishes to an edge that gets better with pocket wear.
The trap with an AirPods case is that it looks like a tiny wallet and behaves like a wet-formed puzzle. The charging case has a lid that flips up, a port on the bottom, and a hinge that has to stay clear — so the pattern is really a study in clearances, not just a fold. Miss the lid clearance by 3 mm and the case looks great but won’t open; wrap it 2 mm too tight and the AirPods case won’t seat. Below is how I pattern it around the real object, where the snap has to land, and the two build routes — a soft stitched wrap or a wet-formed shell — depending on how structured you want it.
Pattern It Around the Actual Case
Do not build to Apple’s published millimeters — wrap the actual charging case in a strip of the exact 4–5 oz veg-tan you will use and mark where the leather meets. That wrap accounts for the two things a spec sheet never will: the case’s real girth and the leather’s own thickness added at every wrap. A current AirPods Pro case sits around 45 mm tall and 60 mm wide, but your finished pattern needs a few millimeters more all around once the leather thickness is in play.
The core pattern is a single piece that wraps from the back, under the bottom, and up the front to a snap tab, leaving the top open for the lid. Mark the fold lines where the leather bends around the bottom edge and lightly crease them; skive those fold zones so the wrap bends cleanly instead of springing. Leave a gap or punch a small port cutout at the bottom so you can charge without removing the case — this is the detail bought cases often get wrong and yours won’t. My templates guide covers turning that first wrap into a reusable pattern once you have dialed the fit.
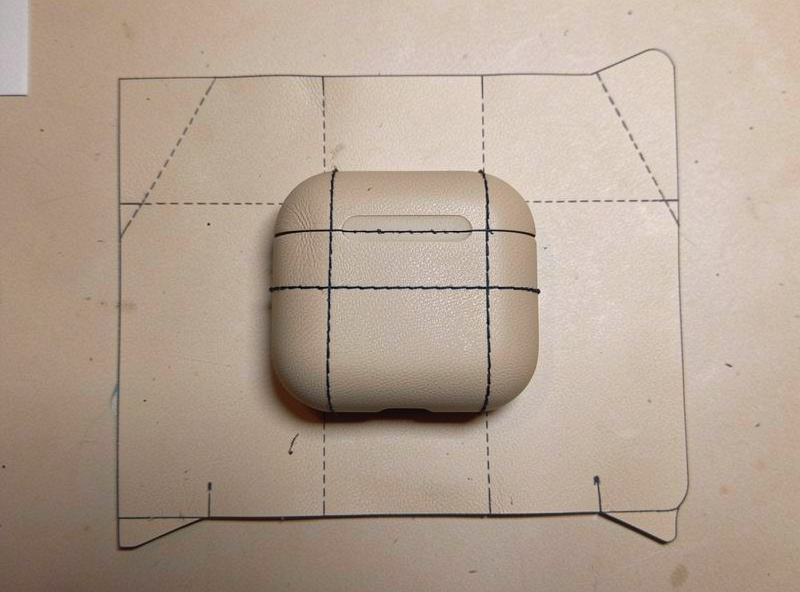
Dye and finish every interior-facing edge before you assemble, because a wrapped case has inner edges you will never reach again once it is stitched. Test-fit the charging case in the paper or scrap mock-up first, open the lid fully, and confirm nothing binds. Ninety seconds of test-fitting saves a finished case that closes beautifully but blocks the lid — the single most common failure on this build. I skipped that test on an early case, stitched it shut, and the lid jammed on the snap post — a ruined piece over 3 mm I could have caught in a scrap mock-up.
Setting the Snap and Clearing the Lid
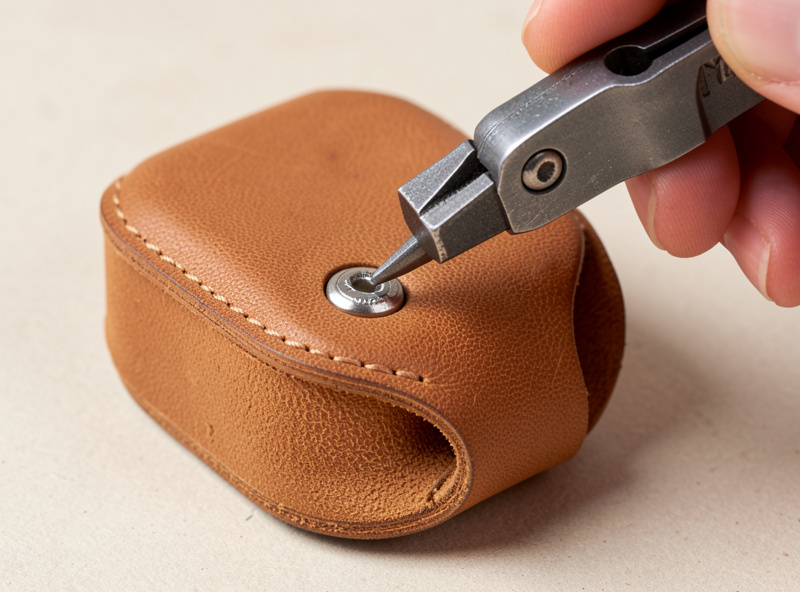
A line-20 snap is the right size — a line-24 looks like a manhole cover on a piece this small and its post can foul the lid hinge. Set the male half on the tab that wraps up the front and the female on the case body, positioned so the tab closes with light tension and the AirPods lid still flips fully open above it. The snap has to sit below the lid line or it fights the hinge.
Set the snap by hand with a setter and anvil — no press needed on leather this thin. My no-press snap guide covers the technique, and the hardware guide explains why snap size and placement matter more on small goods than anywhere else. Test the closure with the actual case inside before you seal anything: the tab should hold the flap shut without straining, and the lid should clear the snap by a few millimeters. As an Amazon Associate I earn from qualifying purchases. A line-20 snap setter kit handles this and every other snap in the EDC lineup.
Soft Wrap vs Wet-Formed Shell
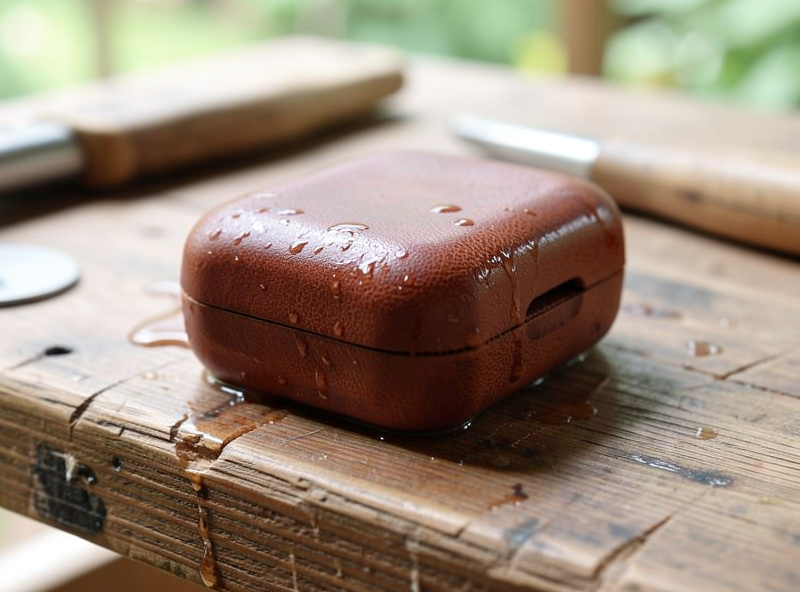
There are two ways to build this, and they feel completely different in the pocket. A soft stitched wrap follows the case loosely and is faster to make; a wet-formed shell is molded to the case’s exact contours and holds its shape like a second skin. Here is how the two routes compare:
| Feature | Soft Wrap | Wet-Formed Shell |
|---|---|---|
| Leather | 4 oz veg-tan | 5 oz veg-tan |
| Fit | Snug, slightly loose | Molded to contours |
| Build time | One evening | Two evenings + drying |
| Difficulty | Intermediate | Advanced |
| Feel | Supple, forgiving | Rigid, precise |
For a first attempt I steer people to the soft wrap — it forgives a millimeter of pattern error where the wet-formed shell punishes it. If you want the molded version, case the leather, press it around the charging case (protected in plastic wrap), and let it dry to shape before stitching; my wet-forming guide and the piece on molding for custom fit cover casing and boning the leather to the object. Wet-forming is veg-tan-only territory — chrome-tan won’t hold a form — which is one more reason this build stays in veg-tan. Firm tooling veg-tan from a tannery such as Wickett & Craig takes and keeps a molded shape well.
Stitching and Edge Finish
The wrap is closed with a short run of saddle stitch up each side, and because the piece is small the stitch has to read fine — I use a European-pitch iron around 3.85 mm and 0.6 mm waxed thread so the stitch line stays in proportion. A coarse pitch on a piece this size looks clumsy. Keep the stitch line parallel to the edge and use a groover or a light crease line to guide it.
Finish the edges to a slick gloss because on a case that lives in a pocket the edge takes constant abrasion; a rough edge frays and snags within weeks. Bevel, sand through the grits, and slick with Tokonole — the full sequence is in my edge finishing guide. If the two-needle stitch is new to you, work through the saddle stitch tutorial first, and the thread guide covers matching thread to your iron pitch. An AirPods case pairs naturally with the rest of the EDC small-goods set — build it alongside a matching key fob and the two read as a kit.
Frequently Asked Questions
What leather weight is best for an AirPods case?
4-5 oz veg-tan. Use 4 oz for a soft stitched wrap that bends easily around the case, and 5 oz if you plan to wet-form a rigid molded shell. Veg-tan is essential because the case needs to burnish and, for the molded version, hold a form that chrome-tan cannot.
How do I make sure the case still opens after wrapping it?
Leave the top open above the lid line and set the snap low enough that it clears the hinge. Always test-fit the actual charging case in a scrap mock-up, open the lid fully, and confirm nothing binds before you cut your good leather. A blocked lid is the most common failure.
Should I pattern to Apple’s published dimensions or the real case?
Wrap the real case in the exact leather you will use and mark where it meets. Published millimeters ignore the case’s true girth and the leather thickness added at every wrap, so a spec-sheet pattern comes out too tight. The physical wrap is the only reliable pattern source.
What size snap should I use on a leather AirPods case?
A line-20 snap. A line-24 is oversized for a piece this small and its longer post can foul the lid hinge. Set the male half on the wrap tab and the female on the body, positioned below the lid line so the case still flips fully open.
Can I charge the AirPods case without removing the leather case?
Yes, if you plan for it. Leave a gap or punch a small port cutout at the bottom of the wrap so the charging cable reaches the port. This is a detail many bought cases skip, and building your own lets you get it right from the pattern stage.
Is a wet-formed AirPods case worth the extra effort?
For a precise, rigid fit, yes, but it is an advanced build that punishes pattern error. A soft stitched wrap is more forgiving and faster, so I recommend starting there and moving to a wet-formed shell once you have the fit dialed in on the softer version.
Further Reading
- Leather EDC Projects: The Small-Goods Guide
- How to Make a Leather Key Fob
- Leather Wet Forming: The Complete Guide
- Setting Snaps Without a Press
- Leather Edge Finishing: Bevel to Burnish



