The best rivets for leather depend on the project: copper burr rivets for heritage-quality permanent fasteners (belts, bag straps, knife sheaths), brass double-cap rivets for everyday hardware on…
The best rivets for leather depend on the project: copper burr rivets for heritage-quality permanent fasteners (belts, bag straps, knife sheaths), brass double-cap rivets for everyday hardware on wallets and small goods, and stainless steel rivets for outdoor and wet-environment goods (dog collars, hunting gear). For most hobbyists, a 100-piece kit of 9mm brass double-cap rivets covers 80% of projects at 12-20 dollars. The leather hardware hub covers where these rivet choices fit alongside snaps, buckles, and matching-finish hardware decisions.
Rivets are the underrated hardware of leatherwork. Most beginners over-rely on stitching where a rivet would be stronger, faster, and historically more correct. A well-set copper burr rivet outlasts the leather around it; a brass double-cap rivet adds visual character to wallet corners; a stainless steel rivet keeps hardware functional on dog collars exposed to rain and saltwater. The right rivet choice — material plus size — turns workmanlike pieces into refined ones.
I once used a stainless steel rivet with a post that was 2mm too long for the leather stack. The rivet sat proud and caught on everything — pocket linings, car seat fabric, other items in my bag. The sizing tables and material comparison below include the post-length calculation that prevents this: add your leather stack thickness in mm and order a post length 1-2mm taller, never shorter.
As an Amazon Associate I earn from qualifying purchases.
The Three Main Rivet Materials and Their Use Cases
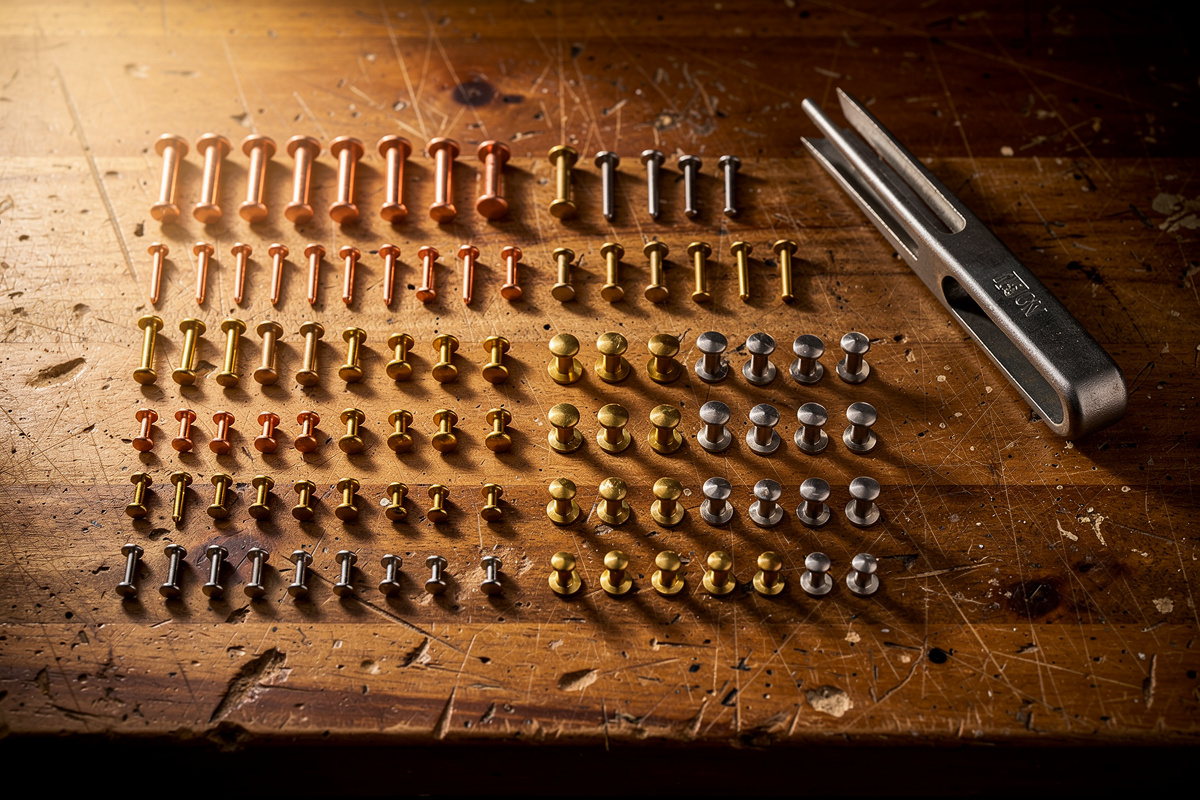
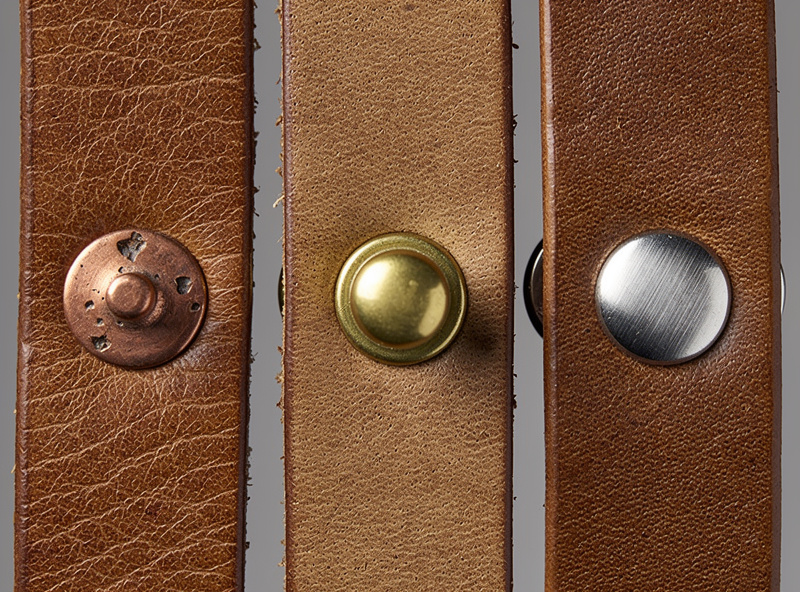
Copper, brass, and stainless steel cover almost every leather rivet need. Copper rivets are the strongest and most heritage-correct, used historically for harness and saddle work. Brass double-cap rivets are the convenience choice for wallets, belts, and small goods. Stainless steel rivets resist corrosion in wet environments where copper and brass would oxidize.
Material-by-material breakdown:
- Copper burr rivets: Two-piece system (rivet stem + burr washer). Strongest possible leather fastener. Patina to a green-brown color over years. Used on saddlery, harness, knife sheaths, premium belts. Setting requires hammering; learning curve 2-3 hours.
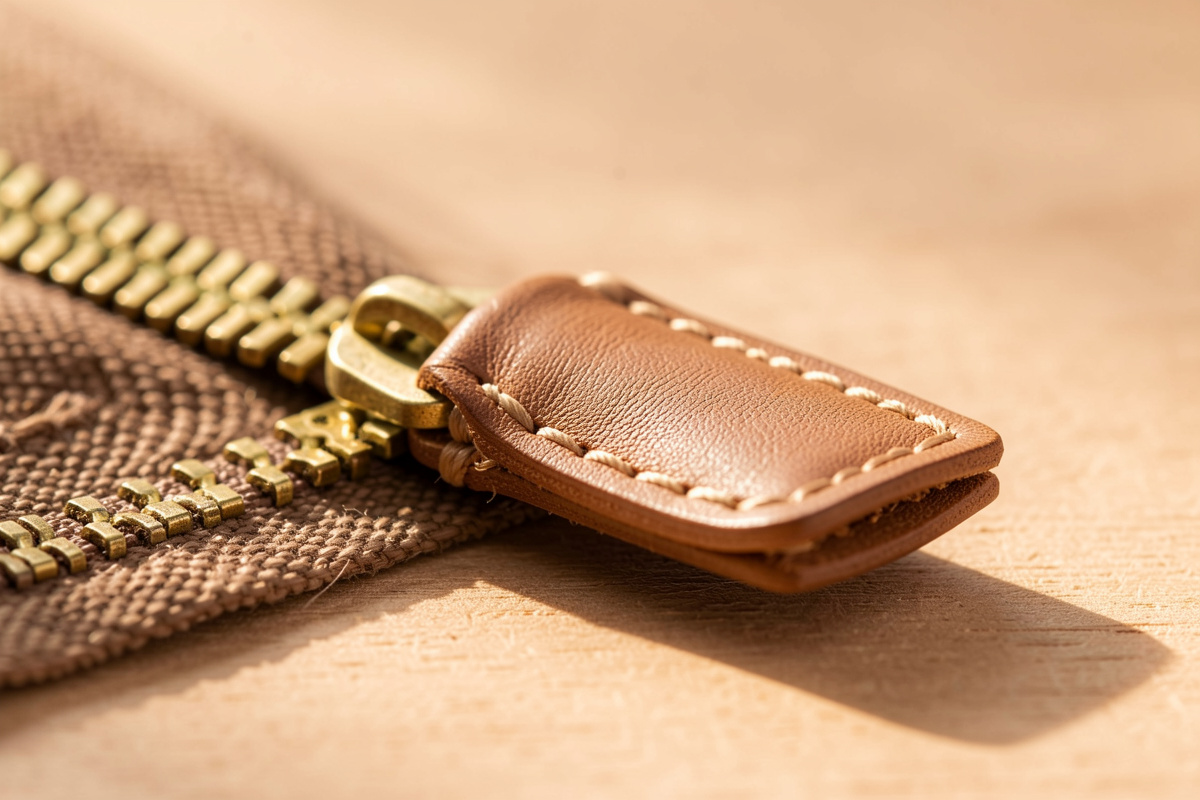
- Brass double-cap rivets: Two-piece system (cap + post). The convenience standard. Hand-set with a basic anvil-and-setter; 5-second per rivet once technique develops. Used on wallets, dog collars, small bags. 100-piece kits cover most beginner needs.
- Stainless steel rivets: Various two-piece systems. Higher corrosion resistance than copper or brass. Used on outdoor goods, dog collars, hunting and fishing gear. Slightly harder to hand-set than brass.
- Aluminum rivets: Cheaper than copper or brass. Lower strength; corrode in salt environments. Acceptable for low-stress decorative use only.
- Black-oxide brass: Brass coated with black oxide finish. Looks blackened steel; matches dark hardware combinations. Less durable than uncoated brass — finish wears at high-stress points.
- Antique-finish copper: Copper with applied antique patina from manufacturer. Looks aged from day one. Some hobbyists prefer the immediate look; purists prefer the natural patina that develops.
For starting out, brass double-cap rivets in 9mm length with 9mm cap diameter cover 80% of hobbyist projects. A 100-piece kit at 12-20 dollars from Tandy, Buckle Guy, or Springfield Leather is enough for 25-50 projects. Add copper burr rivets and stainless steel later as projects demand them.
Rivet Sizes: Length and Cap Diameter
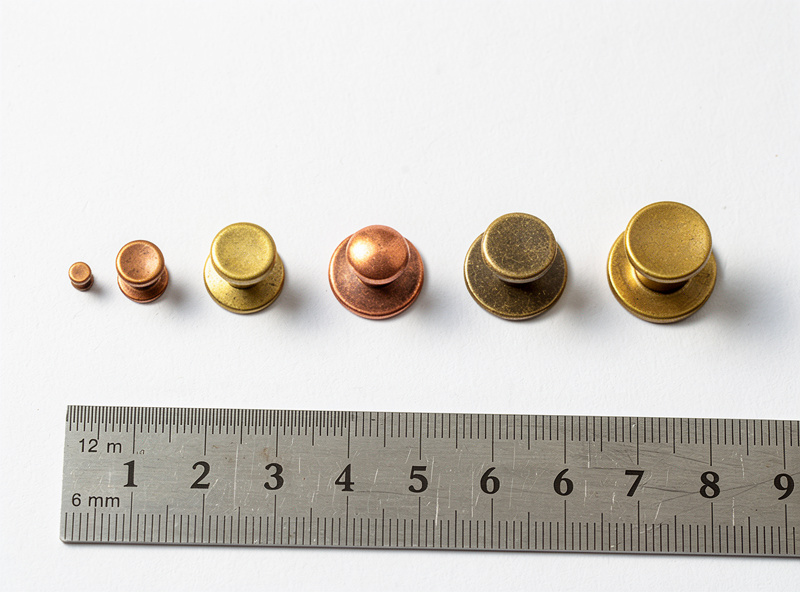
Rivet sizing involves two measurements: post length and cap diameter. Post length must be slightly longer than the combined leather thickness it passes through, with 2-3mm extra for setting. Cap diameter is mostly aesthetic — small caps for refined pieces, large caps for rugged or decorative work. Typical hobbyist sizes are 6mm cap on wallets, 9mm cap on belts and small bags, 12mm cap on heavy-duty pieces.
Size-to-application matching:
- 6mm cap, 6mm post: Wallet snaps, watch strap loops. Smallest practical for hobby work.
- 7mm cap, 6-9mm post: Card holders, slim wallets, refined pieces.
- 9mm cap, 9mm post (universal): Most-used size in hobby leatherwork. Belts, dog collars, small bags, watch straps. Buy first.
- 11mm cap, 9-12mm post: Saddlery, traditional work, decorative emphasis.
- 12mm cap, 12mm post: Heavy work — saddle bags, harness, structural straps.
- 14mm+ cap, custom posts: Specialty saddle and harness work. Rare for hobbyists.
Post length matters more than cap diameter for proper setting. Too-short posts produce loose rivets that fall out; too-long posts mushroom incorrectly and create lumpy installations. Match post length to leather stack: 6mm post for 4mm leather stack, 9mm post for 6-7mm leather stack, 12mm post for 9-10mm leather stack.
Comparison Table: Rivet Options for Leather
| Rivet Type | Material | Strength | Setting Method | Best For |
|---|---|---|---|---|
| Copper Burr | Copper | Highest | Hammer + anvil | Saddlery, knife sheaths, premium belts |
| Brass Double-Cap | Brass | Medium-High | Hand setter + anvil | Wallets, dog collars, small bags |
| Brass Single-Cap | Brass | Medium | Hand setter + anvil | Decorative work, light-stress points |
| Stainless Steel | 304/316 SS | Medium-High | Hand setter + anvil | Outdoor goods, marine gear |
| Aluminum | Aluminum | Low | Hand setter + anvil | Decorative only — skip for structure |
| Black-oxide Brass | Brass coated | Medium | Hand setter + anvil | Dark hardware aesthetics |
| Solid Brass Saddle | Solid brass | High | Special tools | Western and traditional saddlery |
Specific hardware brands worth knowing: Tandy Craftool rivets (most-stocked at retail, solid brass medium double-cap runs about 13 dollars per 100), Ohio Travel Bag (commercial supply, large quantities), and Buckle Guy (curated quality across all materials). Note “Sam Browne” is a stud/button style — a domed closure fastener named after the belt, not a rivet brand — so don’t go looking for “Sam Browne rivets” as a saddlery-grade product line. Avoid generic Amazon “leather rivet kits” without specified material grade — counterfeit pot-metal rivets are common.
Setting Rivets Without a Press
A basic rivet setter tool set with an anvil and setting post costs under 15 dollars and eliminates the hammer-and-pry approach that deforms caps.
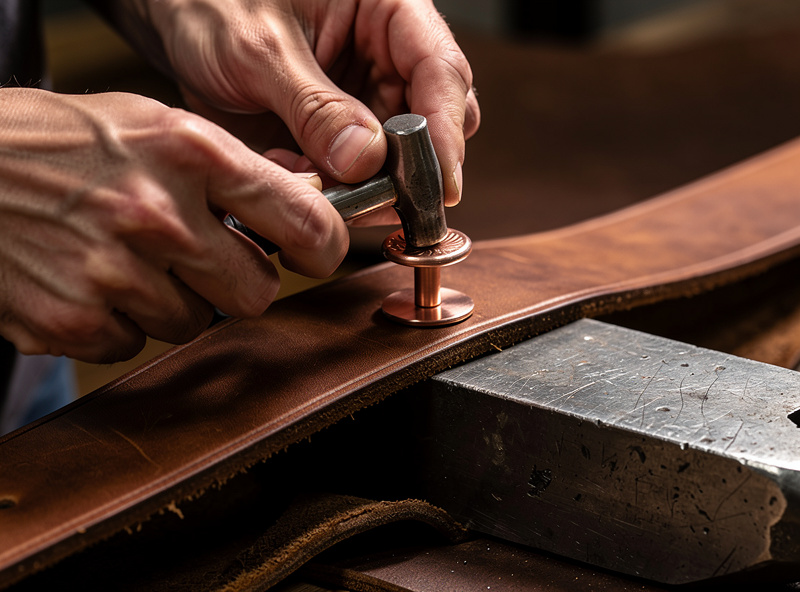
Most hobbyist rivets can be hand-set with a small anvil, a setter punch matched to the rivet size, and a 1-pound ball-peen hammer. The technique: punch a hole through the leather sized to the rivet post, insert the post through both leather pieces, place the cap on top, position the setter punch over the cap, and strike firmly with the hammer. Two to four solid strikes mushrooms the post into the cap permanently.
Setting procedure:
- Punch the hole: Drive punch sized to the rivet post diameter. Hole should be snug — too large lets the rivet rotate; too small splits the leather.
- Position the leather pieces: Stack the two pieces being joined; verify alignment.
- Insert the rivet post: From the visible/decorative side. Cap goes on the side that will face up.
- Position on anvil: The cap sits in the cap-shaped indentation in the anvil to prevent damage.
- Place the setter punch: Setter is matched to the rivet size; covers the post end without touching the leather.
- Strike firmly with the hammer: 2-4 solid strikes. The post mushrooms into the cap and locks.
- Test by trying to rotate the rivet: Properly set rivets do not rotate; loose rivets need re-striking.
For copper burr rivets specifically, the technique varies — the rivet post extends through a burr washer, and the post end is hammered with a ball-peen hammer to mushroom over the washer. The result is the iconic hammered-copper look on saddlery. Read about specific setting tools in our how to set snaps on leather without a press guide.
Common Rivet Setting Mistakes
Five mistakes show up in nearly every first-time rivet installation: wrong post length for leather thickness, hole too large or too small, hitting at an angle and mushrooming sideways, using the wrong setter punch size, and skipping the anvil for direct hammer strikes. Each one shows up as loose, crooked, or visually marred rivets.
Mistakes and corrections:
- Wrong post length: Too short and the rivet does not engage; too long and it mushrooms sideways. Match post to leather thickness plus 2-3mm.
- Hole too large: Rivet rotates after setting. Use a punch one size smaller than you think — leather stretches.
- Hole too small: Splits the leather under stress. The hole should be snug but not require force to insert the rivet.
- Angled strikes: Hammer must hit straight down. Angled strikes mushroom the post sideways and produce crooked rivets.
- Wrong setter size: Setter must match the cap. Too-small setter dents the cap; too-large setter does not engage.
- Direct hammer strike: Always use a setter punch between the hammer and the rivet. Direct strikes mar the cap finish.
- No anvil: Rivets set on soft surfaces (cardboard, wood) bend instead of mushrooming. Use a proper steel anvil.
- Forgetting to remove the burr washer for double-cap rivets: Double-cap rivets do not use burr washers; that is for copper burr rivets only.
The reliable practice habit is to set 5-10 practice rivets on scrap leather before any project rivet installation. The practice rivets reveal technique problems before they ruin the project. After 20-30 successful sets, the technique becomes muscle memory and rivets go in cleanly first try.
Frequently Asked Questions
What rivet size should I use on a leather belt?
9mm cap with 9mm post is the standard for belt buckle attachments and tip reinforcements. The 9mm cap reads correctly on belt-scale projects without looking oversized. Larger 11mm or 12mm rivets work for heavy-duty work belts; smaller 7mm rivets work for dress belts under 1.25 inches wide.
Are copper rivets stronger than brass rivets?
Yes, somewhat. Copper burr rivets create a permanent mechanical lock through hammer mushrooming over a washer; brass double-cap rivets rely on the cap-and-post friction fit. For pure load-bearing applications copper wins. For visual variety and ease of installation brass wins. Both are stronger than the leather around them on hobby projects.
Do I need a press to set leather rivets?
Not for most hobby work. A small anvil, matched setter punches, and a 1-pound ball-peen hammer set every common rivet type. Presses speed up production work and help with exotic-size rivets, but the 30-50 dollar hand-tool kit covers everything beginner to intermediate hobbyists need.
Can I use copper rivets indoors without patina concerns?
Yes. Indoor copper does develop slow patina over years but stays attractive — the warm copper-to-bronze transition is part of why hobbyists choose copper. The dramatic green patina happens primarily with outdoor exposure or salt contact. Indoor wallets and belts develop subtle warm-tone patina without the dramatic verdigris.
What hole size do I drill for leather rivets?
Match hole size to the rivet post diameter, not a fraction of it: a 6mm post needs roughly a 6mm punch, a 9mm post roughly a 9mm punch, a 12mm post roughly a 12mm punch — snug enough that the post doesn’t rotate but not so tight it forces through the leather. Some rivet kits include matched hole punches; if not, leather rotary punches in graduated sizes cover all standard rivet posts.
Should I rivet or stitch a dog collar?
Rivet for the buckle attachment and tip; stitch the rest of the collar body. Dog collars experience strong shear forces at the buckle that rivets handle better than stitching alone. Combining rivets at high-stress points with stitching for the body produces the strongest result.
Related Articles
- How to Set Snaps on Leather Without a Press
- Leatherworking Starter Kit
- Best Leather for Wallets
- Best Edge Bevelers for Leather
- How to Make a Leather Bifold Wallet