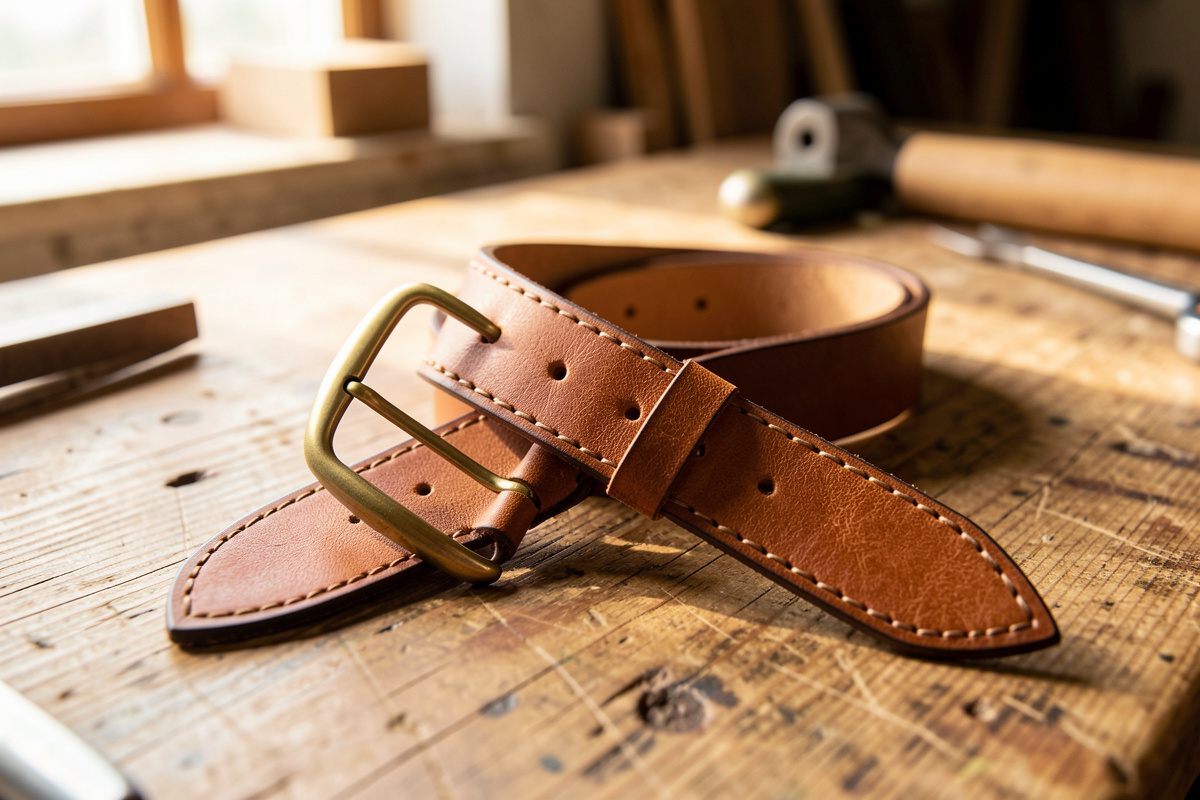
Making a leather belt takes a single strip of 8-10 oz veg-tan, a buckle, and about three hours of bench time. A finished hand-stitched belt costs me roughly…
Making a leather belt takes a single strip of 8-10 oz veg-tan, a buckle, and about three hours of bench time. A finished hand-stitched belt costs me roughly $25-35 in material and outlasts every $60 mall belt I have owned. The whole tutorial below is one piece of leather, four holes, and an edge I can be proud of.
I have cut belts from full bends and from pre-cut strips both ways, and the strip-cut version is where most beginners go wrong. A belt is the most unforgiving project on the bench because it is long, narrow, and every wobble in your cut or your edge shows for the full 44 inches. Get the leather weight and the strap-end shape right and the rest is patient finishing.
What Leather Weight Makes a Good Belt?
A dress belt wants 8-9 oz veg-tan; a heavy work or gun belt wants two layers of 8 oz glued back-to-back for roughly 16 oz total. Thinner than 8 oz and the belt rolls and folds at the buckle within a month. I cut mine from Wickett & Craig bridle when I want a belt that breaks in dark and stiff.
Veg-tan is the only sensible choice here because a belt needs to hold its shape and take a burnished edge. Chrome-tan stays floppy and will never slick clean, so it ends up looking like a strip cut from a couch. For a 1.5-inch dress belt I default to a single 9 oz strap; for a stout EDC belt I laminate two 8 oz pieces flesh-to-flesh with contact cement and stitch the perimeter. The leather thickness chart I keep at the bench settles most of these arguments before I ever pick up the knife.
How to Cut a Belt Strip Straight
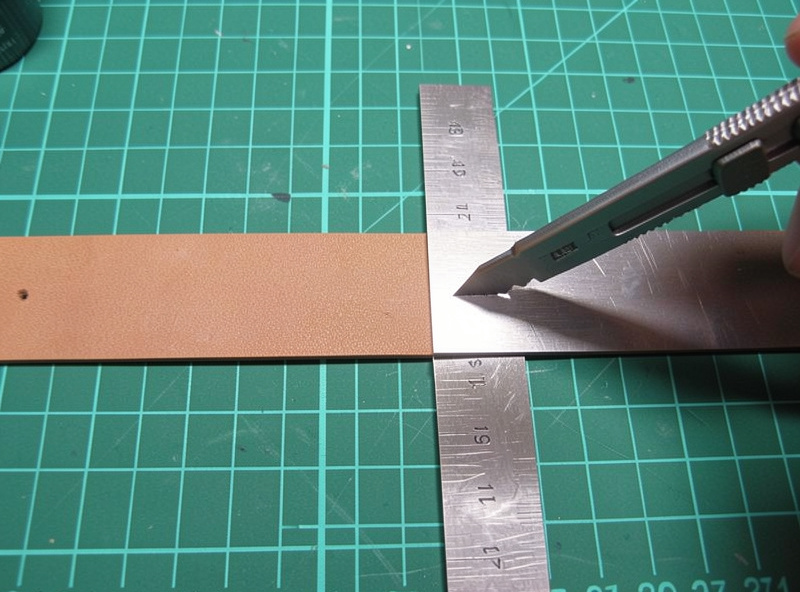
Cut belt strips with a strap cutter or a steel straightedge and a fresh blade, taking two or three light passes rather than one deep drag. A 1.5-inch strap that drifts even an eighth of an inch over its length reads as crooked on the body. I clamp my straightedge and never trust freehand on a cut this long.
I set my adjustable strap cutter to width, run the first pass to score, then deepen it on the second and third. The trick is keeping the leather flat and the cutter tight against the grain edge of the bend so the strip inherits a true reference line. Standard belt widths are 1.25, 1.5, and 1.75 inches; match the width to the buckle you bought, not the other way around. If you are cutting freehand against a straightedge instead of using a strap cutter, the same two-pass discipline that keeps any straight leather cut clean applies here.
How Long Should I Cut the Belt?
Cut your belt blank to your waist measurement plus 10-12 inches: about 5 inches for the buckle fold and tip, plus the run of adjustment holes. For a size 34 waist I cut a 46-inch blank. Measure an existing belt that fits from the buckle fold to the hole you use, and match that.
The classic mistake is sizing to your trouser tag instead of measuring a belt you actually wear. I learned this the hard way on my second belt: I cut to a labeled 36, punched five holes, and the comfortable hole landed two inches off the back end with no room to spare. Now I measure fold-to-favorite-hole on a worn belt, add the tip length, and only then cut. The buckle end gets a slot for the buckle prong; the tip end gets shaped.
Shaping the Tip and Buckle End
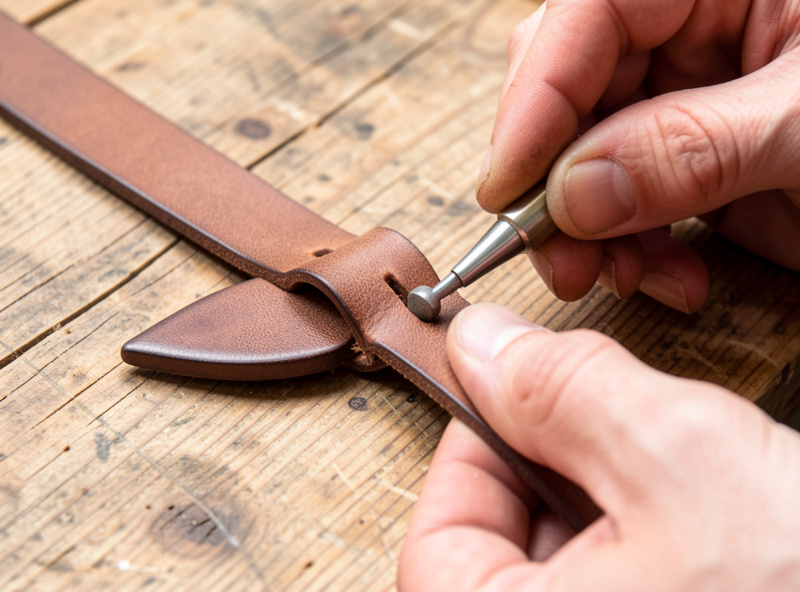
Round the buckle-fold corners and shape the tip with an English point, a rounded swoop, or an angled cut, then punch the buckle slot 0.5 inch in from the fold. The tip shape is purely cosmetic, but a ragged tip is the first thing anyone notices. I template my tips so both belts in a matched set are identical.
For the buckle slot I mark the prong width, punch a round hole at each end of the slot, then connect them with a strap-end punch or a knife. The fold needs to wrap a 1.5-inch buckle bar, so I leave about 3 inches of leather past the slot before the snaps or stitching that holds the fold closed. I bevel the fold area slightly on the flesh side so it wraps without cracking the grain.
Setting the Buckle and Adjustment Holes
Punch 5 adjustment holes spaced 1 inch apart, centered on your measured fit hole, using a 4-5 mm oblong or round punch. The fold closes with two Chicago screws or two line-24 snaps so the buckle is removable. I prefer Chicago screws because they let me swap buckles without a press.
Center hole on the measured fit, two holes ahead, two behind: that gives a comfortable two-inch range each way. I punch with the belt flat and the punch dead vertical, because an angled punch leaves an oval hole that the prong wears into a tear. For removable hardware I set two Chicago screws through the fold; the full rundown on belt hardware sizing lives in my leather hardware guide if you are matching screw post length to a doubled 16 oz belt.
Do You Need a Belt Pattern?
You do not need a printed pattern for a basic belt; the strip is the pattern, and only the tip and buckle slot need a template. I keep a thin acrylic template for each tip shape I use so every belt in a set matches and I never re-measure the slot. A pattern matters more once you add keepers or a contour-cut waist.
For a straight 1.5-inch belt, the geometry is the width of your cut and the length of your blank, full stop. Where a template earns its keep is the strap end: I traced an English point onto 2 mm acrylic, cut it on the workshop laser, and now every tip is identical without freehand guessing. If you want a contoured belt that curves to follow the waist, that is where a full paper pattern comes in, and the same template discipline that governs any beginner leather project pays off. A belt keeper, the small loop that holds the tail down, is just a short strip skived thin and wrapped around the doubled belt, sized to your strap width plus the leather thickness.
Finishing the Belt Edges
Bevel, sand, and burnish all four edges of the belt before final assembly, because a 44-inch slicked edge is what separates a handmade belt from a kit belt. I run a #2 beveler, sand 400 then 600 grit, then slick with Tokonole and a printed hardwood slicker until the edge turns glassy. This is the step that takes the longest and matters the most.
On a belt, the edge is the largest visible surface, so I treat it like the whole project depends on it. Bevel both grain-side corners, knock the flesh corners down with sandpaper, then case the edge lightly and burnish with a slicker run fast enough to build friction heat. Two coats of Tokonole with a buff between them gives a sealed, rounded edge that resists the daily abrasion a belt takes against jeans. A belt that flexes hundreds of times a day will telegraph a lazy edge faster than any other piece you make.
Conditioning and Breaking In a New Belt
A new veg-tan belt is stiff for the first two weeks; one thin coat of neatsfoot oil and a few days of wear softens it without going limp. I rub a light coat into the flesh side, let it absorb overnight, then buff and seal the grain with a carnauba creme. Over-oiling is the mistake that turns a crisp belt into a noodle.
Resist the urge to soak a new belt to speed the break-in; you will stretch it permanently and dull the color. The belt I wear daily got one coat of neatsfoot when it was built, and three years of wear has done the rest, darkening the grain to a deep amber the way only veg-tan does. A sealed grain keeps sweat and rain from blotching the leather, and a wipe with a damp cloth plus an annual re-condition is the entire maintenance schedule. Treat the leather the way it ages best and the belt outlives the buckle.
Frequently Asked Questions
What thickness leather is best for a belt?
A dress belt uses 8-9 oz veg-tan; a heavy work or gun belt uses two 8 oz layers glued for roughly 16 oz. Below 8 oz the belt rolls and folds at the buckle within weeks.
How long should I cut a leather belt blank?
Cut to your waist plus 10-12 inches: about 5 inches for the buckle fold and tip plus the adjustment hole run. Measure a belt that fits from the fold to your favorite hole rather than using your trouser size.
How many holes should a leather belt have?
Punch 5 holes spaced 1 inch apart, centered on your measured fit hole. That gives roughly a two-inch adjustment range each direction, which covers normal weight fluctuation and layered versus tucked wear.
Do I need to stitch a leather belt?
A single-layer belt needs no stitching beyond the buckle fold, which you can close with two Chicago screws or snaps. A doubled belt is stitched around the full perimeter for strength and a finished look.
Can I make a belt without a strap cutter?
Yes. Clamp a heavy steel straightedge and cut with a fresh blade in two or three light passes. A strap cutter is faster and more consistent over 44 inches, but a straightedge and patience produce a clean strip.
What buckle size fits a 1.5-inch belt?
A 1.5-inch belt needs a buckle with a 1.5-inch bar. Buy the buckle first and cut the strap to match it, because forcing a wide strap through a narrow buckle bunches the fold and never sits flat.
Related Guides
- Leather Projects for Beginners: The Right First Three Builds
- Leather Thickness Chart: Ounces to MM for Every Project
- Leather Hardware Guide: Buckles, Rivets, and Snaps
- Best Leather for Wallets: Thickness, Type, and Grain
- How to Cut Leather Straight Every Time



