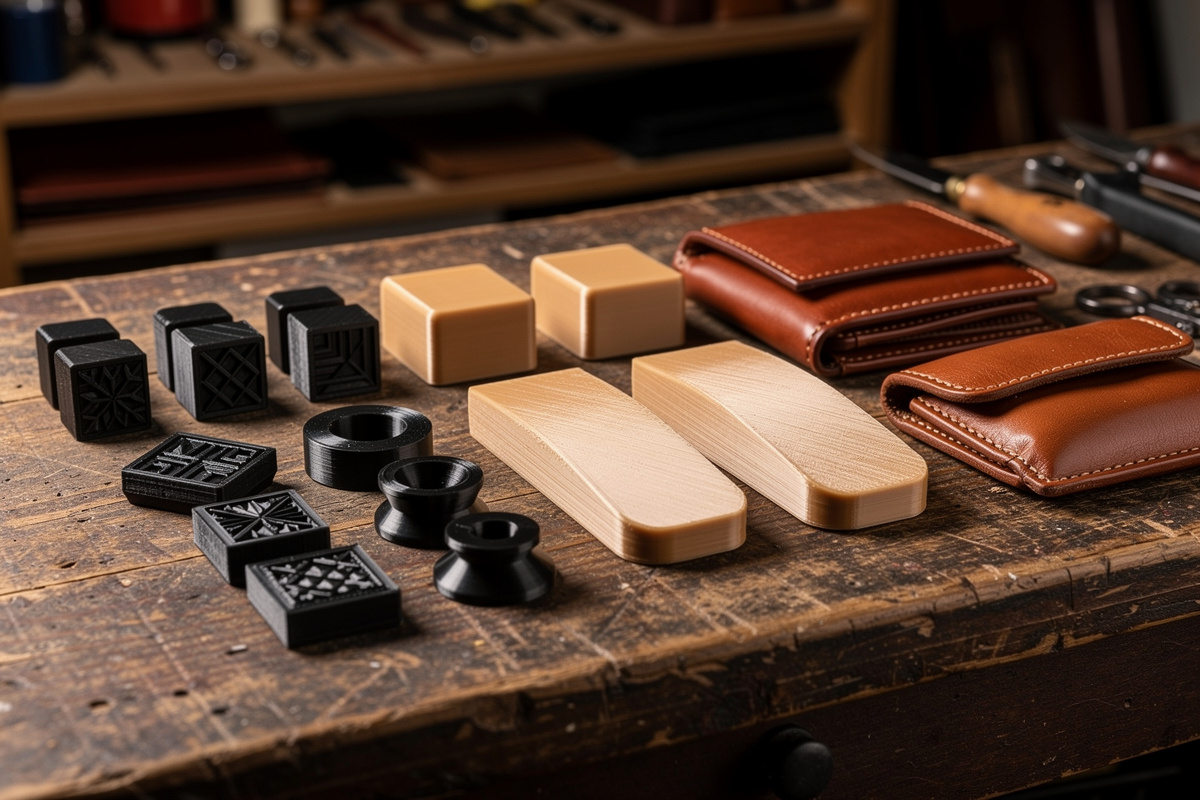
Three categories of 3D-printed leather tooling are worth printing: decorative stamps in PETG (any pattern, $0.20 in filament vs $25-$60 commercial), edge slickers in PLA-CF (sized exactly for…
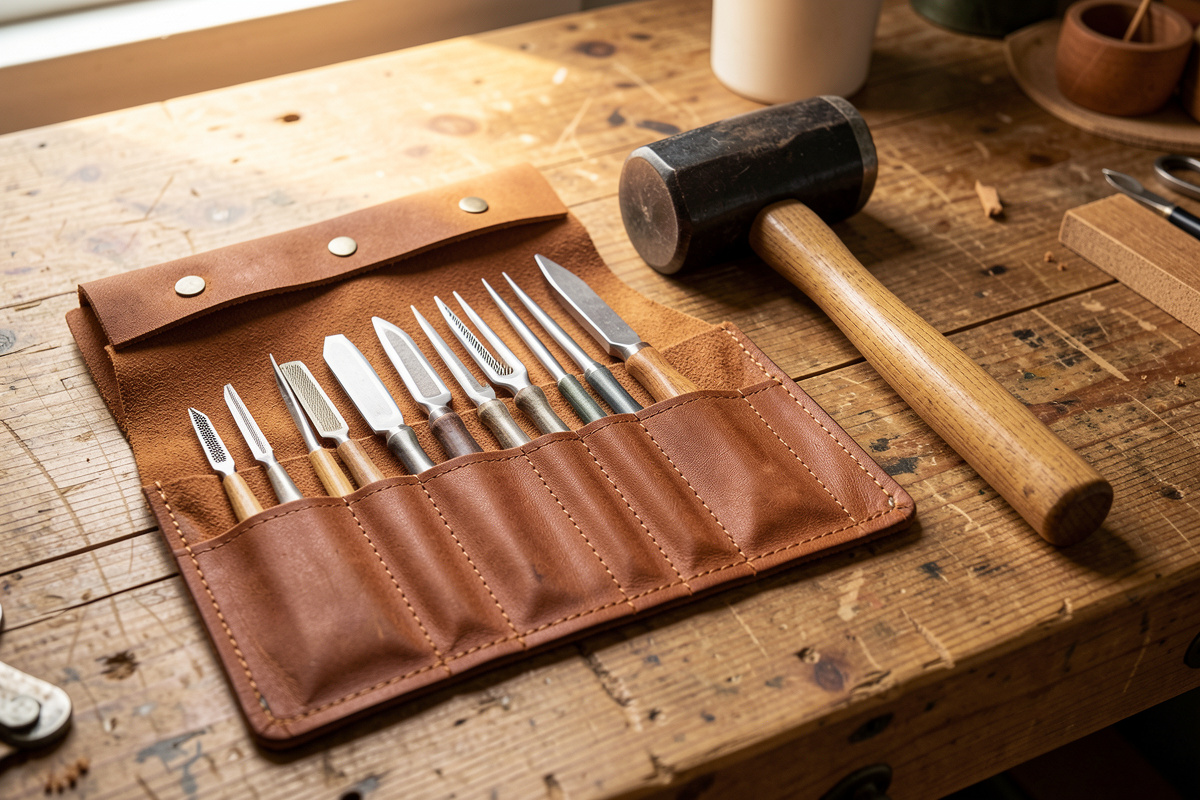
Three categories of 3D-printed leather tooling are worth printing: decorative stamps in PETG (any pattern, $0.20 in filament vs $25-$60 commercial), edge slickers in PLA-CF (sized exactly for the edge profile of your projects, $0.40 vs $35 commercial), and wet-mold form blocks in PETG (custom geometry no commercial form covers, $1-$5 vs not commercially available). Each replaces tooling that costs 50-100x more from leather suppliers, and lets a hobbyist build out a custom tool kit — profiles and patterns no commercial supplier carries — without paying commercial prices to get there. The leatherworking tools hub covers where 3D-printed tooling fits alongside the tier-one essentials and tier-three production tooling.
Leathercraft is one of the smaller niches where 3D printing produces immediately-better results than buying. The leather tools commercial suppliers sell are generic, expensive, and never quite the right size for the project at hand. A 3D printer plus PETG turns the tool inventory from a constraint into a design variable: any stamp pattern, any slicker profile, any form block geometry, in 90 minutes and under $5 of filament. This guide covers the three tool categories that pay off, the print settings that produce leather-tool-quality parts, and the design rules that make the tools last instead of crack on first use.
I printed my first leather stamp in standard PLA and it cracked on the third mallet strike. Switching to PETG solved the durability problem and a spool of PETG at $22 produces roughly 25-30 stamps — the commercial equivalent would cost $400+. The edge slicker geometry and CAD template below are what I iterated across six prints to get the burnish quality comparable to a purchased wooden slicker.
Why 3D Print Leather Tools Specifically
Three reasons 3D printing wins for leather tooling specifically:
Custom geometry is free. Commercial leather stamps come in standard patterns. A 3D-printed stamp can carry your logo, your customer’s monogram, a specific decorative border, or a brand mark that no commercial supplier sells. Total marginal cost per custom design: 30 minutes of CAD plus $0.20 of filament.
Cost compression. A commercial leather edge slicker (e.g., a Kemovan or Vergez Blanchard) costs $35-$80. A 3D-printed PLA-CF edge slicker costs $0.40 in filament and 90 minutes of print time. Across a 20-tool starter kit, the savings compound past $1,000.
Iteration speed. If a stamp pattern is too deep or an edge slicker profile is too narrow, you adjust the CAD file and reprint within hours. Commercial tools are fixed; print is iterative.
The print quality required for these tools is achievable on any modern hobby printer. PrintForgeHQ’s 15 practical 3D printing projects hub covers the broader category of “tools you print rather than buy” — leather tooling fits into that pattern cleanly. The catch is the material and settings choices that make printed tools last under repeated use.
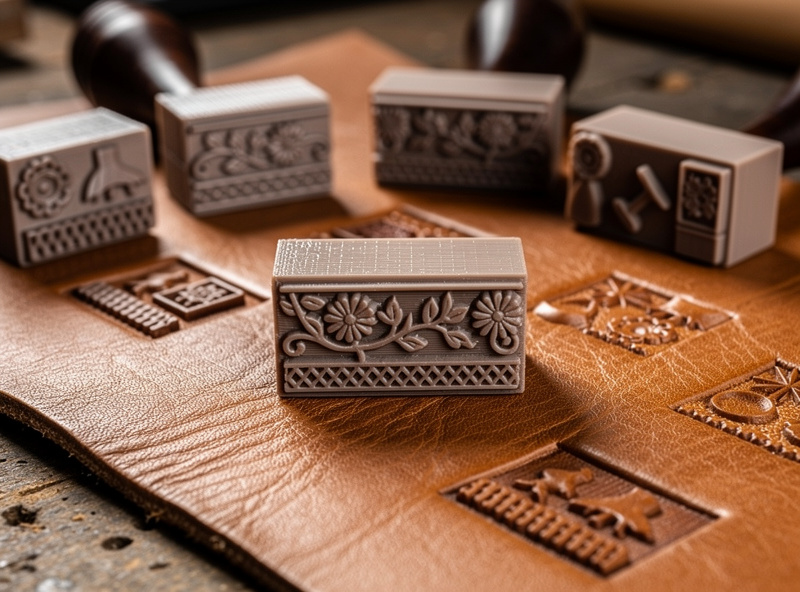
Category 1: Leather Stamps (PETG, $0.20-$1.50 each)
Decorative stamps for tooled leather work. Press the stamp against damp vegetable-tanned leather with a mallet to leave a permanent impression.
Design rules:
- Stamping surface area: 5-15 mm wide for fine detail, up to 30 mm for borders.
- Detail depth: 1.5-2.5 mm raised pattern (any deeper risks cracking on PETG).
- Backing: 8-12 mm flat backing behind the pattern for mallet strikes.
- Handle: 30-50 mm cylindrical or 10×10 mm square grip.
- Filament: PETG only. PLA cracks under repeated mallet strikes. ABS warps during print.
Print settings: 0.12 mm layer height, 5 walls, 50% gyroid infill. Print stamp face DOWN on the build plate (smoothest surface). 230 °C nozzle, 80 °C bed.
The community library on Printables has 200+ free leather stamp designs. Search “leather stamp” and sort by remix count. Custom designs typically take 30 minutes to design in Tinkercad or Fusion 360.
Category 2: Edge Slickers (PLA-CF, $0.40-$2.00 each)
Edge slickers smooth and polish the cut edge of leather to a finished surface. Different leather thicknesses need different slicker channel widths.
Design rules:
- Channel widths: 1.5 mm (for 2-3 oz), 2.5 mm (4-5 oz), 3.5 mm (6-7 oz), 5 mm (8-10 oz).
- Channel depth: 1.5-2.5 mm.
- Body shape: drop-shape, 60-80 mm long, 25-30 mm wide at the widest point.
- Filament: PLA-CF (carbon fibre filled PLA) for stiffness and surface hardness. PLA pure works but wears faster.
- Surface finish: 0.08-0.10 mm layer height for a smooth contact face.
Print settings: 0.10 mm layer height, 6 walls, 80% concentric infill. Hardened steel nozzle (CF wears brass nozzles fast — see PrintForgeHQ’s carbon fibre filament guide for the nozzle considerations). 220 °C nozzle, 60 °C bed.
Single-channel slickers have one width per tool. Multi-channel slickers (2-4 channels in different sizes on one tool) print as a single PLA-CF part and cover most projects with one tool. The multi-channel design is what most commercial slickers do not offer.

Category 3: Wet-Mold Form Blocks (PETG, $1-$5 each)
Form blocks are positive shapes over which you wet-mold leather to create three-dimensional projects: card holders, knife sheaths, phone cases, motorcycle accessories. Commercial form blocks rarely exist for the geometry you actually want; printing your own opens the project category significantly.
Design rules:
- Use the inner dimensions of the desired finished product as the form block dimensions.
- Add 1-2 mm draft (taper) on all sides to allow leather release after molding.
- Round all sharp corners to at least 2 mm radius — leather will not mold around sharper corners.
- Body shape: solid (high infill), or shelled with 100% gyroid infill for big forms.
- Filament: PETG. The block will get wet for hours during molding; PLA softens, ABS warps.
Print settings: 0.20 mm layer height, 4 walls, 30% gyroid infill (50%+ for forms larger than 200 cm³). 230 °C nozzle, 80 °C bed.
The wet-mold process: wet 4-6 oz vegetable-tanned leather in warm water for 10 minutes, drape over the form, work the leather into the form’s geometry with smooth tools, clamp or weight the leather into final shape, dry overnight at room temperature. The leather holds the form’s shape permanently after drying.
Other Leather Tools Worth Printing
Beyond the three core categories, smaller leather tools also print well:
- Strap cutters (PETG). Custom-width strap-cutting jigs for belts and watch straps. $0.30 each.
- Holes-spacing wheels (PETG). Spacing wheels for stitch hole layouts at 4, 5, 6, 7 SPI. $0.20 each.
- Awl handles (PETG). Ergonomic handles for stitching awls and pricking irons.
- Bone-folder substitutes (PLA-CF). Smoothing tools for crease lines and edge work.
- Pattern templates (PLA, low-stress use). Reusable pattern templates for repeat production work.
- Storage drawer organizers (PETG). Custom drawer dividers for tool organization.
For deeper coverage of which 3D printer handles these prints best, see PrintForgeHQ’s best 3D printer 2026 buyer’s guide. Any printer in the $400+ class handles all of these tools comfortably.
Tool Cost Comparison Table
| Tool Category | Filament | Print Time | Filament Cost | Commercial Equivalent | Savings Multiple |
|---|---|---|---|---|---|
| Decorative stamp (15 mm pattern) | PETG | 30 min | $0.20 | $25-$60 | 125-300x |
| Edge slicker (multi-channel) | PLA-CF | 90 min | $0.40-$0.80 | $35-$80 | 50-100x |
| Wet-mold form block (small) | PETG | 2-4 hr | $1-$3 | Not commercially available | — |
| Strap cutter (custom width) | PETG | 45 min | $0.30 | $25-$45 | 80-150x |
| Holes-spacing wheel (per SPI) | PETG | 20 min | $0.20 | $15-$25 | 75-125x |
| Awl handle (ergonomic) | PETG | 40 min | $0.30 | $10-$20 | 30-65x |
| Bone folder substitute | PLA-CF | 90 min | $0.50 | $15-$30 | 30-60x |
Design and CAD Workflow
Three software tiers cover all leather tool design:
Tinkercad (free, browser-based). Right tool for stamps, simple slickers, and basic form blocks. Drag-and-drop primitives, boolean combinations, no learning curve. 95% of leather tool designs can be done in Tinkercad in 15-30 minutes.
Fusion 360 (free for hobby use). Right tool for parametric form blocks (where you might iterate the geometry), complex multi-channel slickers, and tools that need precise dimensions. Steeper learning curve; pays off when the same design needs 5+ variations.
Blender or OnShape. Both free, both more capable than Tinkercad, both more learning curve than Fusion 360. Use only if you already know one for other reasons.
The pattern most leather makers settle into: Tinkercad for one-off stamps and simple tools, Fusion 360 for production templates and parametric form blocks. Skip Blender unless you specifically want sculpted-organic stamp patterns.
Frequently Asked Questions
What 3D printer filament is best for leather tooling?
PETG for stamps, form blocks, strap cutters, and most general tools — strong, water-resistant, easy to print. PLA-CF (carbon fibre filled PLA) for edge slickers and bone folders that need surface hardness. Avoid PLA pure for any tool that takes mallet strikes; avoid ABS unless you have an enclosed printer.
Can a 3D-printed leather stamp really replace a commercial one?
Yes for almost any pattern. PETG stamps with 1.5 to 2.5 mm raised pattern depth, 5 walls, and 50 percent gyroid infill produce impressions that match commercial brass stamps in clarity. Commercial brass lasts longer (decades vs years) but a re-print costs 30 minutes and 20 cents.
How accurate do 3D-printed edge slickers need to be?
Channel width within plus or minus 0.1 mm of the target leather thickness. Wider channels do not burnish; narrower channels split the leather edge. PLA-CF holds tolerance better than pure PLA over time. Print at 0.10 mm layer height for a smooth contact face.
Will 3D-printed form blocks really work for wet molding?
Yes for PETG form blocks. PETG is water-resistant enough that wet leather and overnight drying do not affect the form. Add 1 to 2 mm draft on all sides for clean release, round all sharp corners to 2 mm radius minimum so leather can mold around them.
What software should I use to design leather tools?
Tinkercad (free, browser) for 95 percent of leather tool designs — stamps, simple slickers, basic form blocks. Fusion 360 (free for hobby) for parametric tools where you iterate the design. Blender and OnShape are alternatives but rarely necessary for this category.
Where can I find STL files for leather tools?
Printables.com has 200-plus free leather stamp designs and a growing collection of slickers and form blocks — search the term leather stamp or leather tool and sort by remix count. Thingiverse covers similar territory. Cults3D has a small paid section. Most leather tool STLs are free under Creative Commons licenses.
Related Articles
- Leatherworking Tools Guide
- Edge Finishing and Burnishing
- Leather Projects Guide
- Leather Types Guide
- Laser Engraving Vegetable-Tanned Leather