The best glue for leather is contact cement — coat both surfaces, let them tack, then press for a permanent, flexible bond that holds pieces in perfect alignment…
The best glue for leather is contact cement — coat both surfaces, let them tack, then press for a permanent, flexible bond that holds pieces in perfect alignment while you stitch. Barge and other solvent cements bond strongest; water-based versions cut the fumes. On my bench almost everything gets glued first and stitched second: the cement holds the line, the saddle stitch carries the load. Glue is alignment insurance, not the structure.
Get the glue choice wrong and you either fight a slipping, misaligned seam or trap fumes in a closed shop. Below is every adhesive worth keeping — contact cement, rubber cement, PVA leather weld, and CA — which one to reach for, how to prep a slick grain surface so the bond actually grips, and why almost no leather bond should rely on glue alone.
Disclosure: LeatherCraftHaven is reader-supported. As an Amazon Associate I earn from qualifying purchases made through links in this article, at no extra cost to you. I only point to gear I actually use or would buy for my own bench.
Glue Holds, Stitches Carry: The Core Principle
In hand leatherwork, glue is alignment insurance, not structure. You glue two pieces together so they hold dead-aligned while you punch and stitch; the saddle stitch then carries every bit of the mechanical load. This is why “best glue for leather” rarely means “strongest possible bond” — it means the cement that holds cleanly during assembly and stays flexible under the finished stitch line.
The handful of exceptions are unstitched bonds: a glued-in lining, a folded edge that will not be sewn, or a repair. There, the glue does carry the load and you want the strongest contact cement and best surface prep you can manage. But for wallets, belts, bags, and sheaths, the workflow is glue-then-saddle stitch — the cement buys you a clean, stationary seam to punch through, covered as a core step in the three-tier tools guide.
The Leather Adhesives Worth Owning
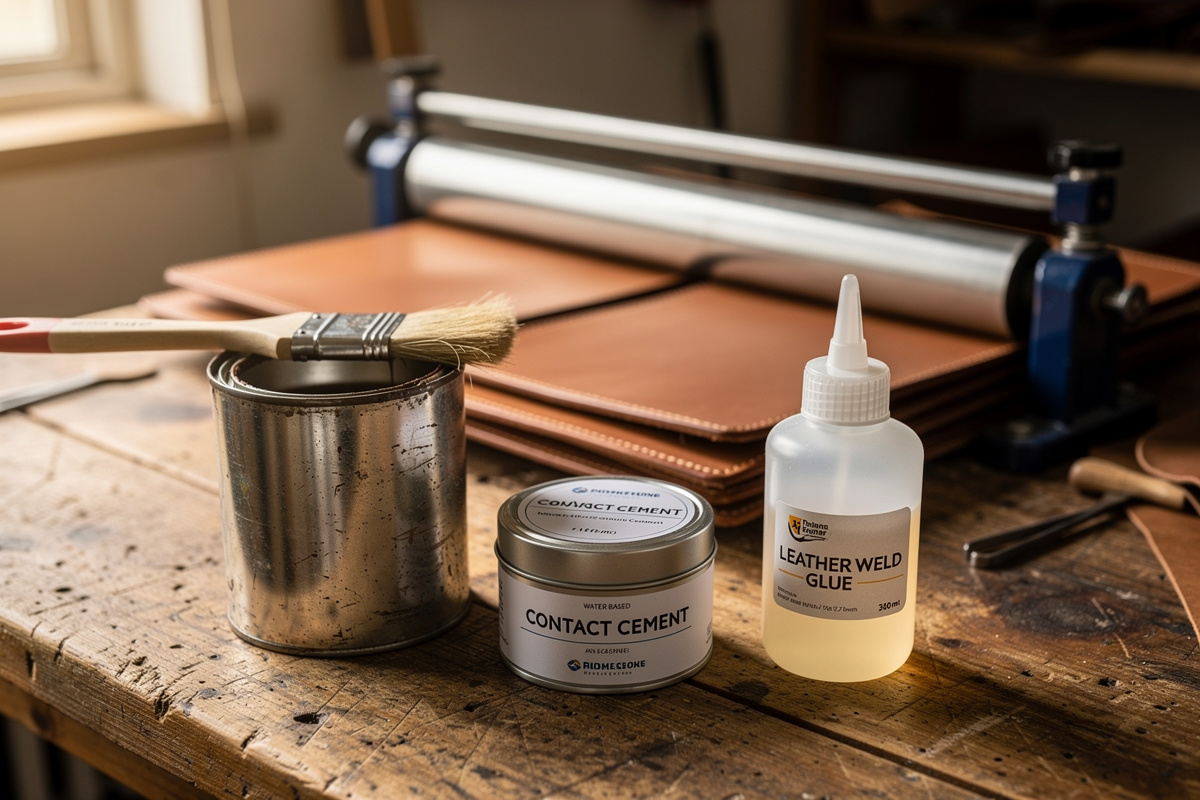
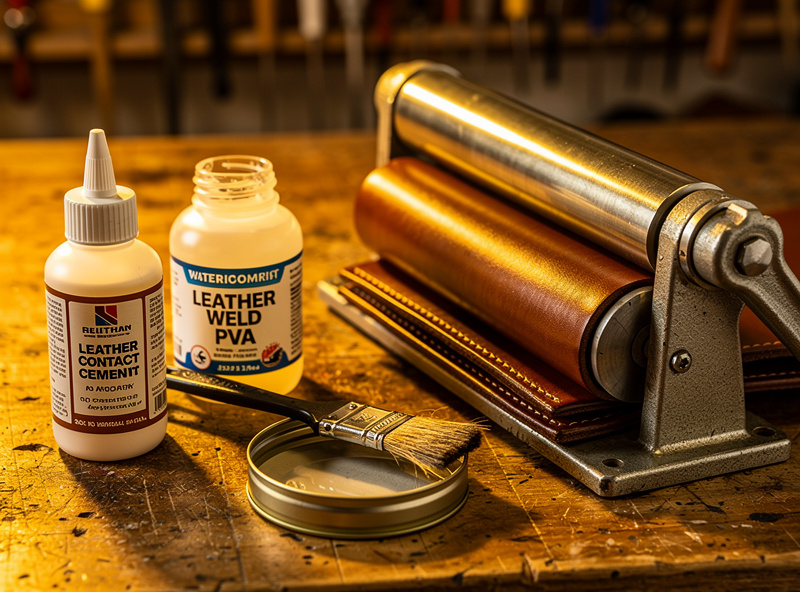
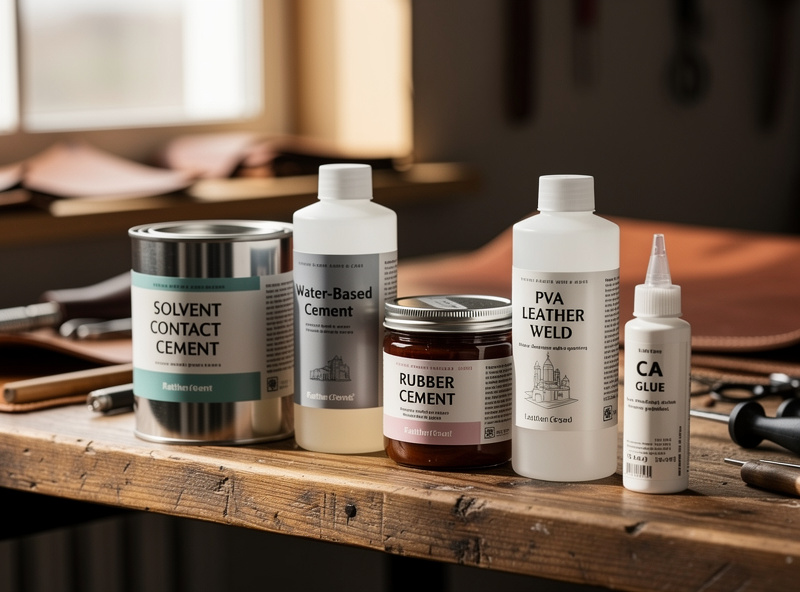
Five adhesives cover everything. Solvent contact cement (Barge, Master) is the strongest, most permanent, and most flexible — the default for structural glued bonds, but it carries strong fumes. Water-based contact cement (Aquilim, Tanner’s Bond contact) bonds nearly as well with far lower fumes. Rubber cement is temporary and repositionable for hold-then-remove work. PVA leather weld is good for porous edge gluing. CA (super glue) is for tiny spot bonds and edge stiffening only.
For most makers, a bottle of contact cement plus a small bottle of water-based cement covers 95% of jobs. Reach for solvent Barge on a structural bond that will not be stitched; reach for the water-based version for everyday glue-then-stitch assembly in a smaller or less-ventilated space. A leather contact cement is the one adhesive every bench needs first; a water-based leather cement is the low-fume companion for closed workshops.
| Adhesive | Bond Strength | Permanent? | Repositionable | Fumes | Best Use |
|---|---|---|---|---|---|
| Contact cement (solvent) | Strongest | Yes | No (bonds on contact) | Strong | Structural / unstitched bonds |
| Contact cement (water-based) | Strong | Yes | No | Low | Everyday glue-then-stitch |
| Rubber cement | Weak | No (peels off) | Yes | Moderate | Temporary hold, removable |
| PVA leather weld | Moderate | Yes | Briefly | Low | Edge gluing, porous bonds |
| CA super glue | Brittle | Yes | No | Low | Spot bonds, edge stiffening |
Avoid hot glue (too thick and rigid, fails at the flex line) and household white school glue (no flexibility, peels). The adhesives above are the only ones that move with the leather instead of cracking off it.
How to Glue Leather So It Actually Holds
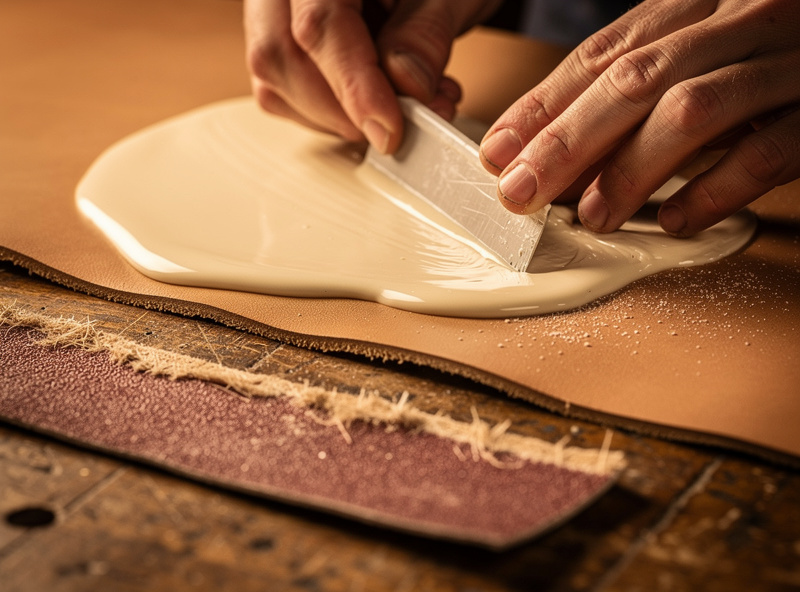
Contact cement needs both surfaces coated, a tack wait, and firm pressure. Apply a thin even layer to both faces, wait until each goes from wet-shiny to dry-tacky (usually 5–15 minutes — touch-dry, not stringy), then align carefully and press once: you only get one shot, because contact cement grabs instantly on contact. Roll the bond hard with a wallpaper roller or tap it down with a mallet to drive full contact across the whole surface.
Surface prep is where most weak bonds fail. The grain side of leather is slick and sheds glue, so rough it up with 120-grit sandpaper wherever you are gluing grain-side, and glue flesh-to-flesh whenever you can — the fibrous flesh side grips far better. Keep glue off any area you will burnish; cement in the edge fibres resists water and Tokonole and leaves a patchy finished edge. A glue spreader and roller set gives the thin even coat that a clumsy brush cannot.
Fumes, Ventilation, and Safe Use
Solvent contact cement is flammable and gives off strong fumes — use it only with real ventilation, never in a closed room or near the sparks and open flame of a metal bench. In a small or shared workshop, water-based contact cement removes most of that risk while keeping a strong bond. This is exactly the kind of cross-bench hazard I cover in the mixed workshop safety guide — leather glue fumes and welding sparks do not belong in the same air.
Practical safety habits: cap the can between coats so the solvent does not flash off, keep a window or fan moving air across the bench, and let solvent bonds off-gas before sealing the piece in a box. Store cement away from heat and ignition sources. None of this applies as strongly to PVA or water-based cement, which is part of why I default to water-based for everyday work in the indoor leather bench and save the solvent Barge for ventilated structural jobs.
Choosing the Right Glue for the Job
Match the adhesive to the bond. Structural unstitched bond (a glued lining edge): solvent contact cement with roughed, flesh-to-flesh surfaces. Everyday glue-then-stitch assembly: water-based contact cement. Temporary hold you will peel back: rubber cement. Edge or porous gluing: PVA leather weld. Tiny spot fix or stiffening an edge before sanding: a dab of CA. The wrong glue is usually too rigid (hot glue, white glue) and cracks at the flex line.
The single most common beginner mistake is treating glue as the bond and skipping the stitch — a glued-only wallet seam peels apart within months of pocket flexing. Glue holds the line; the stitch makes it last. Get the cement choice and prep right, then let the skiving knife thin your fold zones and the stitch finish the job. For the full picture of where adhesives sit among the other tools, the tools buy-in guide places contact cement firmly in the early mid-range tier. A small starter pair — solvent and water-based — covers every project you are likely to build this year.
Frequently Asked Questions
What is the best glue for leather?
Contact cement is the best general glue for leather. You coat both surfaces, let them tack, then press for a permanent, flexible bond that holds pieces aligned while you stitch. Solvent cements like Barge bond strongest; water-based versions bond nearly as well with far lower fumes.
Do you glue leather before stitching?
Yes, almost always. Glue holds two pieces in perfect alignment while you punch and stitch, and the saddle stitch then carries the mechanical load. Contact cement is alignment insurance, not structure, so the glued seam stays stationary and clean while you sew through it.
Is contact cement or super glue better for leather?
Contact cement for any real bond, since it stays flexible and bonds across the whole surface. Super glue (CA) is brittle and cracks at flex points, so reserve it for tiny spot bonds or stiffening an edge before sanding. CA is never right for a structural leather seam.
How do you make leather glue hold better?
Rough up the slick grain side with 120-grit sandpaper where you glue, and bond flesh-to-flesh whenever possible since the fibrous flesh side grips far better. Apply a thin even coat to both faces, wait until tacky, then press hard with a roller or mallet to drive full contact.
Is leather contact cement toxic or flammable?
Solvent contact cement is flammable and gives off strong fumes, so use it only with real ventilation and never near sparks or open flame. Water-based contact cement removes most of that risk while keeping a strong bond, which makes it the safer choice for small or shared workshops.
Can you glue leather without stitching?
For unstitched bonds like a glued lining edge or a non-load seam, yes, using solvent contact cement with roughed flesh-to-flesh surfaces. But for wallets, belts, and bags, a glued-only seam peels apart under flexing within months. Those bonds must be stitched, with glue only holding alignment.
What glue should you not use on leather?
Avoid hot glue, which is too thick and rigid and fails at the flex line, and household white school glue, which has no flexibility and peels. Both crack off leather instead of moving with it. Stick to contact cement, PVA leather weld, rubber cement, or CA for spot work.
Related Articles
- Leatherworking Tools Guide: Three Tiers of Buy-In
- How to Saddle Stitch Leather by Hand
- Leather Edge Finishing: Bevel to Burnish
- Leather Skiving Knife Guide
- Mixed Workshop Safety: Leather Fumes and Welding Sparks