Laser-engraved leather projects bridge two crafts that historically lived in separate workshops — leatherworking and digital design. A 5–10 W diode laser or a 40 W CO2 cuts engrave-quality vegetable-tan…
Laser-engraved leather projects bridge two crafts that historically lived in separate workshops — leatherworking and digital design. A 5–10 W diode laser or a 40 W CO2 cuts engrave-quality vegetable-tan wallet panels in 4 minutes, custom morale patches in 90 seconds, and full belt designs in under 8 minutes per piece. The result is repeatable detail that hand-tooling can’t match, with batch consistency that turns one design into 50 identical pieces. Where most beginners go wrong: settings, leather choice, and ventilation. Get those three right and scrapped panels become the exception instead of the rule. The leather projects for beginners hub covers where laser-engraved projects sit in the recommended progression.
This guide covers the three project categories most leatherworkers start with — wallets, patches, and belts — including the design considerations, the laser-friendly leather types, the engraving settings that produce clean burns without char trails, and the post-engrave finishing that turns a raw burned panel into a finished, ready-to-use piece. For the deep settings reference on each leather type, the laser engraving leather settings reference covers vegetable tan vs chrome tan vs latigo at four common laser power levels.
My first laser-engraved wallet panel came out beautiful — then I wiped it with a damp cloth to remove char residue and the engraving faded to half contrast because I hadn’t masked the surface. Masking tape is now mandatory on every piece. The project walkthroughs below cover wallets, patches, and belts with the exact settings I use on my 5W diode laser for consistent, repeatable results, batch after batch.
Leather Types and Laser Behaviour
Three leather types cover 95% of laser-engraved projects:
- Vegetable-tanned leather — the default. Engraves dark brown to near-black depending on power. Holds detail down to 0.3 mm. Edges burn cleanly. Hermann Oak and Wickett & Craig are the standard suppliers for repeat-quality work.
- Chrome-tanned leather — engraves lighter and shows less contrast. Burning it releases hexavalent chromium — a known human carcinogen, per OSHA — along with particulate matter (documented in laser-cutting-of-leather exposure studies published in ACS Chemical Health & Safety). External venting or a HEPA-carbon extractor isn’t optional here; I keep chrome-tan pieces short and run the extractor the whole time, and I’d rather skip a chrome-tan design than engrave it without solid ventilation running.
- Latigo (combination tanned) — engraves between veg and chrome. Wax content can resist consistent engraving; use higher power and slower speed.
Avoid: faux leather (PU/PVC) — heating PVC breaks down its chlorine content into hydrogen chloride gas, which forms corrosive hydrochloric acid mist and pits laser optics on top of the lung risk (see GWK Laser’s PVC warning). Avoid suede (engrave shows poorly on the napped surface). Avoid bonded leather (the binders melt and produce uneven burns).
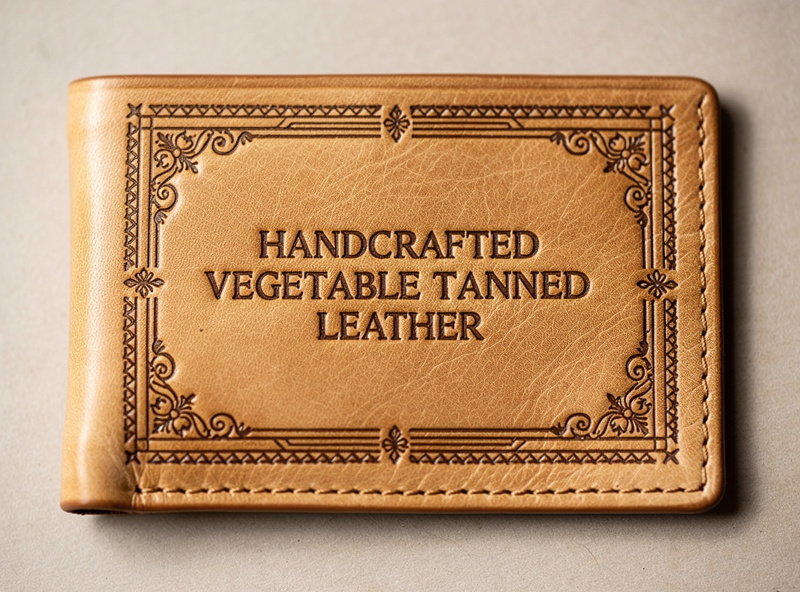
Wallet Engraving
The most common starter project is a bifold wallet panel — typically a 95×120 mm rectangle of 1.4–2 mm vegetable tan. Engraving on the exterior face produces the most visible result; engraving on the interior pocket panels is a good practice surface because mistakes don’t show in the finished wallet.
Settings (40 W CO2):
- Power: 12–15% for surface engraving, 25–30% for deep engraving
- Speed: 250 mm/s for line engraving, 350 mm/s for raster fill
- Resolution: 254 DPI for line work, 600 DPI for photo-quality
- Pass count: single pass for lines, single pass for raster (multi-pass darkens but loses detail)
For diode lasers (5 W class), use 80–100% power, 800–1500 mm/min speed, single-pass. Diode lasers produce harder edges and more char on leather than CO2; expect to wipe with mineral spirits after engraving to remove char residue.
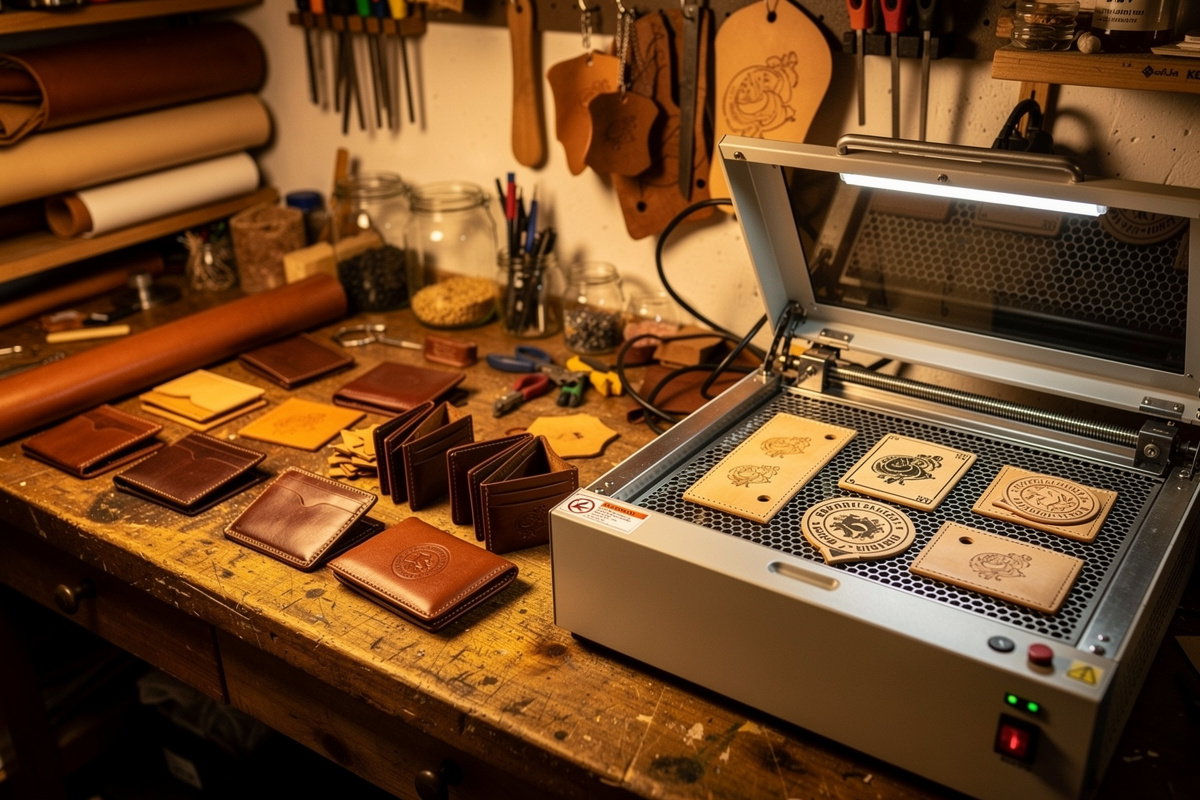
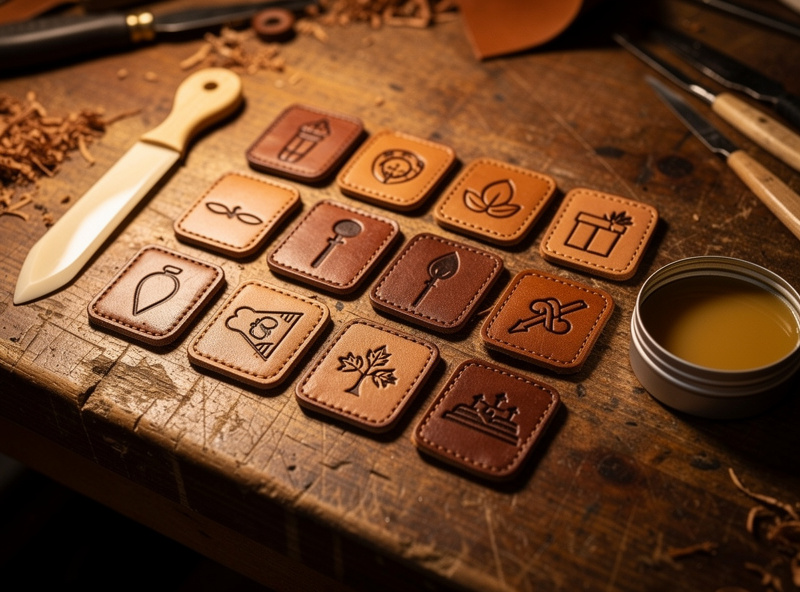
Morale Patch Engraving
Patches are 75×50 mm typical, often with bold typography or simple icon graphics. The design rule is “high contrast, simple shapes” — fine details under 1 mm don’t survive the burn-and-finish process well, and complex backgrounds compete with the patch identity.
For a 50-piece patch run:
- Cut 75×50 mm rectangles from a single hide using the laser at full cut power
- Sequence the engraving with the same focal height for all 50 pieces; 30-minute total run
- Brush off ash residue with a stiff-bristle brush, NOT compressed air (drives ash into the leather grain)
- Apply a thin coat of leather burnishing wax to the engraved area; rub with a smooth bone folder
- Sew or velcro the back per the application requirement
Once the settings are dialed in, a 50-piece batch is a manageable afternoon project — the repeatable part of the laser is the whole point of running a batch instead of one-off pieces.
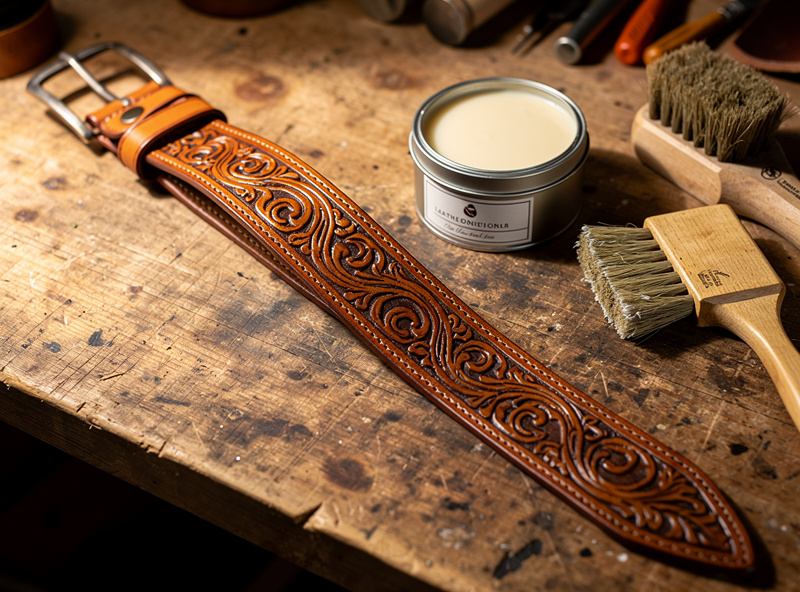
Belt Engraving
Engraved belts are the most challenging of the three because the belt is too long for most laser beds. Two approaches:
- Tile method — split the design across multiple bed-sized passes, advance the belt manually between passes. Requires careful registration; offsets of 0.2 mm visible in the finished belt.
- Pass-through method — open the front and back of the laser bed (some models permit this); pass the belt through during engraving. Continuous engraving but requires modification or specific machine support.
The tile method works on any laser. Use registration marks at the leading and trailing edge of each tile that align under the laser between passes; the human eye won’t notice <0.5 mm offset on a 1.2-metre belt. For makers running longer belt batches, the pass-through option (Glowforge Pro with its front/back Pro Passthrough slots, or OMTech models with front/back pass-through doors) is significantly faster.
Post-Engrave Finishing
The difference between a workshop-grade engraved leather piece and a finished one is in the finishing. The standard sequence:
- Brush off char residue with stiff bristle brush, then wipe with damp cloth
- Apply leather conditioner (Aussie, Bee Natural, or saddle soap) — restores moisture lost in laser drying
- Burnish edges if cutting was part of the job — see the edge finishing cluster for the wax and motion that produces a glassy edge
- Antique or dye if desired — a brown or black dye fills the burn marks and gives even contrast across the design
- Final wax or sealer — protects against moisture and dirt; carnauba wax or Resolene
Total finishing time per piece is 5–10 minutes once you’ve practised. Factor that into your project timeline when you’re running a larger batch.
Ventilation: Don’t Skip This
Leather laser engraving produces particulates and acrid smoke that’s bad for lungs. The ventilation requirement is not optional:
- 4-inch external venting through a metal duct to outside, OR
- HEPA + carbon filtered air-purifier rated for laser cabinets (BOFA, Purex)
Open windows and a box fan are not adequate ventilation for vegetable-tan leather. The smoke is heavier than CO2 acrylic smoke; the particulates settle on workshop surfaces and ruin nearby leather stock.
When Laser Engraving Isn’t the Right Tool
Skip the laser for projects where hand-tooling traditional aesthetic matters (a tooled flowery western belt looks fake when engraved), where the design is larger than your bed (and pass-through isn’t an option), or where the leather is thicker than 5 mm (most consumer lasers struggle to engrave evenly on thick stock). For everything else — wallets, patches, smaller belts, gift items, custom name plates — laser is faster and more consistent than hand work.
Frequently Asked Questions
What is the best leather for laser engraving?
Vegetable-tanned leather is the standard. It engraves dark brown to near-black with clean detail and predictable behaviour. Hermann Oak and Wickett and Craig produce consistent batches that respond identically to the same laser settings, which matters for repeat batches.
Can I engrave faux leather with a laser?
No. Faux leather is typically polyurethane or PVC, both of which release toxic fumes when lasered. PVC produces hydrochloric acid that destroys laser optics. Always confirm the leather is genuine before engraving and skip any synthetic material.
What laser power do I need for leather engraving?
Five watts of diode laser or 40 watts of CO2 is the practical minimum for clean leather engraving. Diode handles surface marking well; CO2 handles deeper engraving and cleaner cuts. For heavier leather work, a 60-watt CO2 cuts thicker leather faster and is the standard upgrade after the entry tier.
How do I prevent char residue on engraved leather?
Mask the leather surface with masking tape before engraving. The laser engraves through the tape into the leather; remove the tape after to reveal a clean engrave with minimal smoke residue on surrounding areas. Brush ash off with a stiff bristle brush before any wet finishing.
Can I engrave already-finished leather goods?
Yes for vegetable tan, with caveats. The finish layer can change burn behaviour. Test on a hidden area first. Chrome tan with surface dye usually does not engrave well because the dye masks contrast. For best results, engrave raw leather and finish after.
Do I need a fume extractor for leather engraving?
Yes. Leather smoke contains particulates and acrid compounds that damage lungs over time. A four-inch external vent to outside or a HEPA-plus-carbon laser fume extractor is mandatory. Open windows and household box fans are not adequate.
How long does laser-engraved leather last?
With proper finishing (conditioner plus wax sealer), engraved leather lasts as long as unengraved leather, which is decades for vegetable tan. The engraved areas are slightly more porous than unengraved areas and benefit from re-conditioning every 12 to 24 months.
Related Articles
- Leather projects cluster — wallet, belt, bag tutorials
- Leather types — vegetable tan, chrome tan, latigo
- Edge finishing and burnishing
- Leather tools — knives, awls, edge slickers
- Laser engraving leather settings reference (LaserBeamForge)