To antique leather, seal the surface with a resist first, then wipe a pigmented antique paste over it and immediately rub the excess off the high spots. The…
To antique leather, seal the surface with a resist first, then wipe a pigmented antique paste over it and immediately rub the excess off the high spots. The resist makes the paste wipe clean from smooth areas while it stays in tooling cuts and texture, creating the aged, high-contrast depth. How much resist you apply controls the whole look — more resist gives sharper contrast, less gives a darker weathered finish.
Antiquing is the finish that makes a tooled panel look like it has a hundred years on it, and it is the one most people get wrong on the first try because they skip the resist and end up with a muddy, uniformly dark mess. The secret is not the paste — it is what you do to the leather before the paste touches it. I antique knife sheaths, belts, and tooled panels, and once you understand the resist, you can dial the look anywhere from crisp museum-piece contrast to grubby trail-worn. This sits under the complete leather dyeing guide.
What Antiquing Actually Does
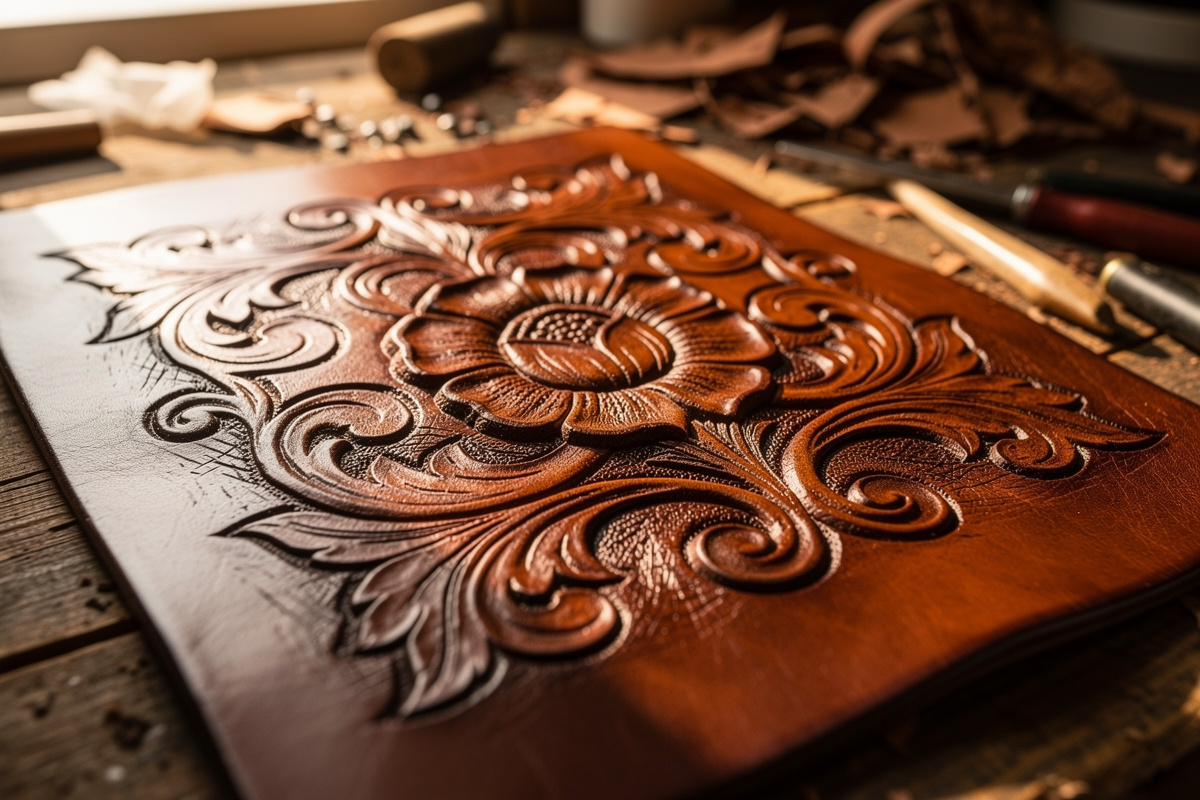
Antique finish is a pigmented paste or gel that you wipe over leather to deposit color in the low spots — tooling cuts, stamped texture, grain creases — while wiping clean off the raised areas. The result reads as age and depth: shadows where shadows would naturally collect on an old, handled piece. It is a contrast tool, not a base color.
Think of antique as controlled, deliberate dirt. On a piece you have tooled or stamped, every cut and depression is a place that real age and handling would darken over decades, and antique paste fakes that in ten minutes. On flat, untooled leather it can still work, settling into the natural grain and any distressing to give a weathered, used look. The key mental shift is that antique is applied over a base — usually a dyed or natural surface that has been sealed — and the sealing is what lets you remove it selectively. Without that resist step, the paste soaks in everywhere evenly and you have just dyed the whole thing a dull brown. Antique is closely related to dye but behaves differently; for the base colors you would put under it, see the dye types comparison.
The Resist Is the Whole Technique
A resist is a clear sealer — acrylic resolene, Super Shene, or a similar finish — applied before the antique so the paste cannot soak into the sealed areas and wipes off cleanly. The amount and number of resist coats directly controls contrast: more resist coats mean the paste wipes off more completely, giving crisper, lighter high spots and sharper definition in the tooling.
This is the lever that does everything. Brush or wipe one to three thin coats of resist over the dyed, dried leather and let each dry fully. One light coat lets the antique grip more of the surface for a darker, dirtier, weathered look — good for a distressed flat piece. Three coats make the surface slick enough that the paste lifts almost entirely off the high spots, leaving color only in the deepest cuts for crisp, gallery-grade contrast — good for fine floral tooling. You can even resist selectively, sealing the parts you want to stay light and leaving others bare to grab more color. Apply the resist evenly, though: a thin or missed spot will grab antique and read as a dark blotch you cannot easily fix. The resist must be bone dry before you antique, or the wet finish drags and the paste streaks.
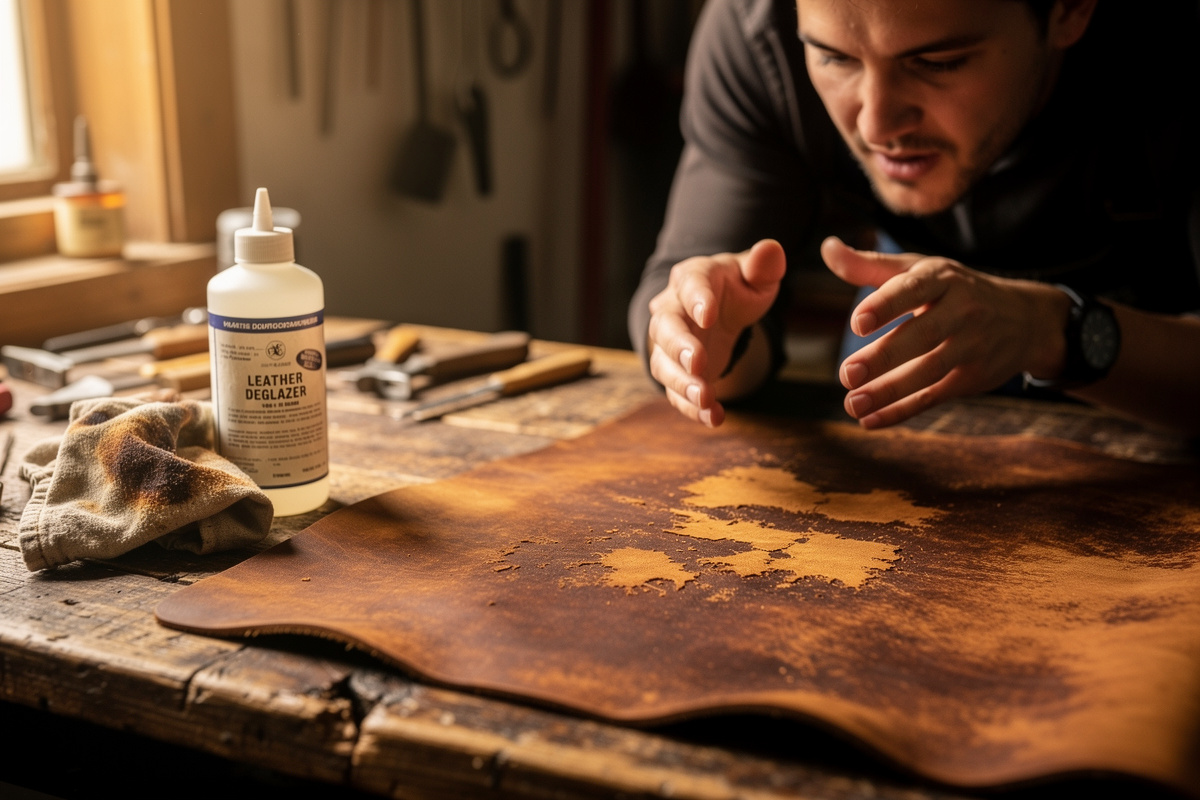
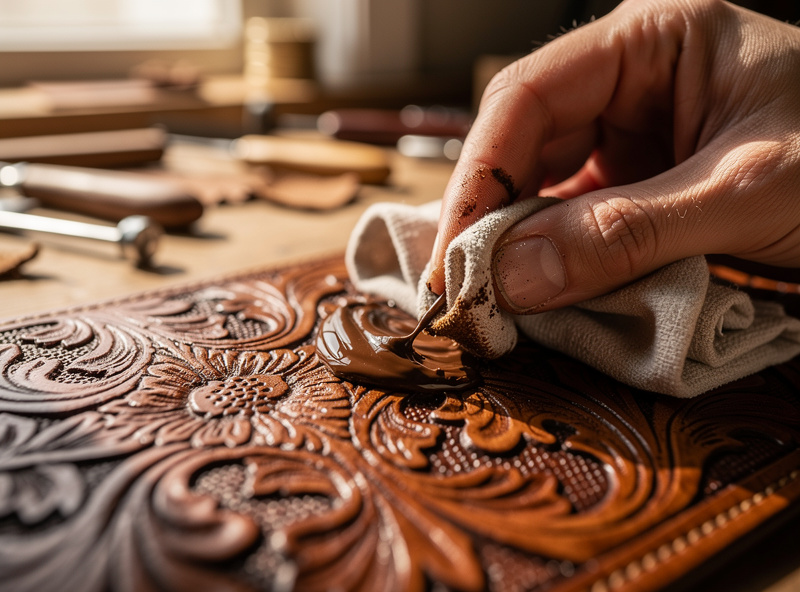
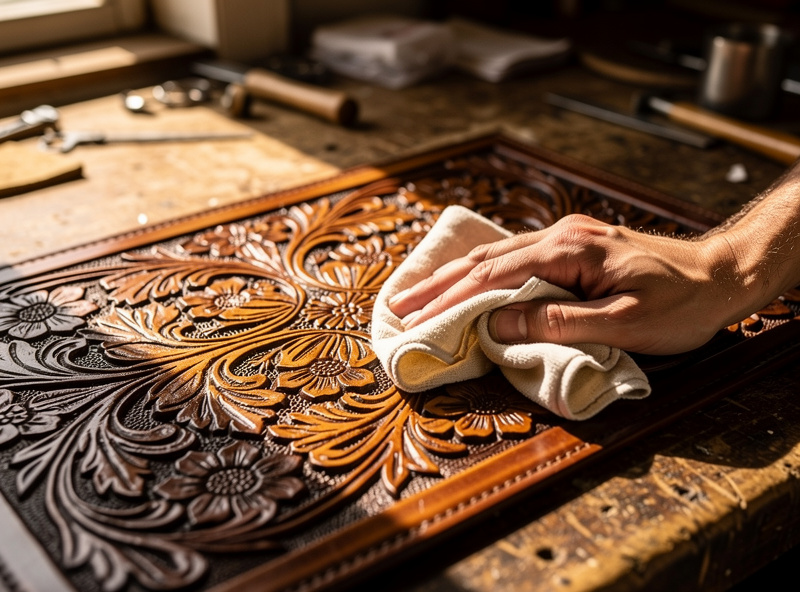
Applying and Wiping the Antique
Work the antique paste over the whole surface with a cloth, sponge, or fingers, pressing it into every cut and texture, then immediately wipe the excess off the high spots with a clean cloth before it sets. Work in sections and wipe while the paste is still workable — once it dries on the surface it is far harder to remove and leaves a haze.
Load the paste on and do not be shy about it; you want it in every recess, so scrub it around and make sure the tooling is fully packed with color. Then flip to a clean cloth and wipe the raised areas with light, even pressure, going with the contours rather than gouging into the cuts. The high spots come clean and the recesses hold their color — that contrast appearing under your cloth is the whole payoff. Keep clean cloth surfaces coming; a dirty rag just smears antique back onto the high spots. If a section dries before you wipe it, a little more paste re-wets it enough to lift. For an even, weathered look on flat leather, wipe less aggressively and let a thin film stay over the whole surface. Gel antiques give you more working time than paste; spirit-based antiques flash fast and are less forgiving.
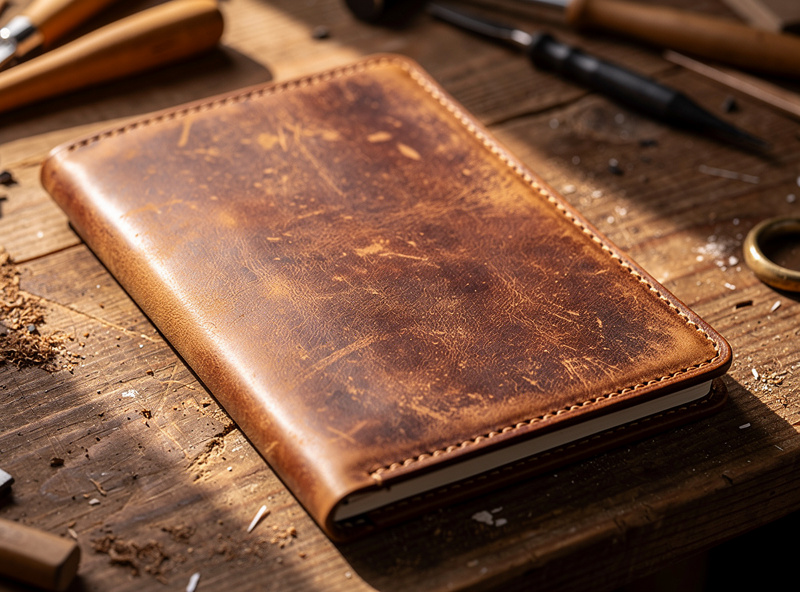
Getting a Weathered, Distressed Look
For a weathered finish rather than crisp tooling contrast, use a single light resist coat (or none on rugged pieces), apply the antique broadly, and wipe unevenly so streaks and darker patches remain. Pre-distressing the leather — scuffing, crumpling, a light sanding — gives the antique low spots to settle into and amplifies the aged effect.
The weathered look is really just antiquing with less restraint. Where crisp tooling contrast wants maximum resist and thorough wiping, a trail-worn or vintage look wants minimal resist and deliberately uneven removal, letting the color pool in scuffs, edges, and folds the way grime collects on a piece that has lived a hard life. Hitting the leather first with a bit of distressing — a crumple, a scuff with a coarse pad, a few honest scrapes — creates texture for the antique to grab. Edges and corners naturally read older when you let them stay darker, so go easy wiping those. The line between “characterful” and “muddy” is judgment, so build it up: a lighter pass you can always darken, where an overdone one means stripping back and starting over.
Seal It or It Wipes Away
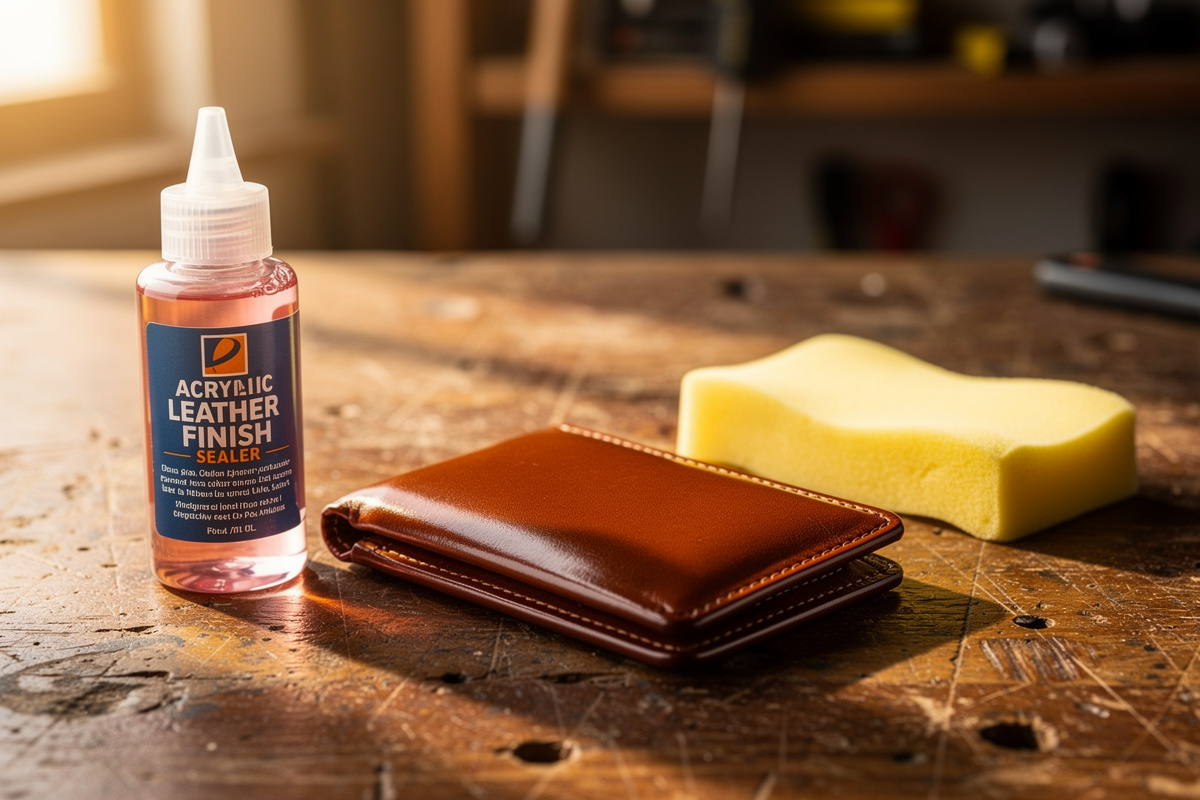
After the antique dries fully, lock it in with two thin top coats of acrylic resolene, because the antique pigment sitting on and in the surface will rub off on hands and clothing until it is sealed. Let the antique cure for several hours to overnight before sealing, and buff lightly first to remove any loose pigment.
This last step is non-negotiable. Antique that is not topcoated crocks badly — it is essentially loose pigment in the recesses and a thin film on the surface, and it will mark everything it touches. A couple of thin resolene coats trap it and add a protective finish over the whole piece. Apply the topcoat gently and in thin passes; a heavy wet coat can re-mobilize the antique and drag it out of the cuts, muddying the contrast you just earned. On a piece with both tooling and stitched edges, finish the edges to match before the final seal so the whole thing reads done — the bevel-to-burnish sequence lives in the edge finishing guide, and for a flawless base color under all of this, the streak-free dyeing guide covers laying the foundation coat.
Antique Mediums and Resist Levels Compared
The choices that change your result are the antique medium and how much resist sits under it. This is how they map to the look you get.
| Variable | Option | Result on the leather |
|---|---|---|
| Resist coats | 1 thin coat | Darker, weathered, more color retained overall |
| Resist coats | 2-3 coats | Crisp high-contrast tooling, clean high spots |
| Medium | Gel antique | Long working time, forgiving, easy to wipe |
| Medium | Paste antique | Strong pigment, classic depth, sets moderately |
| Medium | Spirit antique | Fast-drying, vivid, least forgiving |
| Surface | Tooled / stamped | Color pools in cuts for shadow and depth |
| Surface | Flat, pre-distressed | Weathered, used patina across the panel |
| Topcoat | 2 thin resolene coats | Locks color, stops rub-off, protects finish |
Disclosure: LeatherCraftHaven is reader-supported. As an Amazon Associate I earn from qualifying purchases made through links in this article, at no extra cost to you. I only point to gear I actually use or would buy for my own bench.
What You Need to Antique
Antiquing needs three things beyond your base dye: a resist to control where the color stays, the antique medium itself, and a topcoat to lock it. The same resolene can do double duty as both resist and topcoat.
Get a tub of leather antique finish in brown or dark brown to start, since brown reads as natural age on almost any base. Use acrylic resolene as both your resist and your final topcoat — thin coats for the resist, thin coats again to seal. Apply and wipe with plain cotton cloths, keeping clean surfaces coming as you wipe. For choosing the base dye that goes under the antique, the best leather dye for veg-tan roundup covers the bottles worth building on.
Frequently Asked Questions
How do you antique leather?
Seal the dyed leather with a clear resist, then wipe pigmented antique paste over the whole surface, pressing it into tooling and texture. Immediately wipe the excess off the high spots with a clean cloth so color stays only in the recesses, then topcoat to lock it.
What is a resist when antiquing leather?
A resist is a clear sealer like acrylic resolene applied before the antique so the paste cannot soak into the sealed areas and wipes off cleanly. More resist coats give crisper, lighter high spots and sharper tooling contrast; fewer coats let more antique stay for a darker weathered look.
Why did my antique finish come out muddy?
Usually too little resist or wiping too late. Without enough resist the paste soaks in everywhere and dulls the whole surface. Apply two to three thin resist coats over fully dried dye, then wipe the antique off the high spots while it is still workable, before it sets.
Can you antique leather without tooling it?
Yes. On flat leather, antique settles into the natural grain and any distressing for a weathered, used patina. Use a single light resist coat and wipe unevenly so streaks and darker patches remain. Pre-scuffing or crumpling the leather gives the antique low spots to grab.
Do you have to seal leather after antiquing?
Yes. Unsealed antique pigment rubs off on hands and clothing because it sits loosely on and in the surface. After it cures, buff off loose pigment and lock it with two thin coats of acrylic resolene applied gently so they do not drag color out of the cuts.
What is the difference between gel and paste antique?
Gel antique has a longer working time and wipes more forgivingly, making it the easier choice for beginners and large pieces. Paste antique carries strong pigment for classic depth but sets a bit faster. Spirit-based antiques dry quickest and are the least forgiving to wipe.
Can you antique over dyed leather?
Yes, and it is the normal sequence. Dye the base color first, let it dry fully, then apply your resist over the dye before antiquing. The antique adds shadow and age on top of the base color rather than replacing it, so choose a base a few shades lighter than the final look.
Related Articles
- Leather Dyeing: The Complete Veg-Tan Guide
- How to Dye Leather Without Streaks or Blotches
- Leather Dye Types: Oil vs Water vs Acrylic
- Best Leather Dye for Veg-Tan: 8 Brands Tested
- Leather Edge Finishing: The Bevel-to-Burnish Guide