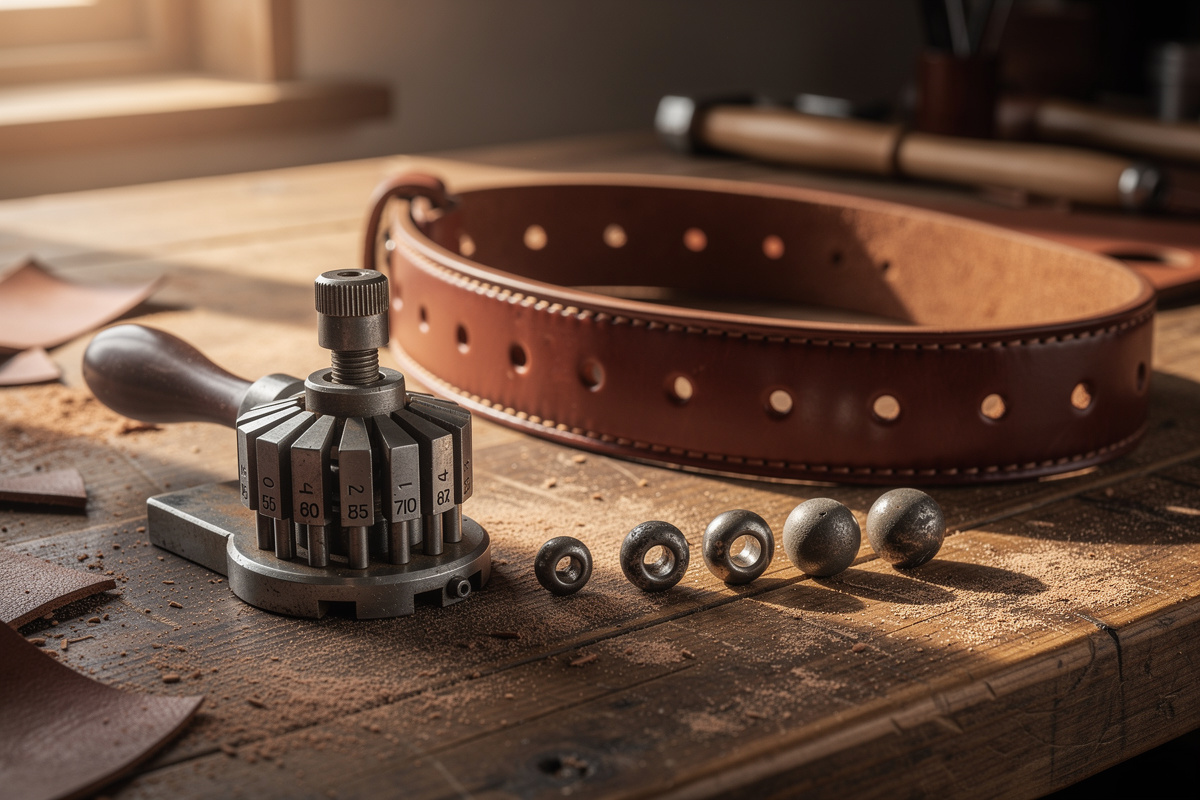
Leather hole punches split into two families: the rotary punch, a squeeze tool with six revolving tube sizes for holes near an edge, and the drive punch, a…
Leather hole punches split into two families: the rotary punch, a squeeze tool with six revolving tube sizes for holes near an edge, and the drive punch, a single struck tube that reaches anywhere on a panel and through any thickness. On my bench the rotary handles belt and strap holes in seconds; the drive punch does everything the rotary’s shallow throat cannot reach.
Pick the wrong one and you either crush ragged holes with a worn rotary or fight a drive punch for jobs a rotary does in one squeeze. Below is exactly when each earns its place, the sizes that match real hardware, why a sharp tube cuts clean while a dull one tears, and how to keep both punching cleanly for years.
Disclosure: LeatherCraftHaven is reader-supported. As an Amazon Associate I earn from qualifying purchases made through links in this article, at no extra cost to you. I only point to gear I actually use or would buy for my own bench.
Rotary vs Drive Punch: The Core Difference
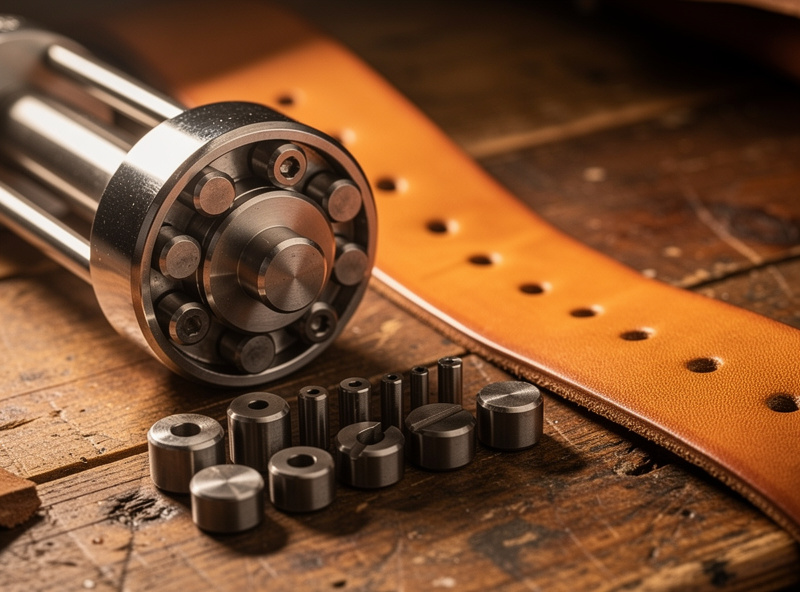
The difference is reach and force. A rotary punch squeezes a tube through leather with hand leverage, but its C-frame throat only reaches a few centimetres from an edge — perfect for belt holes, strap adjustment holes, and watch straps. A drive punch is a loose tube you strike with a maul, so it punches anywhere on a panel regardless of distance from the edge and cuts cleanly through 8–10 oz that would stall a rotary.
I keep both because they solve different problems, not because one is better. The rotary is faster and self-contained for edge work; the drive punch is the only option for a hole in the middle of a bag panel or through a doubled belt tip. The revolving leather rotary punch is the one most beginners buy first because belt sizing is the most common early job.
| Punch Type | Reach | Thickness | Action | Sizes | Best For |
|---|---|---|---|---|---|
| Rotary (revolving) | Near edge only (C-throat) | Up to ~6 oz | Squeeze by hand | 2.0-4.5 mm (6 tubes) | Belts, straps, watch straps |
| Round drive punch | Anywhere on panel | Any (struck) | Struck with maul | 1-25 mm (sold singly/sets) | Bag panels, thick stock, big holes |
| Oblong / bag punch | Anywhere on panel | Any (struck) | Struck with maul | Slot widths | Buckle tongues, strap slots |
| Slot / hole chisel | Anywhere on panel | Any (struck) | Struck with maul | 30 mm card slots | Wallet card slots |
| Lacing / pricking punch | Anywhere on panel | Any (struck) | Struck with maul | Multi-prong rows | Lacing holes, decorative rows |
For the powered and specialty striking tools above, the maul you use matters as much as the punch — a steel hammer mushrooms a punch top, while a poly maul drives it cleanly, which I cover in the leather mallet and maul guide.
Matching Punch Size to Hardware
Hole size is dictated by the hardware, not preference. A hole too small splits when you set the post; too large and the hardware spins or pulls through. Belt holes run 3.5–4 mm for a standard buckle tongue; line-24 snaps want a 4 mm post hole; copper rivets need a hole that grips the burr without forcing. Always test on a scrap of the same leather before committing to the real piece.
The common sizes worth owning: 2 mm for small stitching anchors and thread anchors, 3 mm and 4 mm for most rivets and snaps, 4.5 mm for belt tongues, and 6 mm and up (drive punches) for hardware posts, lanyard holes, and key fobs. Match the punch to the exact fastener — my leather hardware guide lists the hole each rivet, snap, and screw actually needs, and the rivets guide covers post-and-burr sizing in detail. When you set snaps by hand, the no-press snap method depends on getting that 4 mm hole exactly right first.
How to Punch Clean Holes Every Time
The single biggest factor in a clean hole is what sits under the leather. Punch drive punches on a self-healing poly cutting board or an end-grain block — never on granite or steel, which blunts the cutting tube instantly. (Granite is for chisels backed by a knife edge; punches need a surface the tube can bite into without dulling.) Strike once, firmly, with a poly maul; a half-hearted tap crushes fibres instead of shearing them.
For the rotary, the failure mode is a worn or misaligned tube — it crushes a grey ragged hole instead of cutting a clean black one. Keep the brass anvil pad rotated to a fresh spot, and replace a rotary once its tubes stop cutting cleanly rather than fighting it. A drop of leather conditioner or a stab into a bar of beeswax lubricates a drive punch tube so it releases the slug cleanly. Punching is the same patience as the rest of small-goods work — line up to a marked centre, punch once, move on. The same discipline carries through every step in the three-tier tools guide.

Sharpening and Maintaining Punches
A drive punch is a tube with an inside bevel, and it cuts cleanly only while that bevel is sharp. Sharpen it from the inside: wrap fine sandpaper (400 then 800 grit) around a tapered dowel or use a dedicated cone stone, and twist it inside the tube to refresh the bevel, then strop the outside lightly. Never grind the outside diameter — that changes the hole size and ruins the punch. A few minutes of inside honing brings a dragging punch back to shearing clean slugs.
Store drive punches so the tube mouths never knock together — a rolled tool wrap or a drilled wooden block keeps the edges off each other. The same edge logic that keeps knives and bevelers cutting applies to punch tubes, and I cover the full strop-and-stone routine in the guide to sharpening leather tools. A rotary punch is effectively non-serviceable on the cheap end — when the tubes dull, replace the tool — so buy a mid-grade rotary with replaceable tubes if you punch belts often. A round drive punch set covers the sizes a rotary cannot reach, and a poly punching board protects both the punch and the bench.
Frequently Asked Questions
What is the difference between a rotary and drive punch for leather?
A rotary punch squeezes a tube through leather by hand but only reaches near an edge. A drive punch is a single tube you strike with a maul, so it punches anywhere on a panel and through any thickness. Rotary is faster for belts; drive reaches the middle of a piece.
What size hole punch do I need for leather rivets and snaps?
Most rivets and line-24 snaps need a 3 to 4 mm hole, belt tongues want 3.5 to 4.5 mm, and larger hardware posts need 6 mm or more. Match the punch to the exact fastener and always test on a scrap of the same leather first before punching the real piece.
What do you punch leather holes on?
Punch drive punches on a self-healing poly cutting board or an end-grain wood block, never on granite or steel, which blunts the cutting tube instantly. The soft surface lets the tube shear all the way through the leather and bite slightly without dulling the edge.
Why is my hole punch tearing the leather instead of cutting?
The tube is dull or you are striking too softly. A sharp drive punch shears a clean slug in one firm maul strike. Sharpen the inside bevel with fine sandpaper on a tapered dowel, and strike once firmly rather than tapping repeatedly, which crushes the fibres.
Can a rotary punch go through thick leather?
Only up to about 6 oz, and even then it strains near its size limit. The C-frame leverage runs out on thick stock and far from an edge. For 8 to 10 oz leather or holes in the middle of a panel, switch to a struck drive punch on a poly board.
How do you sharpen a leather drive punch?
Sharpen the inside bevel only. Wrap 400 then 800 grit sandpaper around a tapered dowel, or use a cone stone, and twist it inside the tube to refresh the bevel. Strop the outside lightly. Never grind the outside diameter, since that changes the hole size.
What hole punch is best for belts?
A six-size revolving rotary punch is ideal for belts because the holes sit near the edge within the tool’s reach and you can size them on the spot. Use the 4 to 4.5 mm tube for a standard buckle tongue, and test on a scrap first to confirm the fit.
Related Articles
- Leatherworking Tools Guide: Three Tiers of Buy-In
- Leather Hardware Guide: Rivets, Snaps, Buckles, Setting
- Leather Mallet and Maul Guide
- How to Sharpen Leather Tools
- Best Rivets for Leather: Copper vs Brass vs Stainless