You can set up a working leathercraft bench in a corner of a room with a sheet of glass, a self-healing mat, a poly cutting board, and good…
You can set up a working leathercraft bench in a corner of a room with a sheet of glass, a self-healing mat, a poly cutting board, and good light. You do not need a dedicated workshop, and you do not need most of what the catalogue photos show. What you need is a hard flat surface for punching, a clean dust-free zone for finishing, and enough light to see your stitch line. Everything else is a refinement.
My leather bench lives walled off from the metal-and-grinding side of my workshop for one reason: swarf and grinding dust will land in a wet finish coat and ruin it. That separation taught me what actually matters in a leather workspace, which is not square footage but the right surfaces in the right places. Here is how to set up a space that works whether you have a spare desk or a whole garage bay.
The Punching Surface Is the Foundation
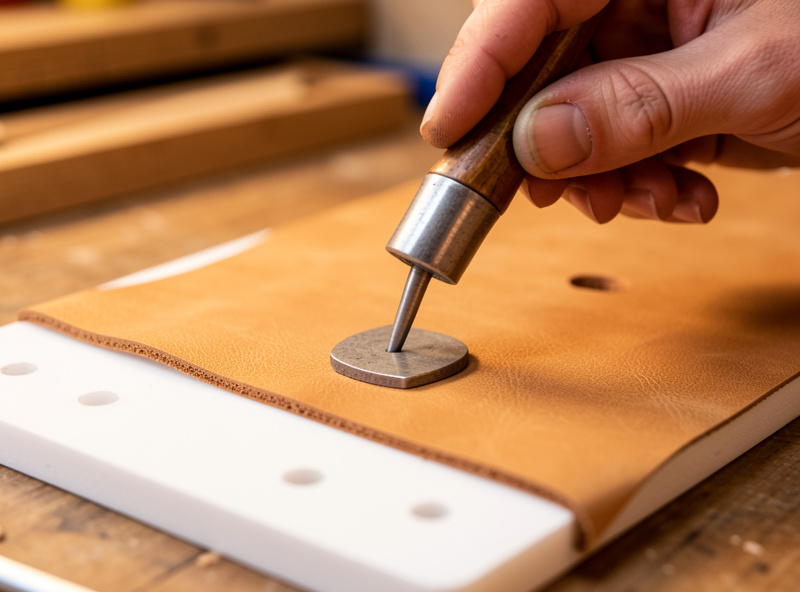
Hand-punching stitch holes and setting hardware sends shock straight through the leather into whatever is under it. Punch on a soft self-healing mat alone and you blunt your irons against the hard table beneath, or worse, into a surface that gives unevenly and bends the prongs. The fix is a dense, hard striking surface: a poly cutting board, a slab of HDPE, or a granite/marble offcut on top of the bench, with the mat for cutting only.
I keep two surfaces side by side. A poly punching board takes the maul blows and saves both my irons and the bench, and a separate self-healing mat takes the knife. Never punch on the cutting mat and never cut on the poly board; each surface does one job and lasts far longer for it.
The Cutting Zone
Cutting leather straight and safe needs three things: a self-healing mat large enough for your biggest pattern, a heavy steel straightedge that will not slip, and a sharp blade. The mat protects your table and your knife edge; the steel straightedge guides the cut and protects your guiding hand far better than the aluminium rulers that flex and ride up. Pull cuts toward you in light passes rather than forcing one deep stroke.
Give the cutting zone enough clear space that a full hide shoulder can lie flat. Cramped cutting is where beginners ruin leather and nick fingers, because a short mat forces awkward angles. If space is tight, a larger mat that you store vertically and bring out to cut on is better than a permanent small one.
Keep Finishing Away From Dust
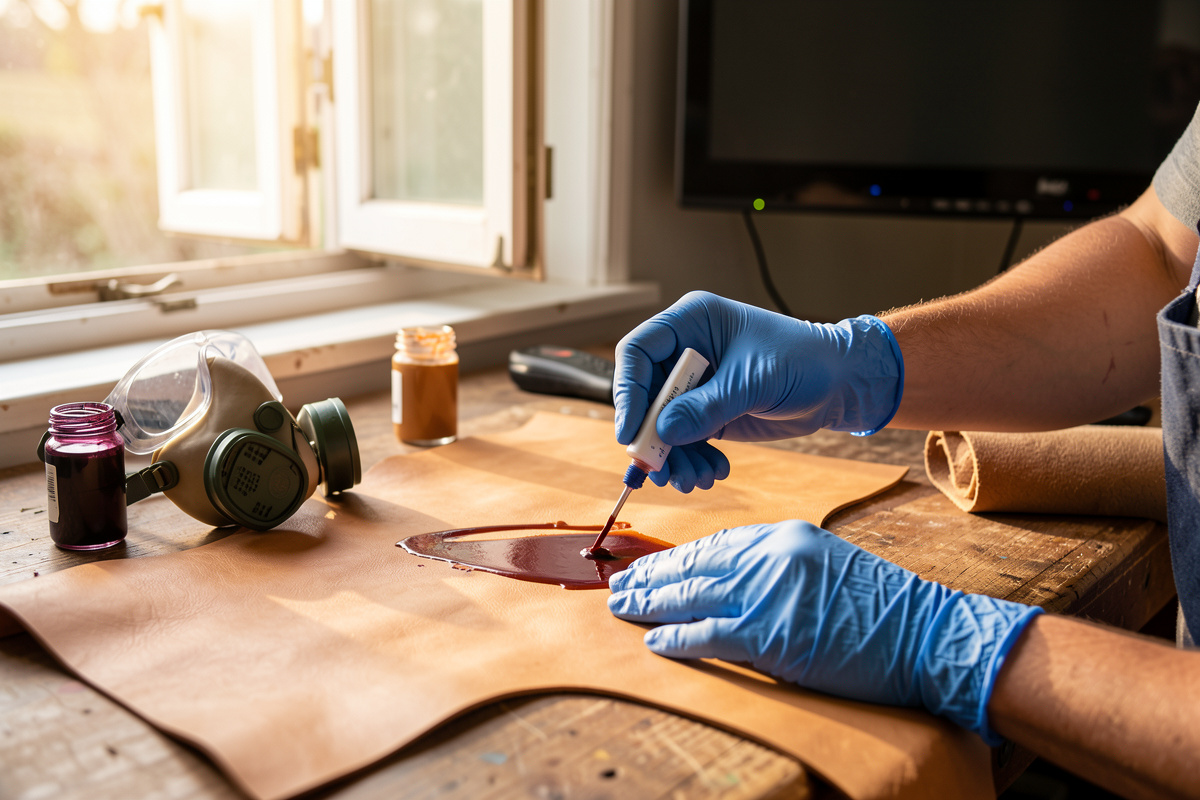
Dyeing and burnishing are wet, and anything airborne lands in the finish. This is the single most overlooked part of a leather workspace. Set your dye-and-finish area away from any sanding, sawing, or grinding, ideally with a few minutes between sanding edges and laying down dye so the dust settles. If your whole craft happens at one desk, finish at the end of a session after the dust has cleared, not in the middle of cutting and sanding.
Dyes and solvents also need ventilation. Spirit dyes, deglazer, and contact cement all off-gas, and an enclosed room with no airflow turns unpleasant fast. A window plus a fan moving air out is the minimum; for airbrushing dye you want real extraction and a respirator, not just a cracked window.
Lighting Decides Whether You See the Mistake
You cannot finish an edge you cannot see, and you cannot keep a stitch line straight under a single overhead bulb that throws your own shadow onto the work. The aim is bright, even, shadow-free light coming from the side and front. A daylight-temperature LED on an articulating arm positioned to rake light across the surface shows you grain, scratches, and an uneven burnish that flat overhead light hides completely.
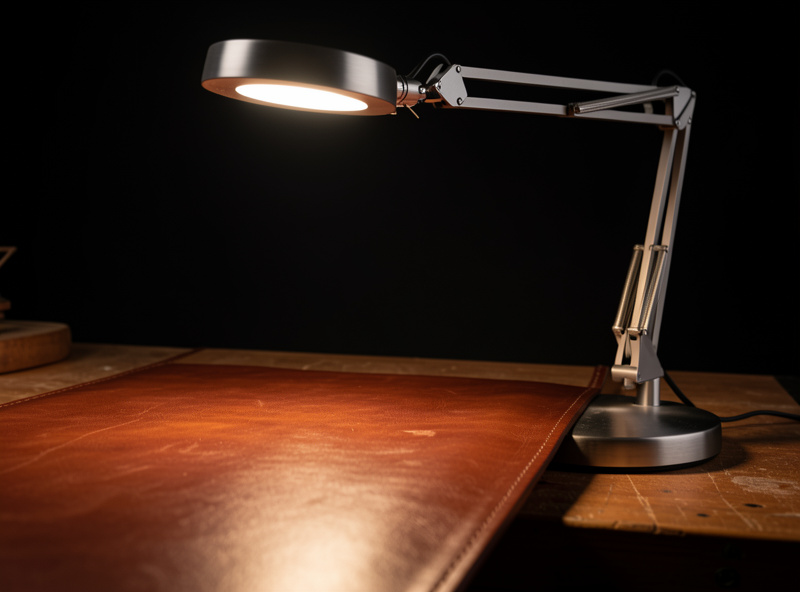
Raking light is also how you check an edge: tilt a piece under an angled adjustable task lamp and every flat spot in the burnish jumps out. I do my final edge inspection this way before any piece leaves the bench.
Disclosure: LeatherCraftHaven is reader-supported. As an Amazon Associate I earn from qualifying purchases made through links in this article, at no extra cost to you. I only point to gear I actually use or would buy for my own bench.
Bench Height and the Stitching Pony
Bench height matters more than beginners expect, because the two main motions, punching with a maul and saddle-stitching, want different heights. Punching is easier standing at a bench around hip height, where you can drop the maul with gravity instead of muscling it sideways. Stitching is easier sitting, with the work held in a stitching pony clamped at chest height so both hands are free and the stitch line sits where your eyes naturally fall.
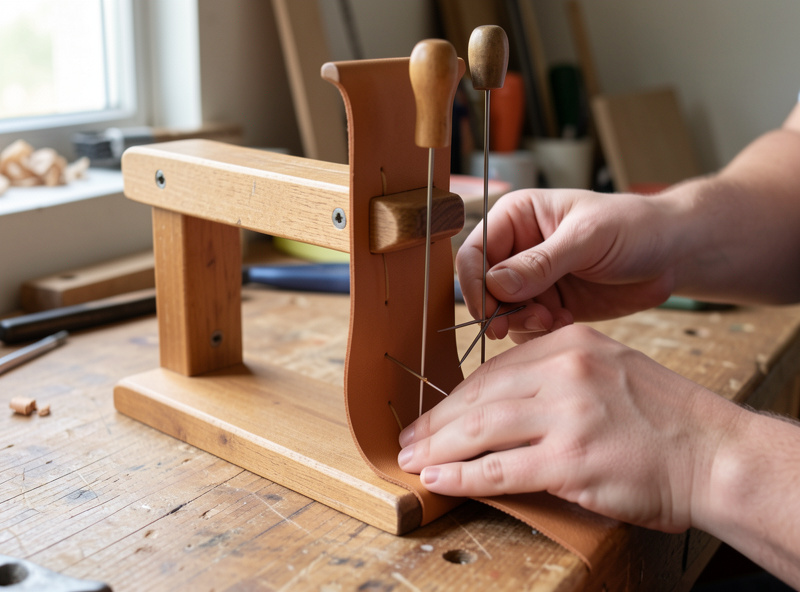
You can reconcile the two with a bench at a comfortable standing-punch height and a stitching pony or clamp you sit beside. The pony is the one piece of holding gear I would not work without, because hand saddle-stitching needs both hands and a third grip to hold the leather steady and square. Without it your seam wanders, your tension drifts, and you fight the leather instead of stitching it. Mount or clamp the pony where you can sit square to it under good light.
Storing Leather and Tools So They Last
Leather wants to be stored flat or rolled loosely, grain side out, away from direct sun and damp. Folded leather creases permanently, and sunlight darkens veg-tan unevenly so a hide left half-exposed shows a tan line forever. I roll larger pieces and lay smaller offcuts flat in a drawer, sorted by weight, so the chart in my head matches what my hand reaches for.
Tools live where the work is. A wall rack or a simple leather tool roll keeps edged tools from rattling against each other and dulling, and keeps your awl and irons within reach instead of buried in a drawer. Edged tools touching each other is how a sharp awl becomes a dull one.
Making It Work in a Small Space
If you are starting at a dining table or a single desk, the whole kit fits in a box and the surfaces stack: poly board on top of the cutting mat, both stored against a wall, brought out per session. The non-negotiables shrink to four things, a hard punching surface, a cutting mat with a steel straightedge, good raking light, and a ventilated spot for finishing. Get those four right and the corner of a room outperforms a badly arranged garage.
As your kit grows, the natural progression is a dedicated bench at standing-friendly height (punching with a maul is far easier standing), then separated cutting, punching, and finishing zones. But that is an upgrade path, not a starting requirement. Build the piece, not the showroom.
What surface should I punch leather on?
Punch on a hard, dense surface like a poly cutting board, HDPE slab, or granite offcut placed on your bench. Punching on a soft cutting mat alone blunts your irons and bends the prongs. Keep a separate self-healing mat for cutting only.
Do I need a dedicated room for leathercraft?
No. A working setup fits on a single desk: a hard punching surface, a self-healing cutting mat with a steel straightedge, good raking light, and a ventilated spot for finishing. The surfaces stack and store against a wall between sessions.
How should I store leather hides?
Store leather flat or rolled loosely, grain side out, away from direct sun and damp. Folding creases it permanently, and sunlight darkens veg-tan unevenly, leaving a tan line. Sort offcuts flat by weight so you can find the right thickness fast.
What lighting is best for leatherwork?
Use bright, daylight-temperature LED light from the side and front, ideally on an articulating arm. Raking light across the surface reveals scratches, grain, and uneven burnishing that flat overhead light hides, which is essential for checking edges and stitch lines.
Related Guides
- Leather Working for Beginners: A Complete Starter Guide
- Leather Thickness Chart: Ounces to MM for Every Project
- Mixed Workshop Safety: Leather Fumes, Welding Sparks, and Ventilation